Namecheap email to Office 365 migration
Are you looking for a way to migrate your Namecheap email to Office 365? You're in the right place! This guide will help you navigate the process of transferring your emails from Namecheap to Office 365, offering clear, step-by-step instructions to make the transition smooth.
Namecheap is a well-regarded domain and web hosting provider that also offers email hosting services. While its email solutions work well for small businesses and personal use, many organizations find themselves outgrowing Namecheap’s email hosting as their needs evolve. On the other hand, Office 365 offers a powerful, cloud-based suite of tools designed to scale with growing businesses, providing enhanced security, better collaboration features, and more robust email management.
For small businesses, Namecheap's affordable email hosting might suffice. However, as your company grows, so do your requirements for features like seamless collaboration, advanced security, and storage capabilities. Office 365 meets these demands, offering integrated services like Microsoft Teams, SharePoint, and OneDrive that help businesses stay productive and organized.
When it comes to migrating from Namecheap to Office 365, EdbMails IMAP migration software streamlines the entire process. This software allows for the seamless transfer of emails, folders, and attachments from Namecheap to Office 365 without any hassle. EdbMails removes the complexity of using PowerShell, making the migration process more user-friendly. Additionally, EdbMails offers a free personalized demo, allowing you to try the software before committing to it, ensuring that it meets your business needs. With its delta migration feature, EdbMails ensures that only the changes made after the initial migration are transferred, saving time and bandwidth. The software also automatically handles throttling management, ensuring a smooth migration even if your email provider imposes restrictions on data transfer speeds. Furthermore, EdbMails offers lifetime licenses and free software updates, giving you long-term value and peace of mind as your business continues to grow.
User Query
For example, a user on the Microsoft forum inquired about migrating from Namecheap private email to Office 365, as shown in the screenshot below.
Reasons to migrate from Namecheap to Office 365
- Advanced business tools: Office 365 includes apps like OneDrive, SharePoint, and Teams for seamless collaboration.
- Robust security: Regular updates ensure top-level protection against malware and breaches.
- Scalability:Easily add users or expand storage as your business grows.
- Backup and recovery: Reliable data backup and quick recovery options in case of unexpected events.
- Improved productivity: Streamlined workflows and enhanced efficiency with Office 365’s integrated features.
Namecheap email to Office 365 migration plan
Planning is one of the most important steps before you begin Namecheap email to Office 365 migration. Prepare the environment and have a backup plan in place to avoid potential risks and data loss. Here is a checklist of points to consider before you migrate.
- Determine the size of the data and the number of mailboxes you want to migrate.
- Make a list of all the data and permissions from Namecheap email that you want to transfer.
- Create appropriate user mailboxes on Office 365 and assign licenses to them.
- Ensure you have enough network capacity and bandwidth to migrate.
- Communicate the migration plan and flow to your end users.
Pre-migration activities for Namecheap email to Office 365 migration
- Find the IMAP server name of your Namecheap email server. You can find this information from your server’s dashboard settings or by connecting your email system to Outlook.
- Before you migrate Namecheap email to Office 365, ensure that you create mailboxes for your users in your organization and assign suitable licenses to them.
- If you have a custom email domain from your hosting provider to which you want to migrate and receive emails, you must add and verify the domain on Office 365.
Steps to add a custom domain to Office 365 and Steps to add DNS records to connect your domain.
- Configure Office 365 to send and receive large messages.
Follow the steps to increase the message size on Office 365 to 150MB and see tips to optimize IMAP migration to Exchange online.
Steps to migrate Namecheap email to Office 365 using EdbMails
Step 1: Download and install EdbMails IMAP migration software
- Download EdbMails and install the application on any computer running on Windows OS that is connected to the source and target environment.
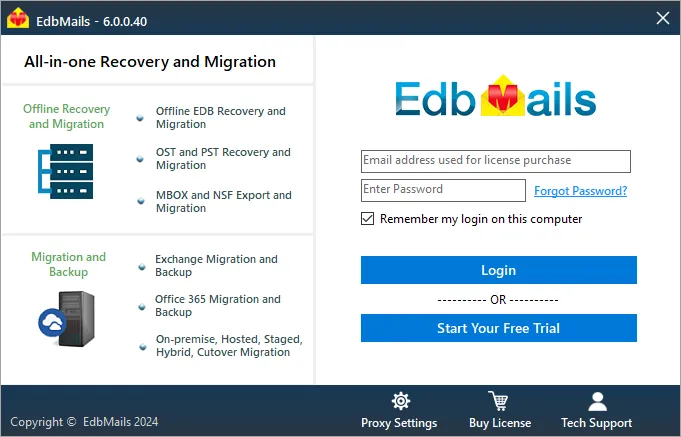
- Launch the application and click 'Login' button or 'Start Your Free Trial'
See a detailed list of EdbMails system requirements for IMAP migration.
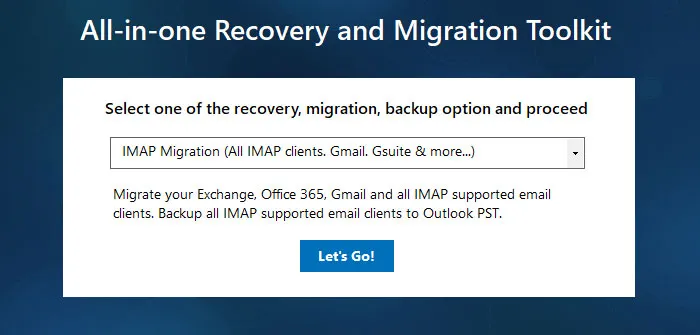
- Choose the 'IMAP Migration' method.
Step 2: Connect to source Namecheap server
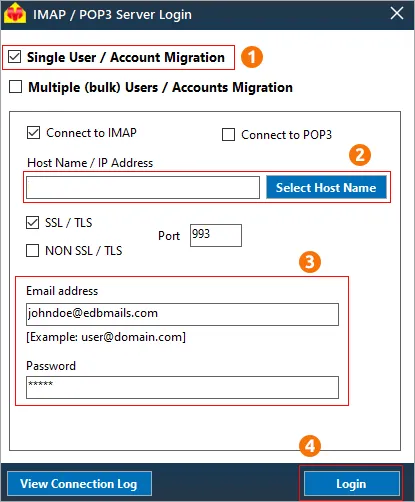
- If you want to migrate a single user, enter the Host Name, Port Number (993 for SSL), and account credentials to connect to connect to Namecheap email server as shown.
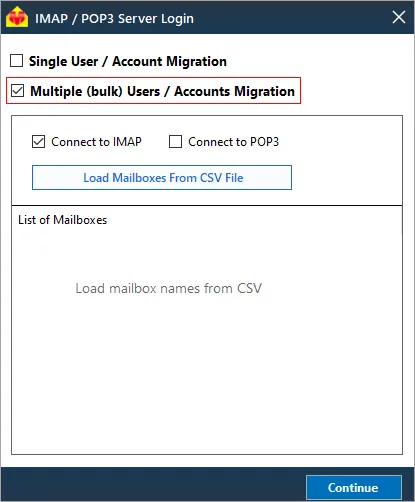
- If you want to migrate multiple mailboxes, select 'Multiple (bulk) Users/Accounts Migration'. Download the sample CSV file and add the required details such as mailbox name, password, hostname, and port. Load the CSV file into EdbMails and verify the list of mailboxes to continue.
Steps to connect to single and multiple users in EdbMails IMAP migration
Step 3: Select source Namecheap server mailboxes
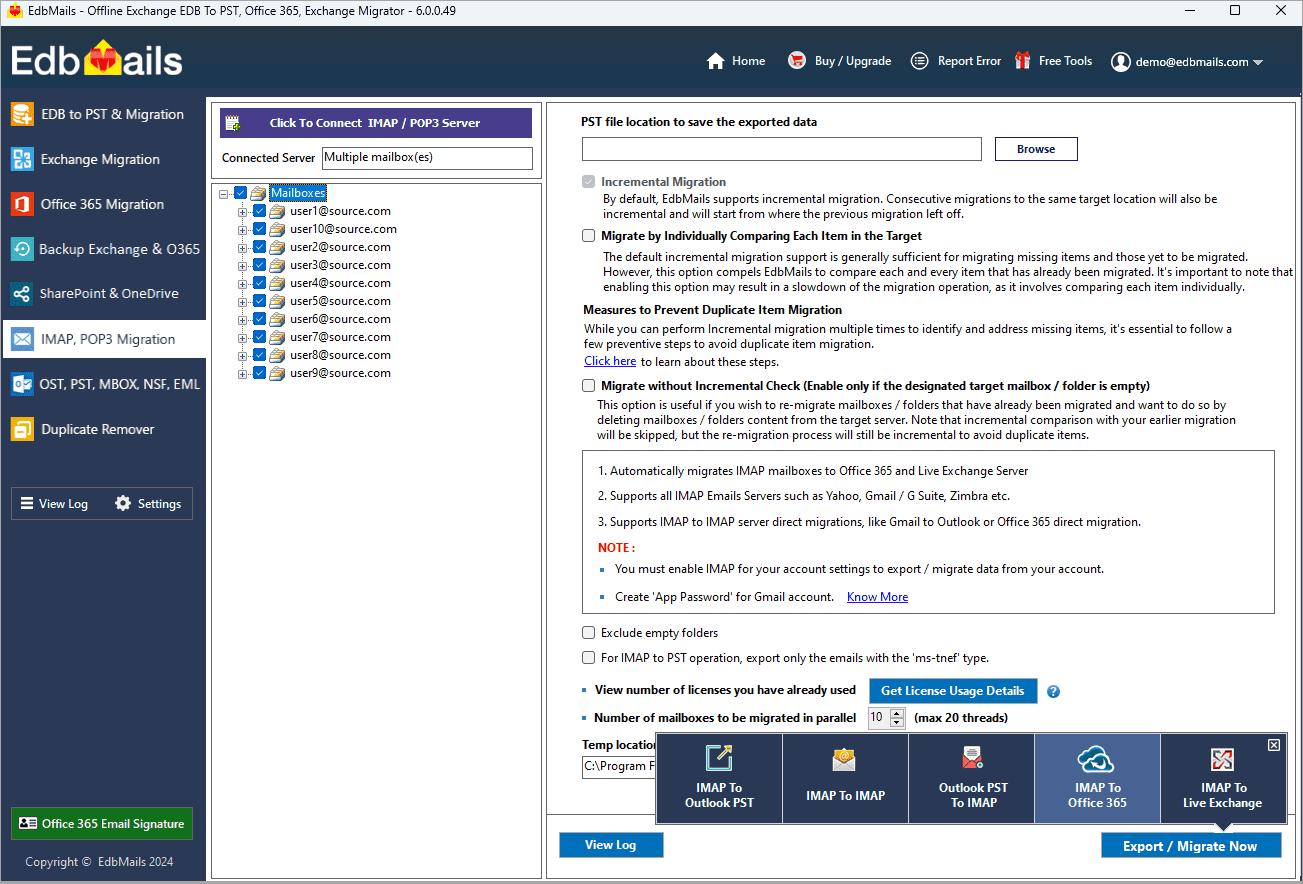
- Select the mailboxes and folders from the left panel to migrate to Office 365
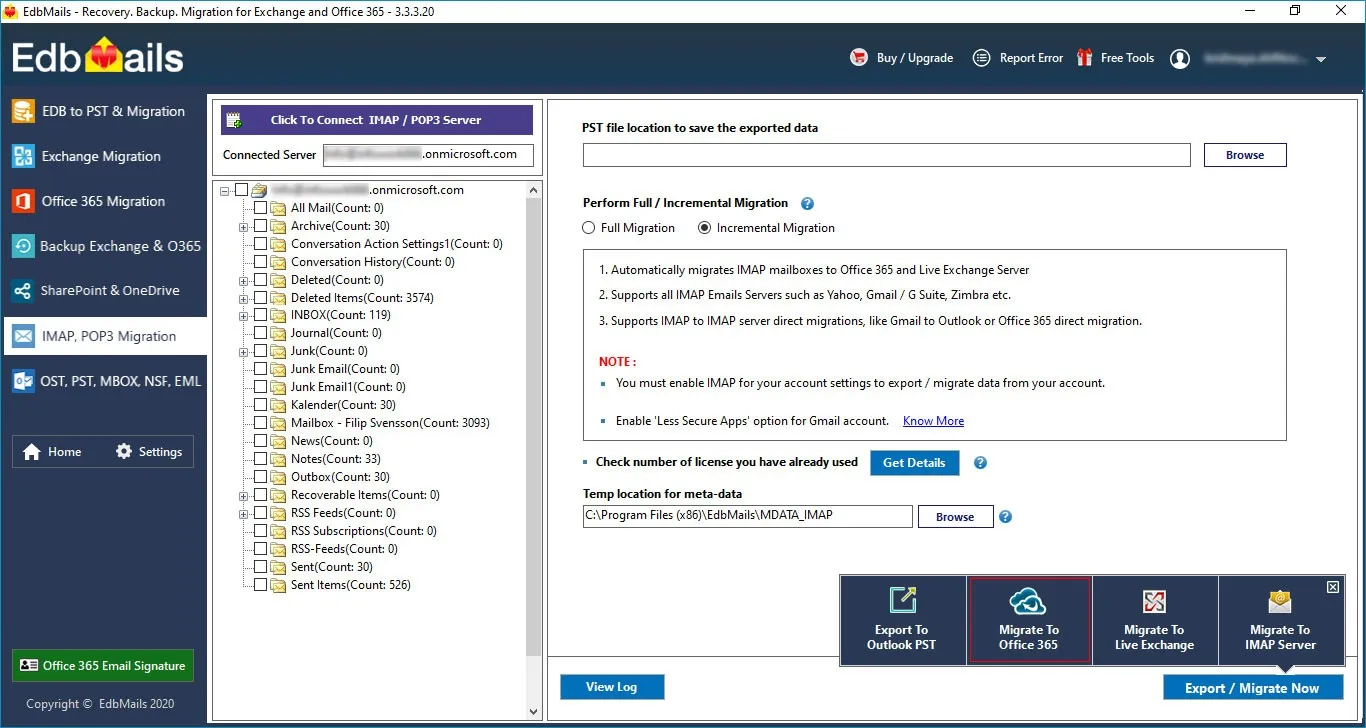
- Click 'IMAP to Office 365' to set up the connection with the target server
Step 4: Connect to target Office 365
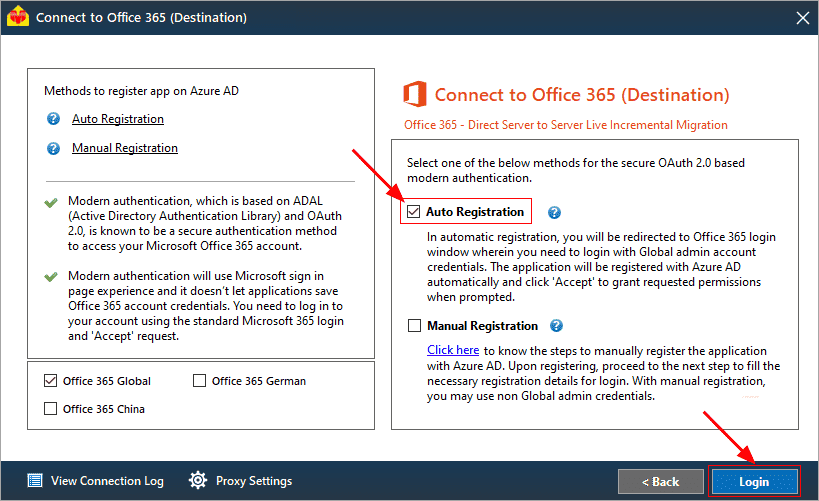
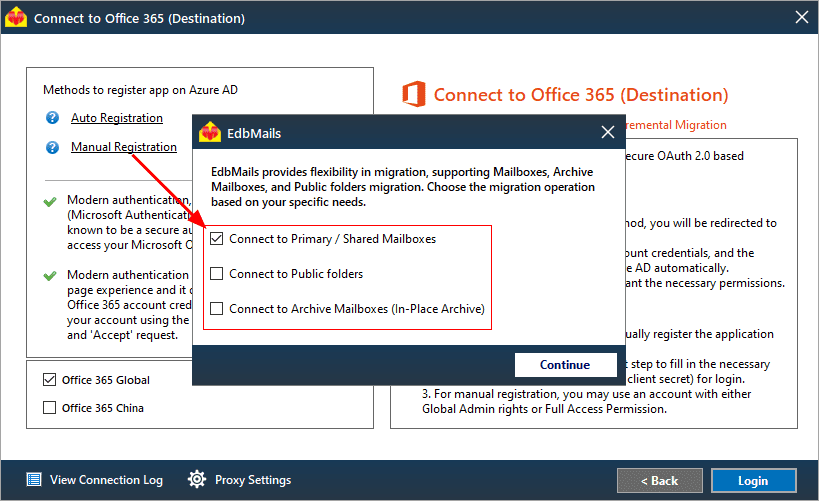
- Select the preferred method for secure OAuth-based modern authentication. The default option, ‘Auto Registration,’ requires Global admin access. Alternatively, in the Manual Registration method, you can use either a Global admin account or any user account with full access rights.
- Next, select the most suitable migration option and proceed to authenticate by logging into the Microsoft sign-in page.
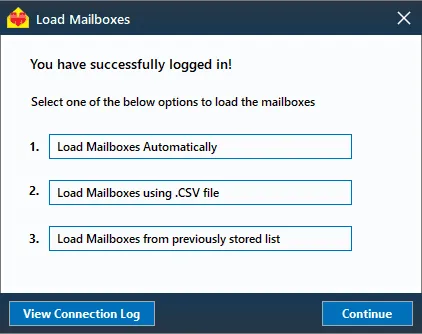
- Once logged in, you can easily fetch mailboxes directly from your Office 365 target server. For a more efficient approach, upload a CSV file to manage mailboxes in bulk, streamlining the migration process and enhancing overall productivity.
Step 5: Namecheap email to Office 365 mailboxes mapping
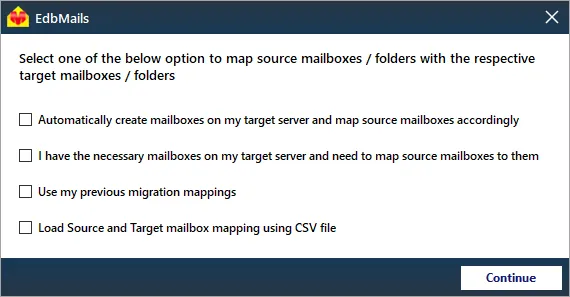
- Select the mapping option that best aligns with your requirements.
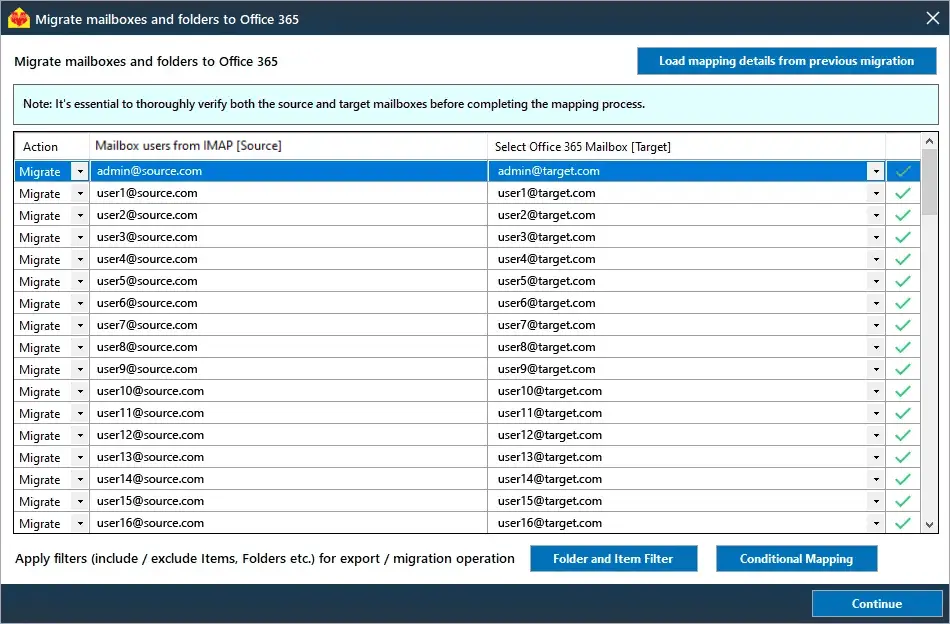
- EdbMails streamlines migration by automatically creating mailboxes in Office 365, effortlessly setting up target mailboxes and mapping source IMAP server mailboxes and folders. This functionality is crucial for ensuring precise management of large-scale mailbox migrations.
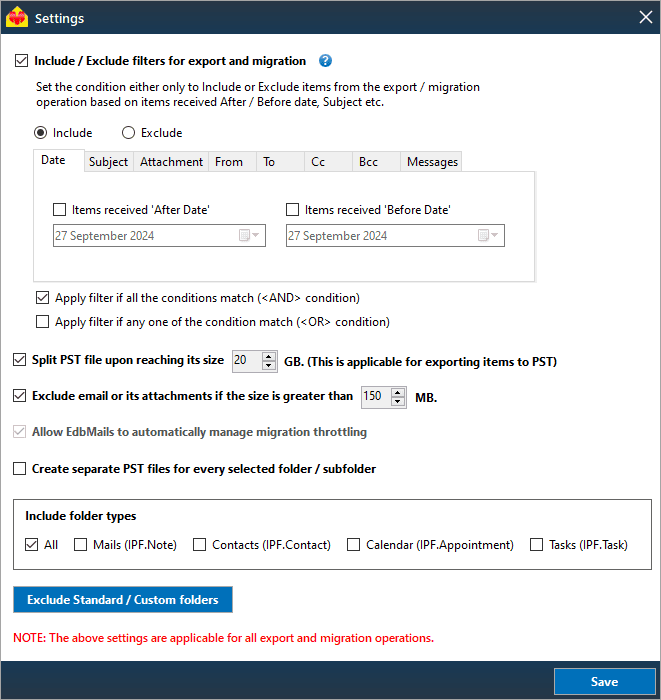
- Click the ‘Folder and Item Filter’ option to customize your migration criteria. You can apply a date filter to transfer data within a specific range or exclude particular standard and custom folders from the migration process.
Step 6: Start Namecheap email to Office 365 migration
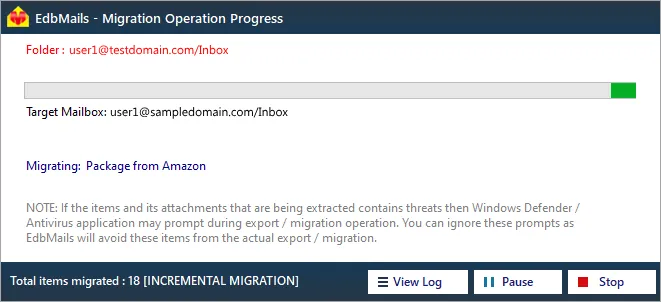
- After mapping the mailboxes, assign a job name and initiate the migration. To review the progress, click the ‘View Log’ button for a detailed migration report, showcasing the number of emails, folders, and other items successfully transferred.
Namecheap email to Office 365 post-migration tasks
- Step 1: Update the MX records to point to Office 365
If you have not done this step previously, change the DNS records known as MX records to enable and receive email messages on the target Office 365 server. In addition to this setup, configure the Autodiscover record to allow Outlook to connect to the migrated mailboxes.
- Step 2: Create a new Outlook profile for users in the new domain
Configure and recreate the Outlook profile for each user in your domain if Outlook has problems connecting to Office 365 mailboxes.
- Step 1: Update the MX records to point to Office 365
Namecheap email to Office 365 migration troubleshooting
Refer to the knowledge base articles for solutions to common issues. For additional details on EdbMails IMAP migration, check the frequently asked questions (FAQs) section or contact our technical support team.
Robust features of EdbMails to migrate Namecheap email to Office 365
- Error-free migration
EdbMails ensures a seamless and error-free migration from Namecheap to Office 365. The software automates the process while retaining all your critical email data without missing or corrupting any information. This guarantees an accurate migration for businesses, reducing risks and downtime.
- Time-saving process
Migrating Namecheap email to Office 365 with EdbMails significantly reduces manual effort and saves time. The tool uses smart algorithms to perform migrations swiftly without requiring continuous intervention. This allows businesses to focus on essential tasks rather than spending hours managing the migration process.
- Automatic data loading
EdbMails automatically loads all mailbox data, including emails, folders, and attachments, ensuring a smooth transition to Office 365. It eliminates the need for manual imports, which can be error-prone and time-consuming. This feature simplifies the migration process and guarantees nothing is left behind.
- Clear navigation and immediate feedback
EdbMails offers a user-friendly interface with clear navigation, making the migration process straightforward. Users receive real-time feedback throughout the migration, allowing for easy monitoring of progress. Immediate alerts help identify and address issues quickly, ensuring minimal disruption during the process.
- Enhanced security with MFA
EdbMails supports Multi-Factor Authentication (MFA) to enhance security during the migration. By requiring additional authentication steps, it ensures that only authorized users can access sensitive data. This robust security feature provides peace of mind, protecting your business data during the entire migration process.


