Troubleshooting Outlook data file errors
Outlook is a widely used email client that allows users to send and receive emails, manage calendars, contacts, and tasks. However, sometimes users face issues when setting up their Outlook data files. One common error that users encounter is ‘Outlook data file cannot be configured’ or OST file cannot be accessed. This error can be caused by various reasons such as corrupted files, incorrect settings, or other technical issues. In this blog article, we will discuss the different causes of this error and how to fix it.
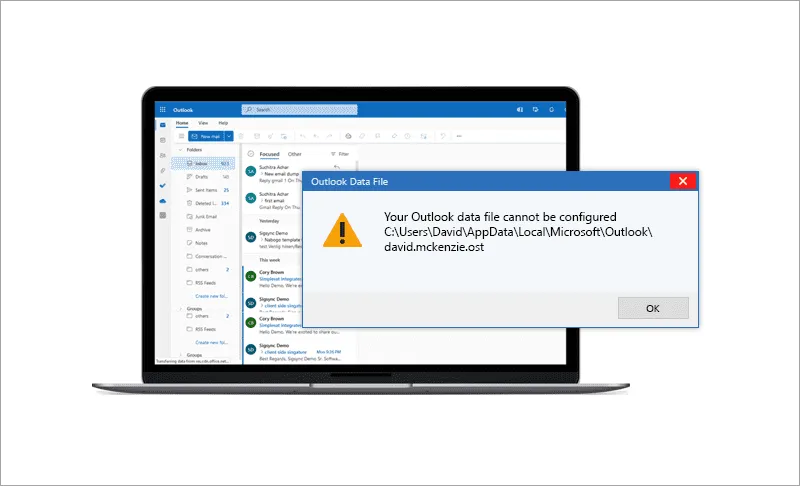
What causes the error Outlook data file cannot be configured?
The most common cause of the 'Outlook Data File cannot be configured' error is a corrupted Outlook profile or a damaged Outlook data file (OST or PST). Some other common causes of the error include:
Here are the most common reasons for ‘Outlook errors have been detected in the file OST’:
- Corrupted Outlook data files: Corrupted Outlook data files can cause issues when setting up a new account or accessing an existing account. These files can become corrupted due to several reasons such as system crashes, virus attacks, or improper shutdown of Outlook. If errors have been detected in the OST file, Outlook fails to open your mailbox and can also crash.
- Incorrect settings: If Outlook is not syncing your emails, it may be due to incorrect account settings, server settings, missing or incorrect passwords, or issues with your internet connection. Incorrect settings can also cause the ‘Outlook data file cannot be configured OST’ error.
- Compatibility issues: Compatibility issues with Outlook versions or the operating system can also cause the ‘Outlook data file cannot be configured’ error. When you use an outdated application, it is prone to bugs, vulnerabilities and Outlook cannot connect to the Exchange server due to slow performance.
- Corrupted Windows registry: The Windows registry is a crucial component of the operating system. Corrupted registry entries can cause issues with Outlook and result in the data file configuration error.
- Damaged Outlook profile: A damaged Outlook profile can also cause issues when setting up a new account or accessing an existing account. This can happen due to various reasons such as system crashes, virus attacks, or incorrect settings. In such cases, you may have to open the OST file with an OST file opener tool.
- Disabled Cached Exchange mode: Outlook uses the Cached Exchange mode to create and configure the Outlook data file. In case the Cached Exchange mode is turned off, you may get the data file configuration error message. Follow the steps to enable Cached Exchange mode in Outlook.
How to fix the error ‘Outlook data file cannot be configured’?
The following methods can help you resolve the error ‘Your outlook data file cannot be configured’ in Windows 10, 11, 8.1, 8 and 7.
- Method 1: Delete and create a new Outlook profile
Deleting and creating a new Outlook profile can help fix the error ‘Outlook data file cannot be configured’ because it enables you to reset the settings and configurations that might have caused the error in the first place. When you create a new profile, you create a new set of files and settings that Outlook uses to manage your email, contacts, and other data. The new profile can help fix the error by replacing any corrupted or misconfigured files or settings that might be causing the issue.
- Step 1: Close Outlook and open the Control Panel
- Save any unsaved work and close Microsoft Outlook.
- Click on the ‘Start’ button and open the ‘Control Panel’
- Step 2: Locate and open the Mail applet
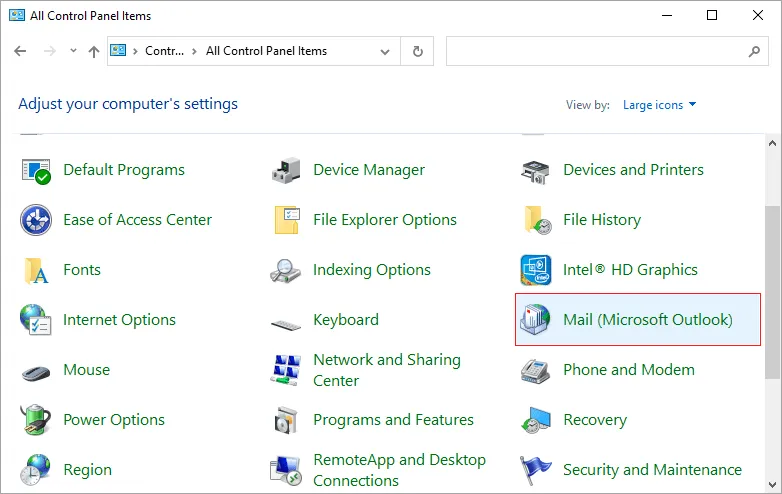
- In the Control Panel, search for ‘Mail’ or ‘Mail (32-bit)’ and open it.
- Step 3: Create a backup of the current Outlook profile
- Click ‘Show Profiles’ and select your current Outlook profile.
- Click ‘Copy’ and create a backup of the current profile.
- Step 4: Delete the current Outlook profile
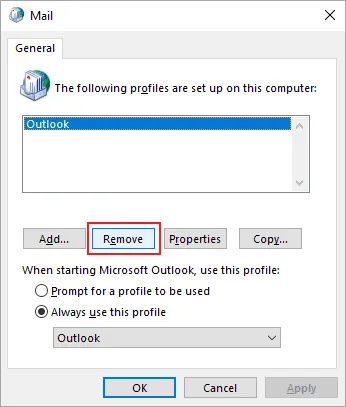
- Now, select your current Outlook profile and click ‘Remove’
- Confirm the action and delete the profile.
- Step 5: Create a new Outlook profile
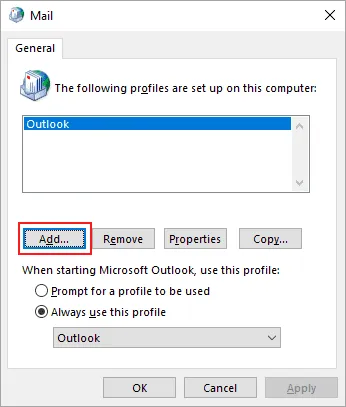
- Click ‘Add’ to create a new Outlook profile.
- Enter a name for the new profile and click on ‘OK’.
- Follow the on-screen instructions to set up your email account in the new profile.
- Step 6: Set the new profile as the default profile
- In the Mail Setup window, select the new profile from the drop-down menu under ‘When starting Microsoft Outlook, use this profile’.
- Click ‘Apply’ and then ‘OK’
- Close all windows and restart Microsoft Outlook.
Check if the error message is fixed. It is important to note that reconfiguring your Outlook profile creates a new OST file, and any synchronization changes saved in the old OST file are lost.
Note: When you configure an Office 365 account with Outlook, the application creates an .NST file, and you may receive the error message ‘Outlook Data file (.nst) cannot be configured’. In such cases, delete the Outlook profile associated with the Office 365 account and reconfigure it as described in the preceding steps.
- Step 1: Close Outlook and open the Control Panel
- Method 2: Repair the Outlook data file with ScanPST
ScanPST is a built-in repair tool in Microsoft Outlook that scans and repairs corrupted or damaged Outlook data files (PST and OST files). Repairing the Outlook data file with ScanPST can sometimes help to resolve the ‘Outlook data file cannot be configured’ error.
- Step 1: Close Outlook and open the Control Panel
- Save any unsaved work and close Microsoft Outlook.
- Click on the ‘Start’ button and open the ‘Control Panel’
- Step 2: Locate and open the Mail applet
- In the Control Panel, search for ‘Mail’ or ‘Mail (32-bit)’ and open the applet.
- Step 3: Open the Data Files tab and select the data file to repair
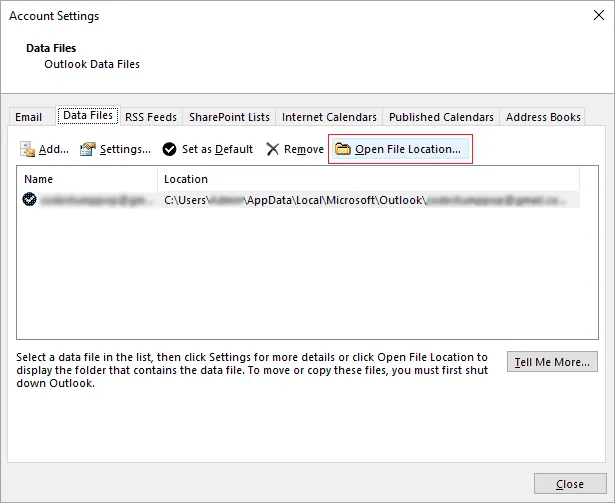
- In the Mail Setup window, click on the ‘Data Files’ tab.
- Select the data file that is causing the error and click on the ‘Open File Location’ button.
- Step 4: Create a backup of the data file
- Before repairing the data file, create a backup by copying the file to a safe location.
- Step 5: Run the Inbox Repair Tool or ScanPST.exe
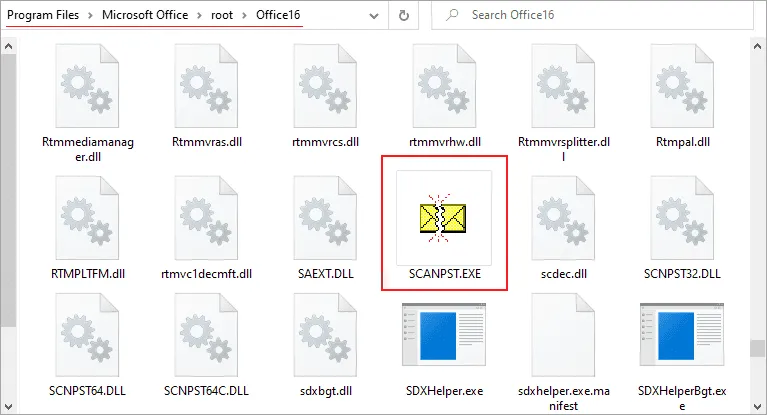
- Navigate to the location C:\Program Files\Microsoft Office\root\Office16.
- Search and run the ‘ScanPST.exe’ application.
- Select the Outlook data file from your computer that you want to repair.
- After the repair operation is complete, relaunch Outlook and check to see if the error is fixed.
While ScanPST is a useful tool for repairing corrupted or damaged Outlook data files it does have some limitations that you should be aware of.
- Limited Repair Capability: ScanPST is only designed to repair minor corruptions and inconsistencies in Outlook data files. If your file is severely damaged or corrupted, it may not be able to repair or rebuild the Outlook OST file.
- File Size Limitation: ScanPST has a limit on the size of the data files that it can scan and repair. The tool can handle files up to 2 GB in size, but larger files may require you to split the OST file to multiple PST files, which is only possible with professional third-party tools.
- Risk of Data Loss: While using ScanPST to repair a corrupted or damaged Outlook data file, there is a risk of data loss. The tool may delete some of your data during the repair process, or it may not be able to recover all of your data.
Note: If the Inbox Repair Tool fails to repair the data file, try using a third-party tool like EdbMails OST to PST converter software or PST repair tool for Outlook to restore your email data.
- Step 1: Close Outlook and open the Control Panel
- Method 3: Convert OST file to PST with EdbMails
EdbMails is a fast, efficient, and user-friendly tool that can help you to resolve the ‘Outlook data file cannot be configured’ error by converting your OST file to PST format. It is a reliable and convenient option for users who want to recover their Outlook data file from errors and restore the mailbox data. The tool maintains data integrity, supports selective conversion, has no file size limitation and also allows you to migrate emails from Outlook OST to Office 365.
Here are the steps to resolve the Outlook error with EdbMails:
- Step 1: Create a backup of your .ost file
- Before you start the conversion process, it is important to create a backup of your .ost file.
- To do this, you can simply make a copy of the .ost file and save it in a safe location on your computer.
- Step 2: Install EdbMails OST to PST conversion tool
- Download EdbMails and double-click on the setup icon to start installing the application.
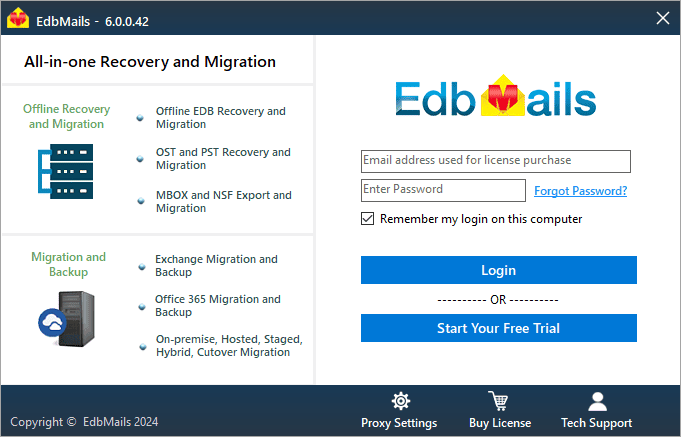
- After the setup is complete, launch the application and select ‘Start Your Free Trial’.
- Select the OST recovery, conversion and migration option from the main screen.
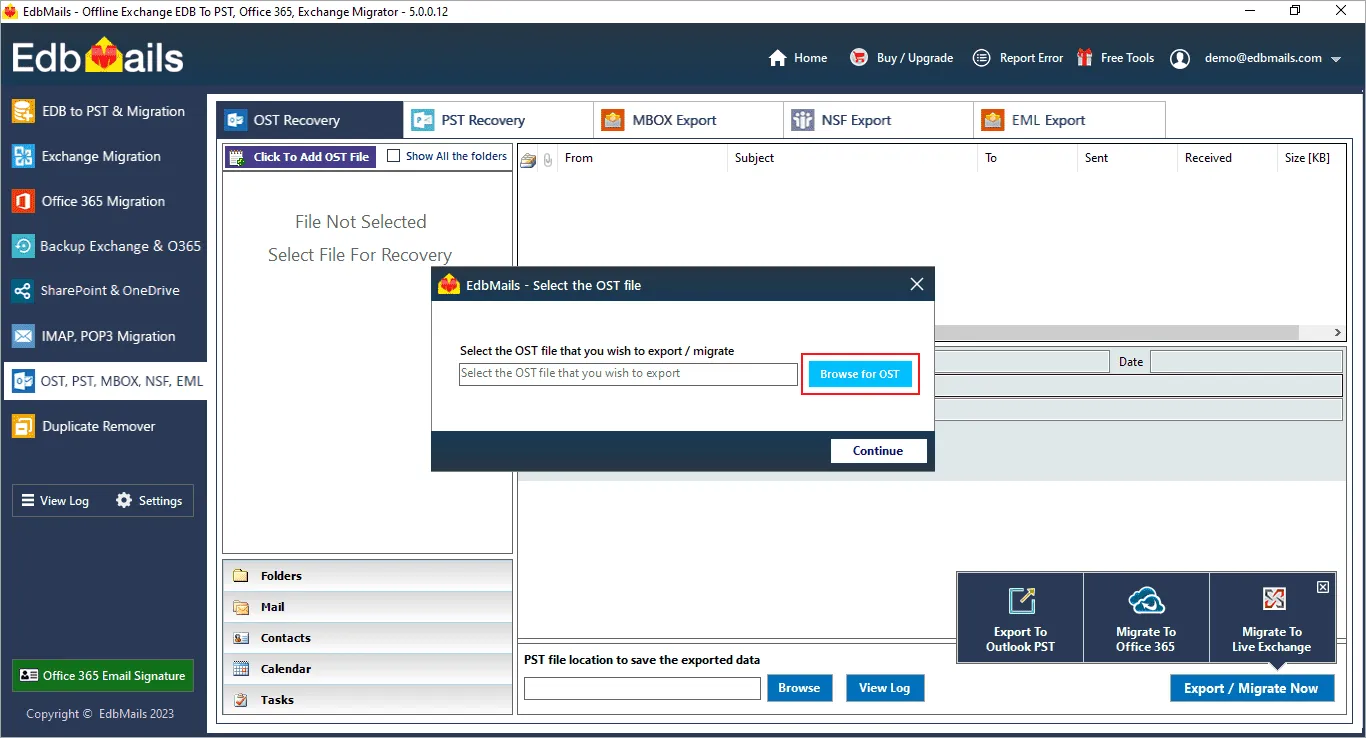
- Step 3: Browse and select the .ost file from your computer
- Click ‘Browse’ and select the OST file that you want to convert to PST.
- In case your Outlook data file is orphaned or corrupted, EdbMails can successfully repair and restore the file.
- Step 4: Preview and select the mailbox items to export
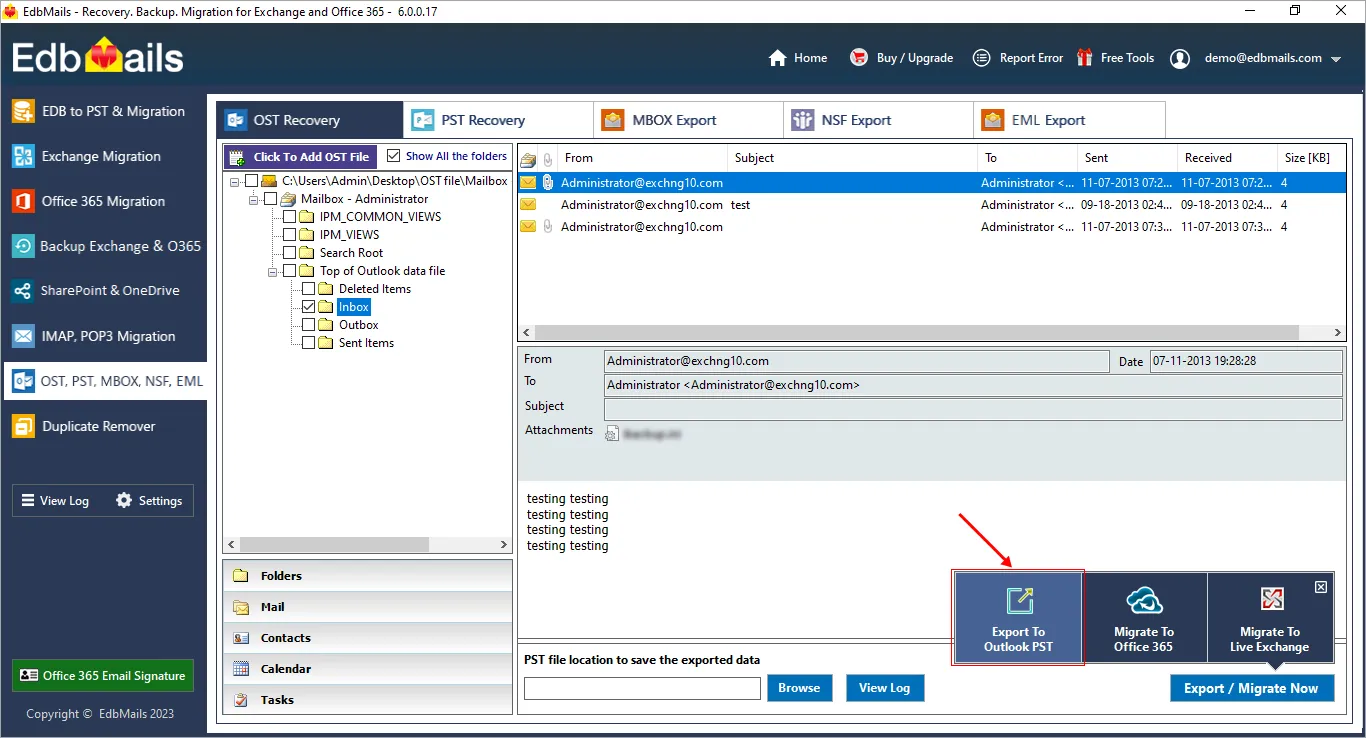
- EdbMails displays a comprehensive preview of your mailbox data such as emails, contacts, notes, tasks, folders.
- Configure the conversion settings such as the location where you want to save the converted .pst file.
- You can also apply the advanced filter settings to select mails based on Date, Sender and Recipient address.
- Step 5: Start the OST to PST conversion process
- After you have configured the conversion settings, ‘Export OST to PST’ to start the conversion process.
- This may take some time depending on the size of your .ost file.
- Verify the exported emails and folders with the log report
- Step 6: Open the converted .pst file in Outlook
- Finally, open Microsoft Outlook and import the converted .pst file.
- Select ‘File’ > ‘Open & Export’ > ‘Import/Export’ and follow the prompts to import the .pst file.
Tip: EdbMails also has a PST repair tool that you can use for repairing corrupted PST files and restoring your mailboxes. Here are some benefits of using EdbMails over the other methods to resolve the Outlook data file issue.
- Fast and Efficient: EdbMails is a fast and efficient tool that can convert large and corrupted OST files to PST format quickly. The tool uses advanced algorithms to ensure a smooth and error-free conversion process and can also repair Outlook OST from corruption.
- User-Friendly Interface: EdbMails has a user-friendly interface that enables you to perform the conversion process effortlessly. The tool provides step-by-step instructions to guide you through the entire export and migration operations.
- Maintains Data Integrity: EdbMails ensures that the converted PST file contains all the data from the original OST file, including emails, contacts, calendars, tasks, notes, and attachments. The tool maintains the original formatting and metadata of the data, such as sender, recipient, date, and time.
- Supports Selective Conversion: EdbMails enables you to perform selective conversion of OST data to PST. You can choose which folders or items you want to convert and exclude any unwanted data.
- Supports All Versions of Outlook: EdbMails supports OST file conversion from versions of Microsoft Outlook, including Outlook 2021, 2019, 2016, 2013, 2010, 2007, and 2003. You can convert OST files to PST format regardless of the Outlook version you are using.
- No File Size Limitation: EdbMails can handle large OST files of any size without any issues. There is no file size limitation, and you can convert files of any size to PST format. Learn how to export Outlook emails to an external hard drive.
- Step 1: Create a backup of your .ost file
Summary
In conclusion, the ‘Your Outlook file cannot be configured’ error is a common issue that can prevent users from accessing their Outlook mailbox. There are various methods to resolve this error, including repairing the Outlook data files, resetting the Outlook settings, deleting and creating a new Outlook profile, converting OST to PST, and fixing the .nst file error. However, when the Outlook data file is corrupted or becomes inaccessible, it is recommended to use EdbMails Outlook repair tool to resolve the error. It successfully repairs corrupted PST and OST files, maintains data integrity, supports selective conversion and can also import an OST file into Office 365 and Exchange.

