Rebuild OST Files from Outlook 2019, 2016, 2013 and 2010
To support offline work, Outlook stores mailbox data locally in an OST file, so you can read and manage emails, contacts, calendars, and attachments. This file is created automatically when Outlook connects to Exchange, Office 365, or IMAP accounts and updates the server once an internet connection is available.
Problems arise when the OST file becomes damaged or unavailable due to system failures, disk issues, or a corrupted Outlook profile. In such cases, Outlook may not open properly or may display synchronization errors, especially in versions like Outlook 2019, 2016, 2013, and 2010. Although deleting and recreating the OST file is a common fix, it only restores data that exists on the server. Any data stored only on the local system and not synced can be permanently lost.

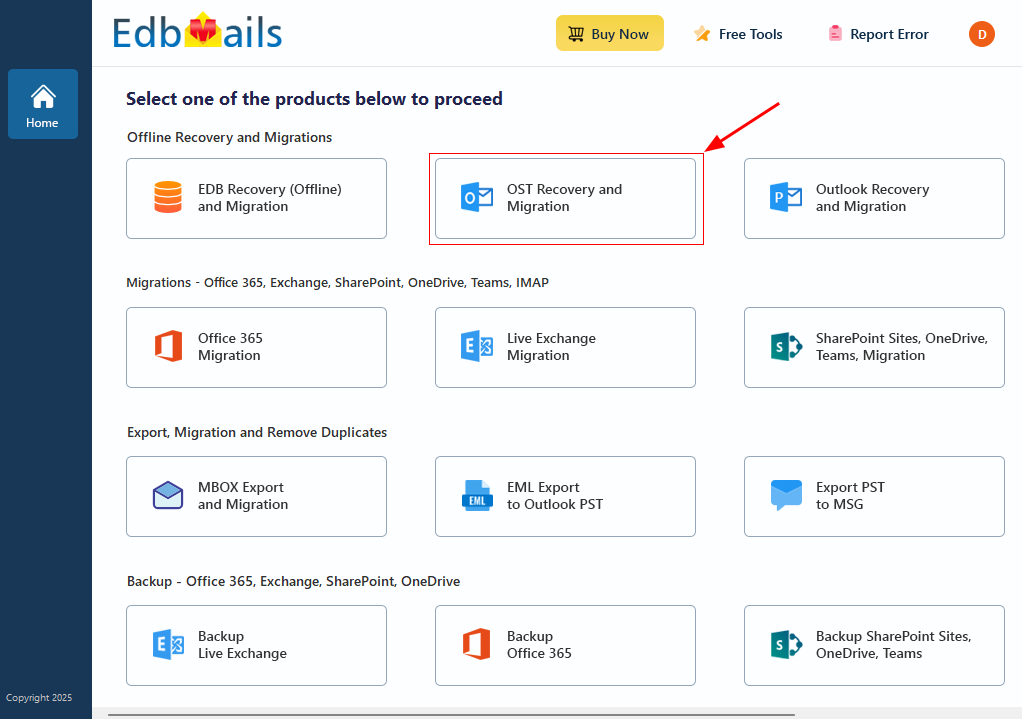
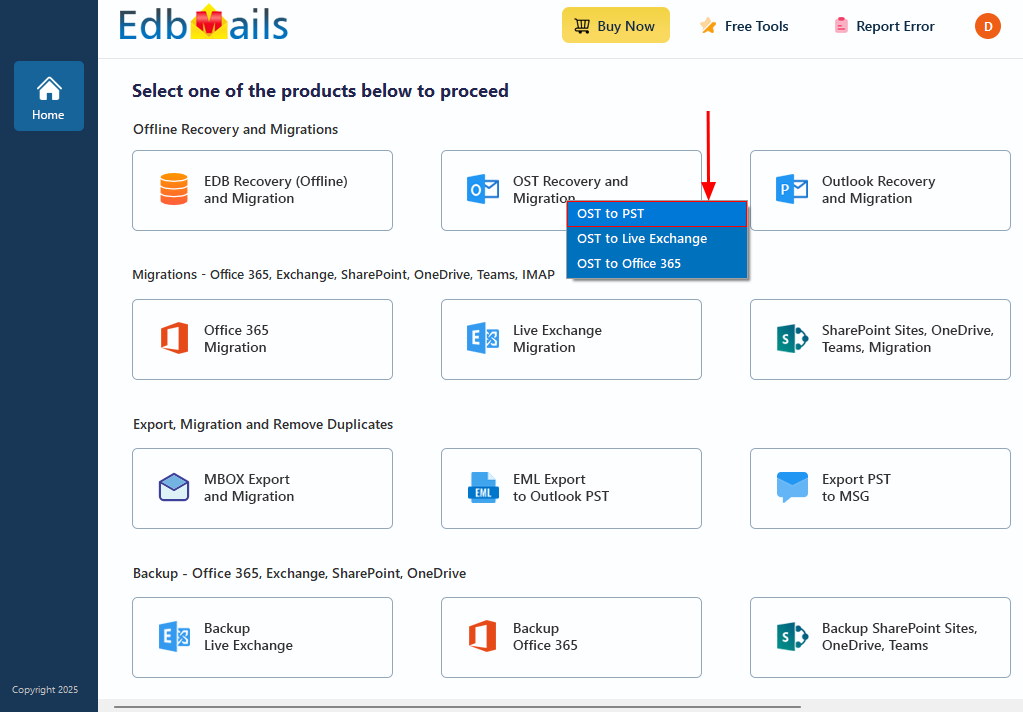
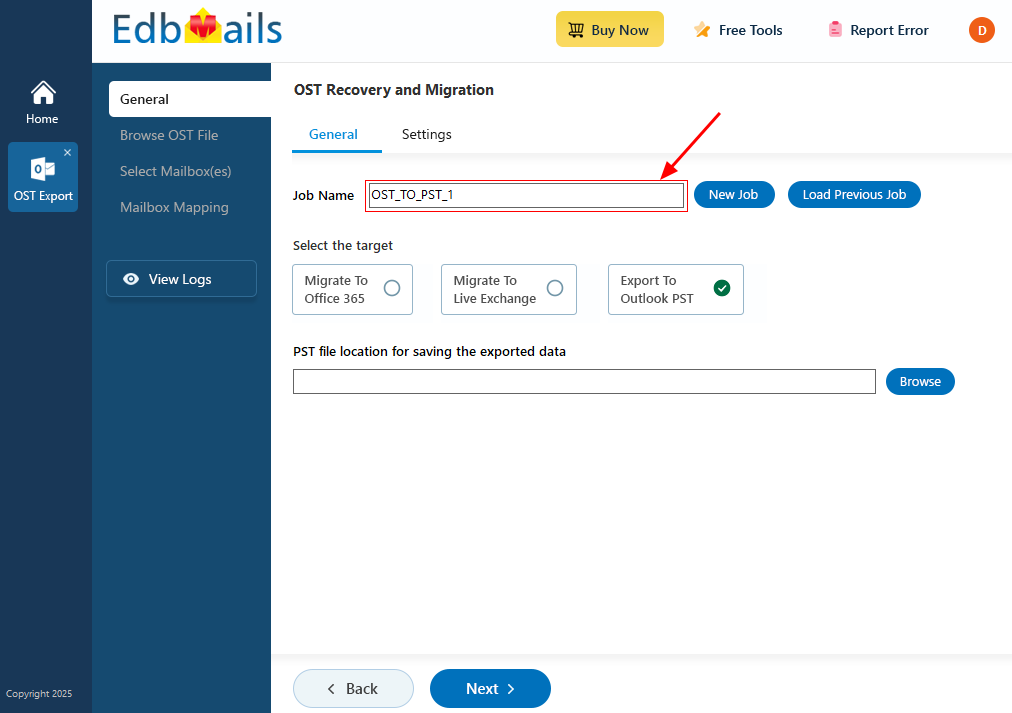
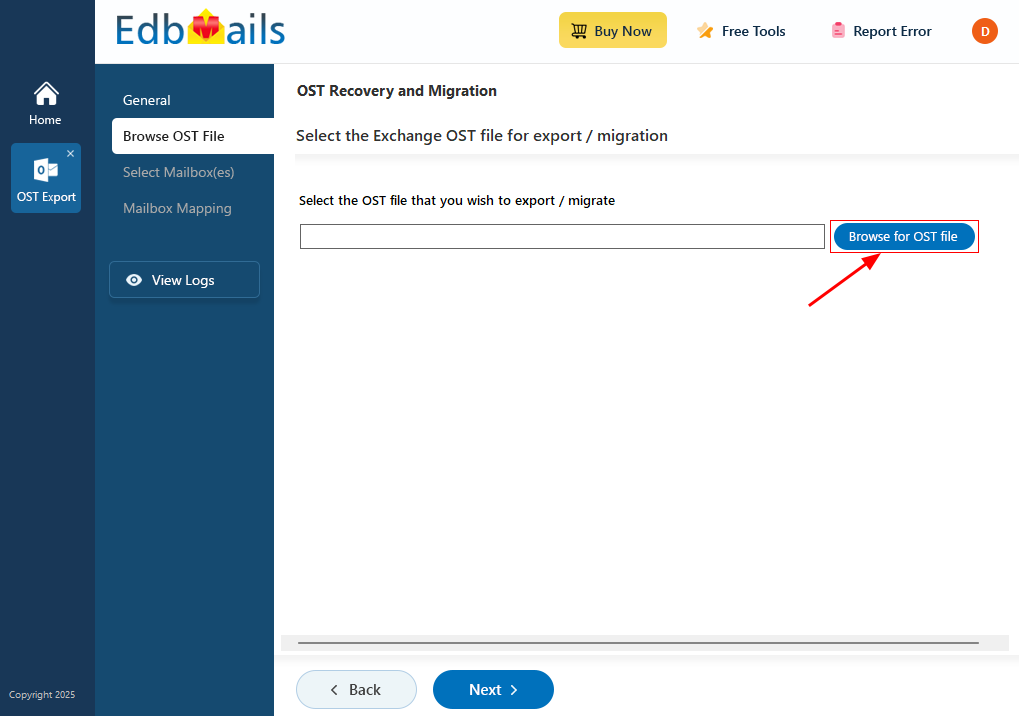
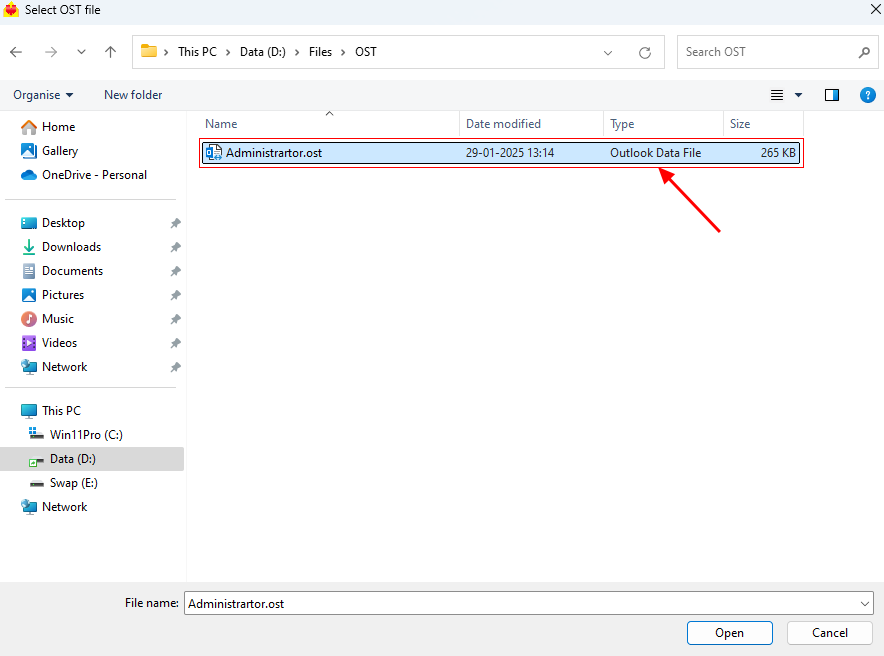
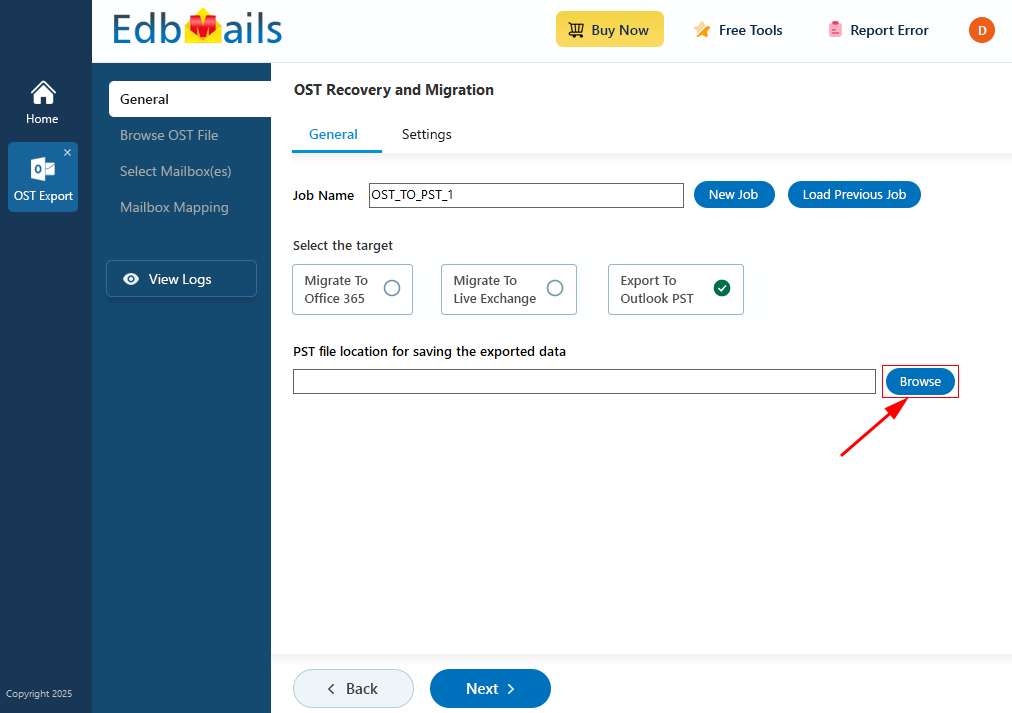
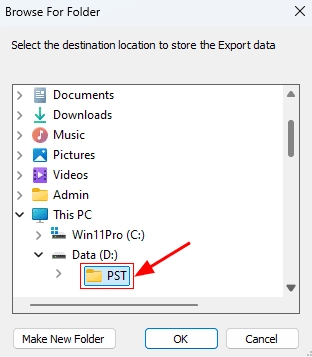
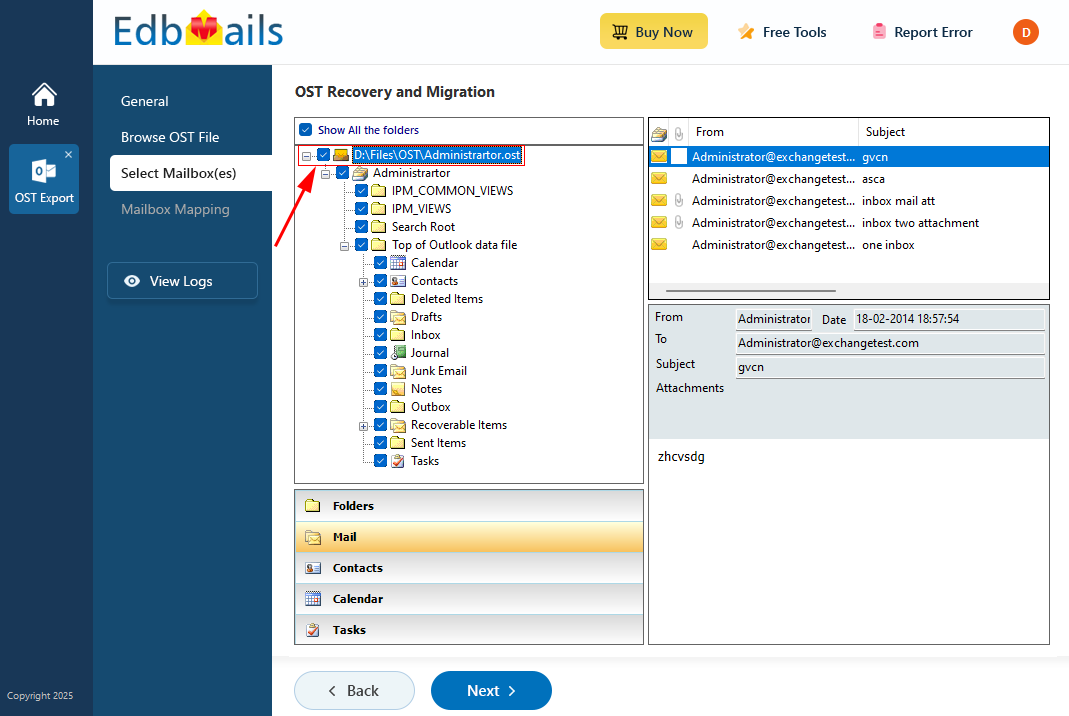
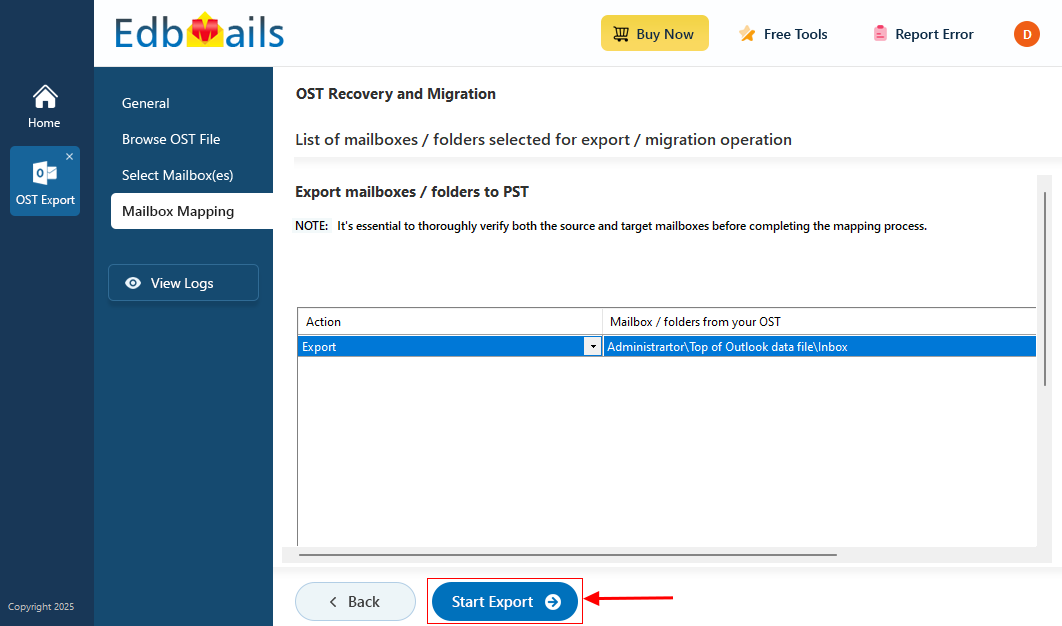
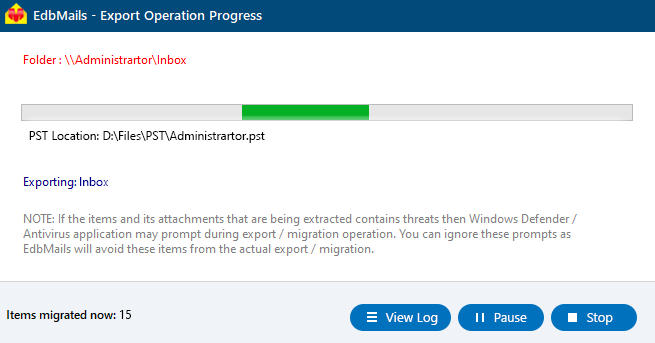
EdbMails OST to PST Converter provides a safer and more dependable option. Instead of risking data loss, you can recover and convert the original OST file to PST format, ensuring that all mailbox content remains intact—even if Outlook can’t open the file. Once converted, the PST can be imported back into Outlook, giving you full access to your data without relying on server sync.
The step-by-step guide below outlines how to use EdbMails to recover and rebuild your mailbox data from a damaged OST file, making the process straightforward and secure.
Common reasons why OST Files become Corrupted or Inaccessible
- Large OST file size: If the Outlook OST file exceeds the specified size limit, it can cause Outlook to become unresponsive or crash, leading to file corruption or make the OST file inaccessible. EdbMails allows you to convert large OST files and Split the OST file into multiple PST files, reducing file size issues and preventing further corruption.
- Malware or virus infection: Harmful software present on the system can corrupt various files, including the OST file, making them unreadable or inaccessible. When malware or a virus affects the system, it may lead to this error message. EdbMails can scan and recover mailbox data from damaged or inaccessible OST files, allowing it to safely export clean data to PST even after malware-related corruption.
- Hard drive issues: Bad sectors or hardware problems on the hard drive can corrupt OST files and other Outlook data, leading to data loss or access issues. EdbMails extracts mailbox data directly from the OST file structure and converts it to PST, helping recover data even when the original storage media has caused file damage.