OST to Exchange Migration
OST to Exchange migration involves transferring data from Offline Storage Tables (OST files) to an Exchange server, particularly when an OST file becomes corrupt, damaged, or inaccessible. This migration is important during Exchange profile corruption, server changes, or after an OST file gets disconnected from its original account. This process ensures continued access to emails, contacts, and calendars. Migrating to an Exchange server provides advantages like strong data synchronization, centralized management, and improved security, ideal for business environments. However, since OST files cannot be directly imported into Exchange, especially when they are corrupted, recovery and proper mailbox mapping are essential to maintain data integrity and minimize downtime.
EdbMails OST to Exchange migrator makes the entire migration process smooth and effortless. It maintains password-protected, corrupt, damaged, and encrypted OST files, allowing users to recover and transfer emails, contacts, calendars, tasks, notes, and journals directly to the Exchange server. EdbMails eliminates complex setup steps and ensures everything works flawlessly. It also preserves all metadata, such as headers, timestamps, and folder structure during OST to Exchange migration. With Automated mailbox mapping, EdbMails automatically matches source mailboxes to their Exchange targets, reducing manual effort. Also, EdbMails offers a free trial, allowing users to transfer up to 30 items, to experience its functionality and effectiveness before proceeding.

Prerequisites to Import OST to Exchange Server
- Create mailboxes on the Exchange server
Before migration, it's important to ensure that mailboxes are created on the target server. You can choose the option to allow EdbMails to automatically create mailboxes on the target server. However, if you prefer to create mailboxes manually, please refer to the link below.
See how to create mailboxes in Exchange server
If you want to migrate to an Exchange Public Folder, refer to the link below to create the public folder on the Exchange server and assign the required permissions to the admin user.
Steps to create Public folder in Exchange server and assign permission to the admin user
- Configure the throttling and message-size limits
For a successful OST to Exchange migration, it’s important to account for throttling policies. Since migration tasks are resource-intensive, Microsoft may impose throttling to maintain server performance and stability. Configuring these limits helps ensure a smooth, consistent, and uninterrupted data transfer throughout the migration process.
Steps to set up custom EWS throttling policies on Exchange server
To ensure a successful migration of larger emails and attachments without encountering delivery errors, timeouts, or performance issues, set the message size limit to the maximum value (150MB).
Steps to set up change message size limits on Exchange server
- Create mailboxes on the Exchange server
Steps to Import OST to Exchange Server using EdbMails
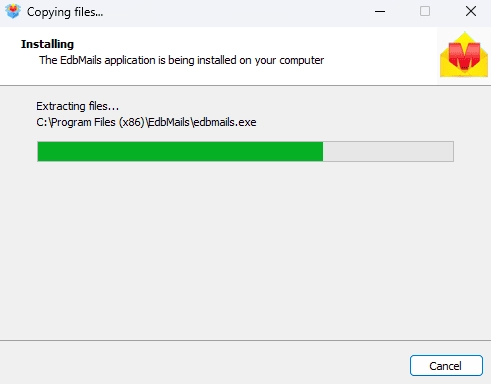
Step 1: Download EdbMails OST to Exchange converter tool
- Download and install the EdbMails application on your computer.
- See the detailed list of EdbMails system requirements for OST file conversion.
- Open the EdbMails application.
- Enter your email address and password, then click ‘Login’. If you don’t have an account, click ‘Start Your Free Trial’ to use the trial version.Note: The Free Trial version allows you to explore the features and export up to 30 items from each folder. To access the full functionality, you must purchase a valid license.
Click here to purchase the license from the EdbMails website.
Once the purchase is complete, close and relaunch the EdbMails application. Log in using the same email address and password used during the purchase to activate your license.

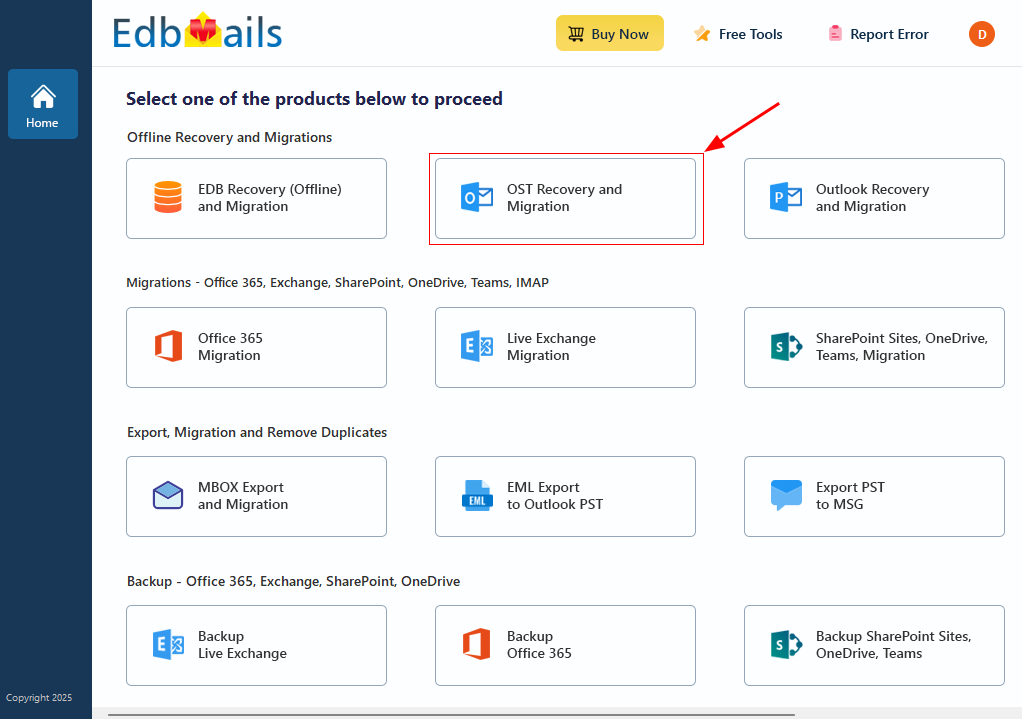
- Select ‘OST Recovery and Migration’
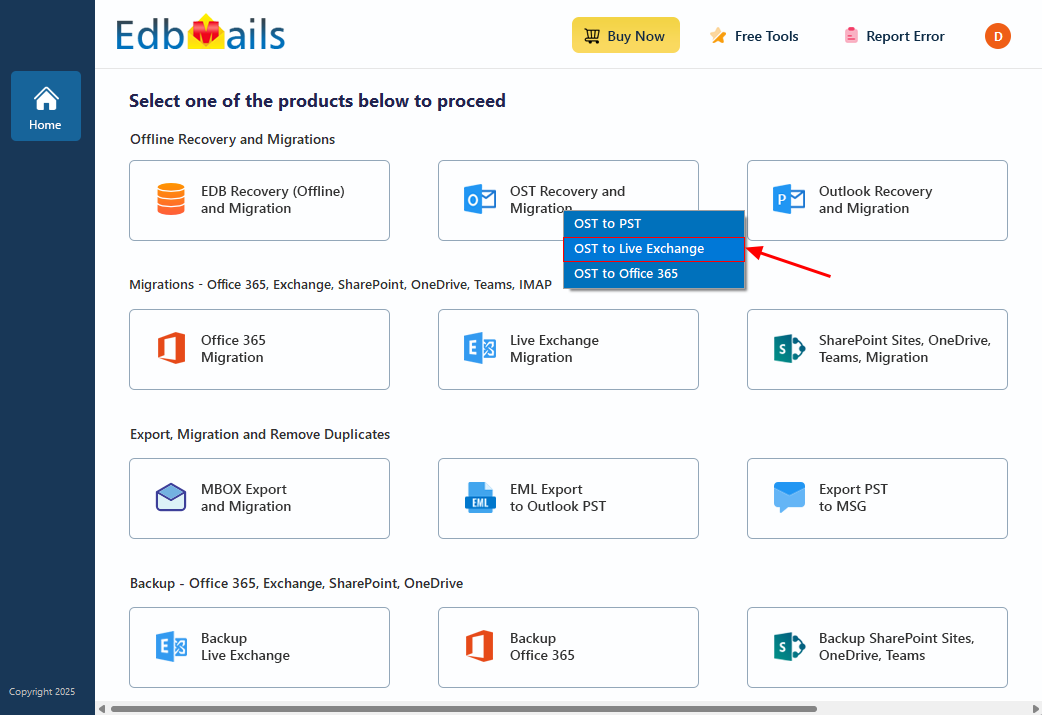
- Select ‘OST to Live Exchange’.
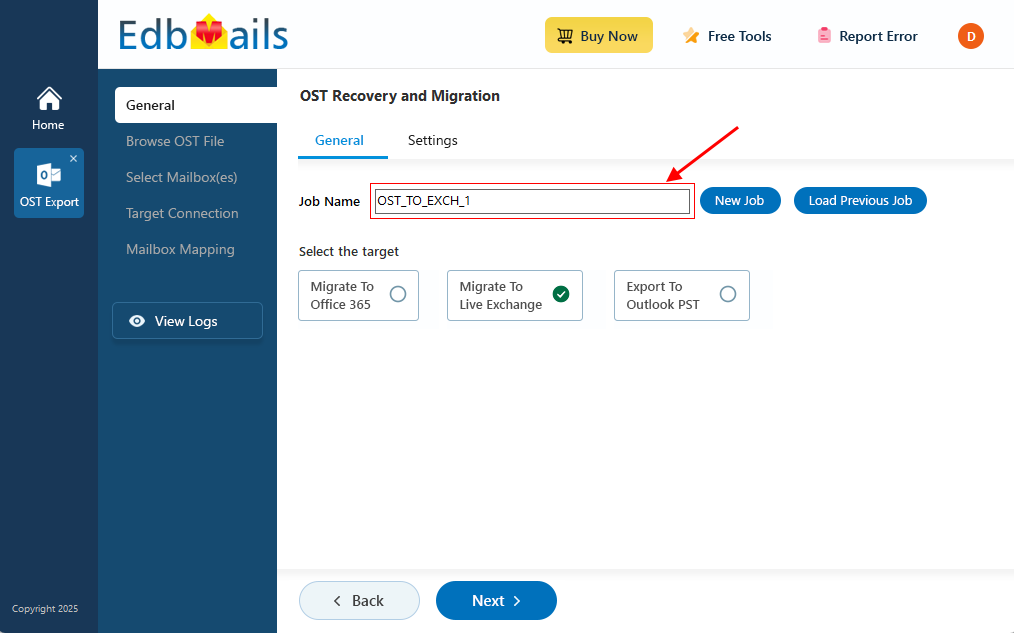
- You can continue with the default job name or select the ‘New Job’ button if you prefer to change the job name.
- Then, click ‘Next’ to continue.
- Download and install the EdbMails application on your computer.
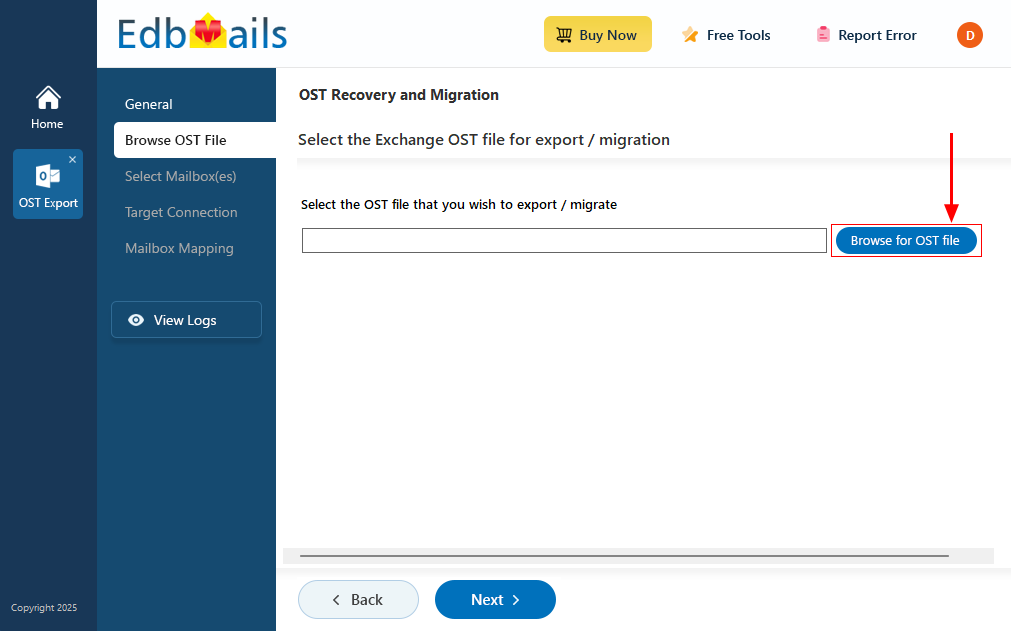
Step 2: Select the offline OST files
- Click ‘Browse for OST file'.
- Select the offline OST file from your local drive and click ‘Next’ to continue. You can also use an OST file stored on a shared network location with both read and write permissions assigned.
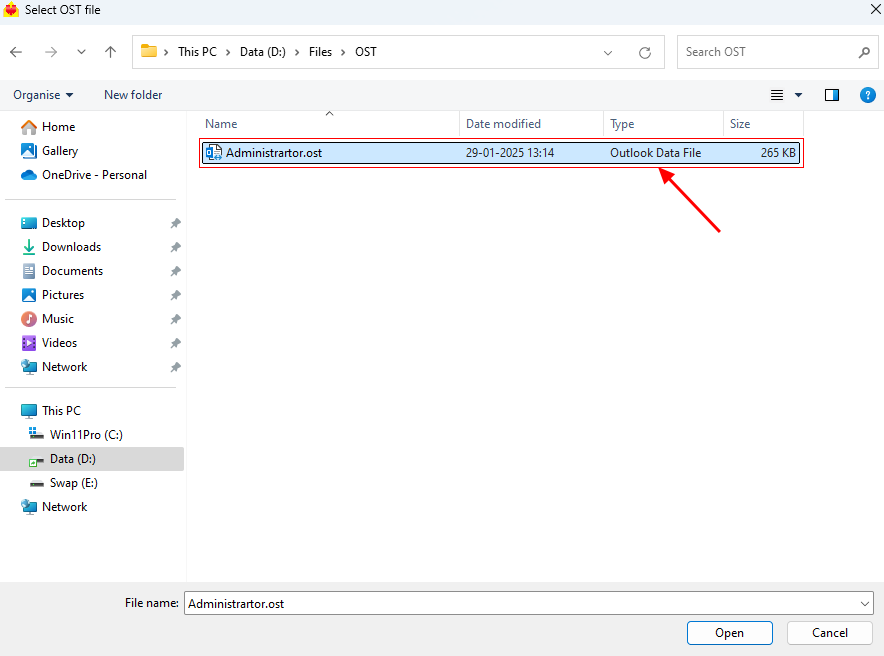
- Click ‘Next’ to proceed.
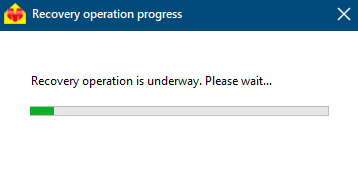
- EdbMails scans your OST file and recovers data in case of corruption.
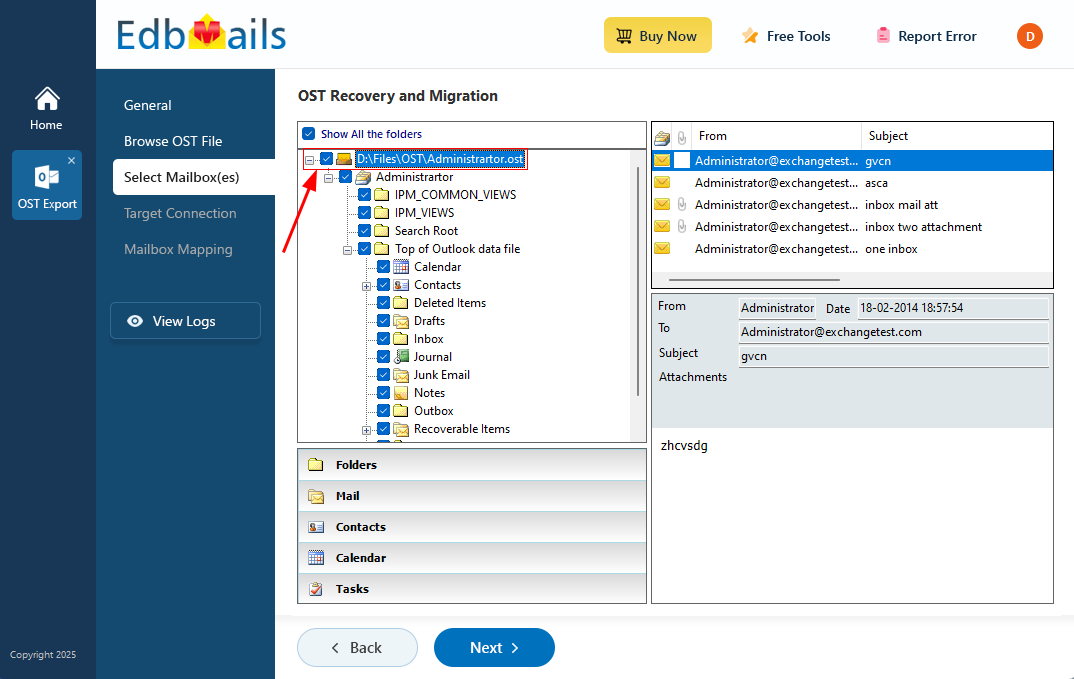
- After the recovery process is finished, you'll see the complete folder layout on the left side pane. You can expand the mailbox and its folders to look through the contents. The preview section lets you view emails, contacts, calendars, notes, tasks, and folders right inside the app. There's no need for Outlook—you can open and preview OST file data directly within the software.
- Click ‘Browse for OST file'.
Step 3: Preview and select the mailbox
- Select the entire OST file or the required folders / subfolders and click the ‘Next’ button.
- Select the entire OST file or the required folders / subfolders and click the ‘Next’ button.
Step 4: Connect to the target Exchange server
- Click the ‘Add New Connection’ button to establish a new connection to the target Exchange server. To use a previous connection, select it from the connection list and click the ‘Connect to Existing’ button to proceed.
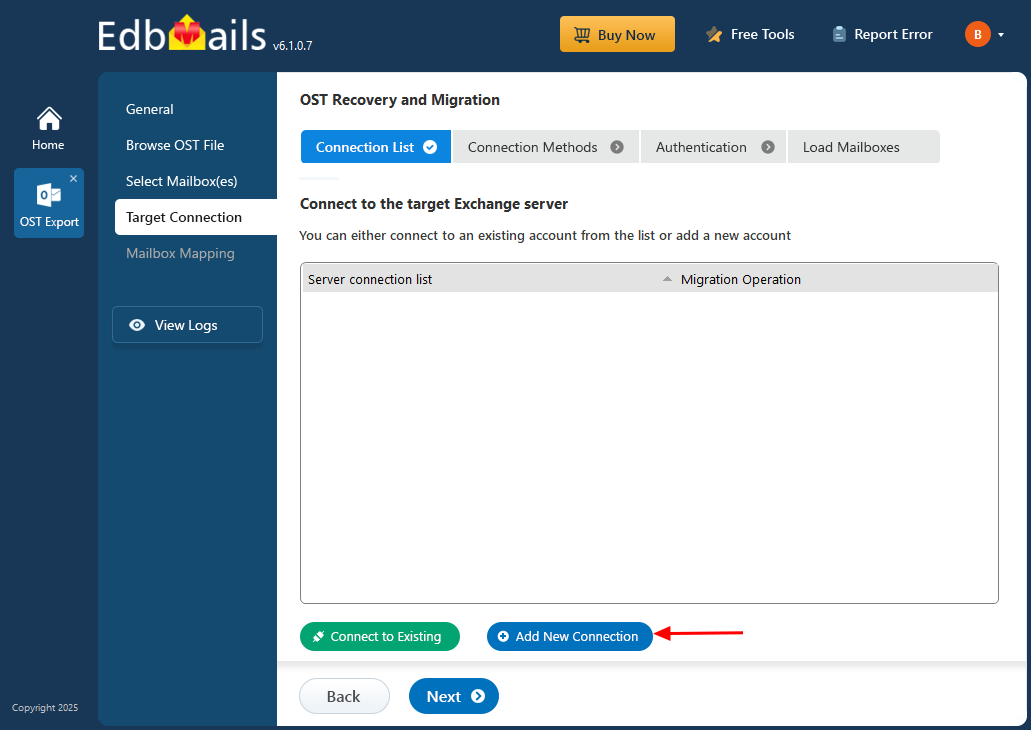
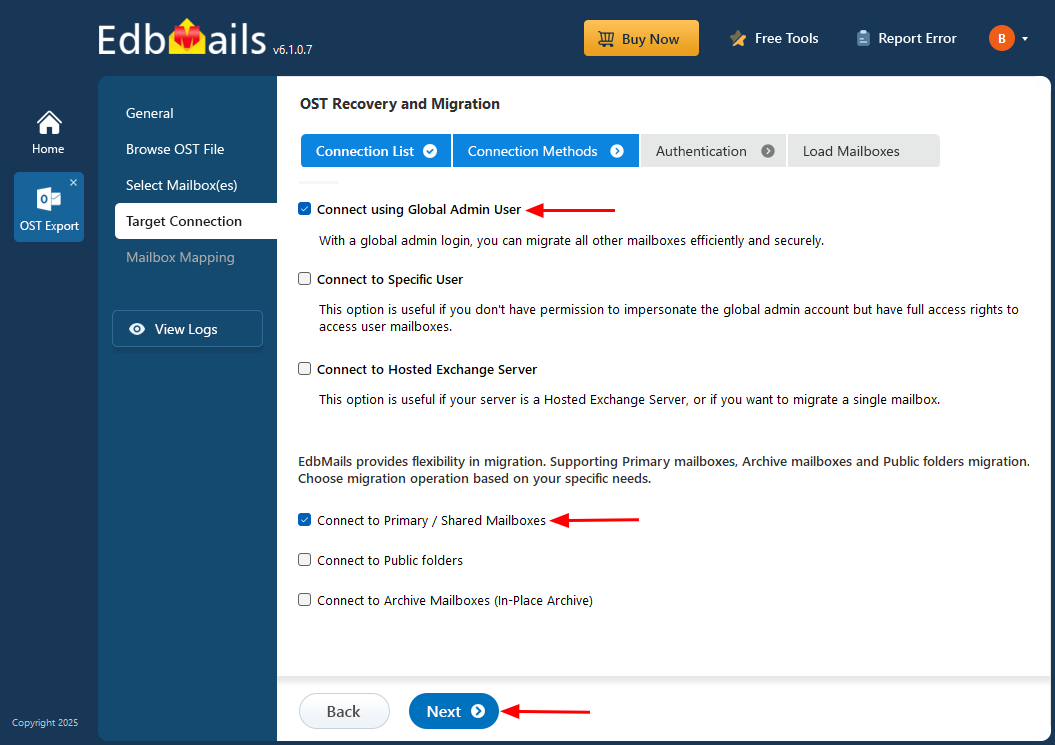
- Select the required connection options and click the ‘Next’ button.
Different options to connect to Exchange server in EdbMails
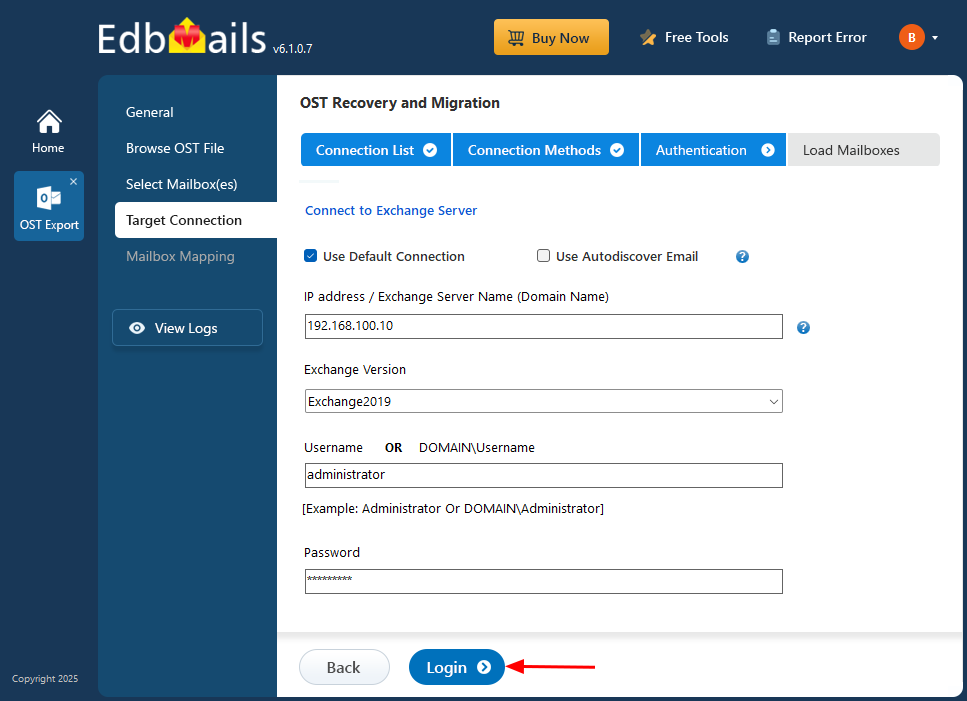
- Enter the target Exchange server details and click the ‘Login’ button
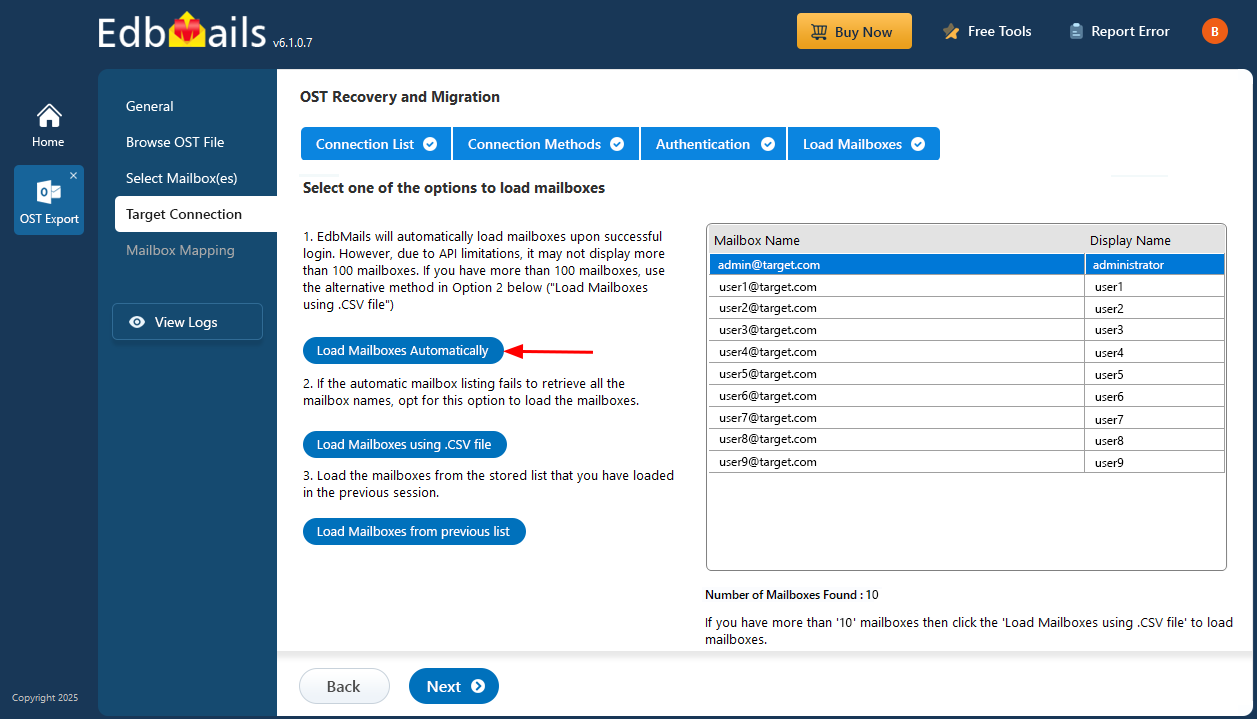
- Select one of the methods to load the mailboxes. You can also load mailboxes using CSV files.
- Click the ‘Add New Connection’ button to establish a new connection to the target Exchange server. To use a previous connection, select it from the connection list and click the ‘Connect to Existing’ button to proceed.
Step 5: Map source and target mailboxes
- Choose the required mailbox mapping option
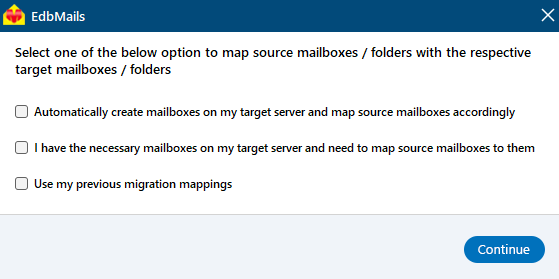
- If you have installed EdbMails on your Exchange server, you can choose to automatically create mailboxes on the target Exchange server.
Click here to know more about automatic mailbox creation
- EdbMails automatically maps the mailboxes and folders between the source and target servers. You can also manually map source mailboxes to the target mailboxes

- Choose the required mailbox mapping option
Step 6: Start OST to live Exchange migration
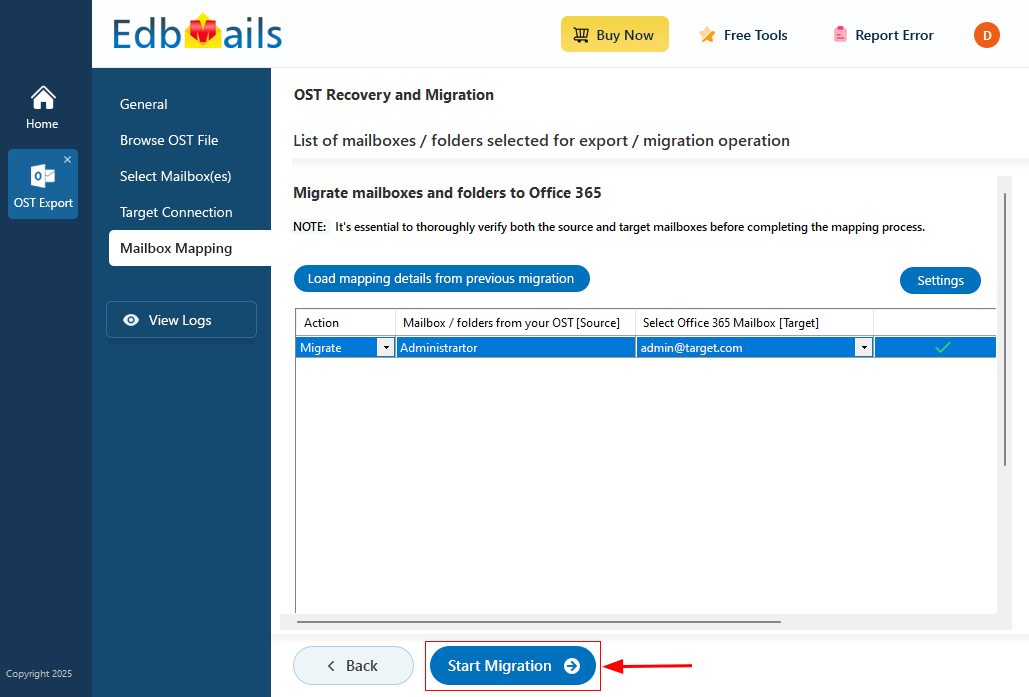
- Verify the mailbox mapping between OST file and target Exchange server
- Click the ‘Settings’ button to apply the filters to customize your export process. For instance, you can apply date filters to export the items within a certain date range.
- Click the ‘Start Migration’ button.
- During the migration, you can monitor the progress in real-time. Once the process is complete, a message will appear prompting you to review the migration status.
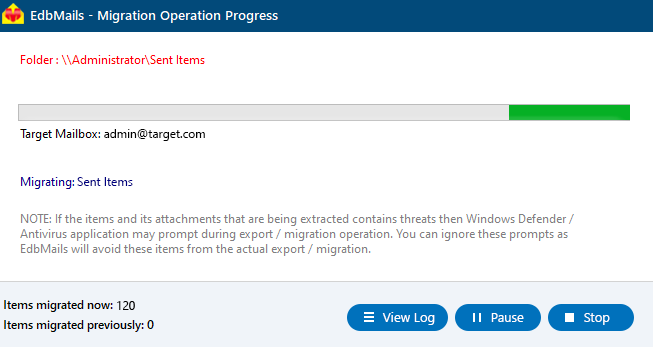
- Click the ‘View Logs’ button to see a detailed status of the migration process, including the number of emails, folders, and mailbox items migrated, along with their counts.
OST to Exchange Post-Migration Tasks
- Step 1: Update the MX records to point to the target Exchange server
To receive messages on the target Exchange server, update the MX records in the DNS to enable email functionality with the new server you have migrated to. In addition, configure the Autodiscover record to allow Outlook to connect to the migrated mailboxes.
- Step 2: Create a new Outlook profile for users in the new domain
Configure the Outlook profile for each user in your domain if Outlook encounters issues connecting to the new Exchange server.
- Step 1: Update the MX records to point to the target Exchange server
Troubleshooting Guide to Import OST to Exchange
For troubleshooting, visit Knowledge Base. For more queries, check Frequently Asked Questions or contact support.

