

GMX Mail to Office 365 Migration
Move GMX Mail email to Microsoft 365 using GMX's secure IMAP service. GMX currently documents imap.gmx.net as the IMAP server, port 993, with SSL/TLS encryption.
Before connecting an external application, make sure POP3/IMAP access is enabled in the GMX account settings. If the GMX security configuration requires an app password, including when two-factor authentication is enabled, use the GMX app password for the external IMAP connection.
EdbMails IMAP Migration Tool supports bulk CSV loading, mapping, selective folder migration, concurrent processing, incremental follow-up runs, and migration reports. Standard IMAP migrates email/mail folders; contacts, calendars, and tasks require a separate workflow.
User Query
" I've been using my '@gmx.net' email via IMAP as a paying 'GMX TopMail' customer, but the storage limitations are a problem. I want to move my GMX emails to Microsoft 365 Exchange and continue managing them in Microsoft 365. Is it possible to send, receive, and manage GMX emails through Microsoft 365 without deleting them from the GMX server? What’s the best way to achieve this? "
Reasons to Migrate emails from GMX Mail to Office 365
Here are the key reasons why users prefer to make the switch to Office 365:
- Enhanced security features: GMX Mail offers basic security options such as two-factor authentication and spam filtering. However, Office 365 delivers advanced protection with cyber threat security, password policies, and Identity and Access Management (IAM) for comprehensive protection.
- Lack of productivity tools in GMX Mail: GMX Mail lacks integrated productivity tools, which can limit its suitability for professional or business environments. In contrast, Office 365 provides a comprehensive suite of applications including Outlook, Word, Excel, and Microsoft Teams that support real-time collaboration and significantly enhance productivity across organizations.
- Insufficient cloud storage: GMX Mail provides only 2 GB of cloud storage, which is insufficient for users with larger data needs. Office 365, however, offers 1 TB of cloud storage per user, ensuring ample space for all business data.
- Compatibility and integration: GMX Mail offers limited compatibility with external applications, restricting business operations. Office 365’s seamless integration with Microsoft tools and third-party applications enhances workflow and allows for greater collaboration within diverse business environments.
Challenges of Manual GMX Mail Migration to Office 365
Here are the main obstacles businesses and users face when choosing a manual migration approach:
- Time-consuming process: Manual migration is lengthy, requiring significant time and effort to complete each step.
- Requires technical expertise: The process demands a solid understanding of technical tasks, making it difficult for non-technical users.
- Risk of data loss: Unstable internet connections or application crashes can lead to data loss during the migration.
- Not suitable for bulk migration: Manual migration is inefficient for transferring large volumes of data or multiple accounts at once.
- Prone to user errors: High user involvement increases the risk of mistakes that could result in data corruption or incomplete migration.
EdbMails: Professional Solution for GMX Mail to Office 365 Migration
EdbMails provides a graphical IMAP-to-Microsoft 365 workflow for GMX Mail. Administrators can connect single or multiple mailboxes, select the required folders, review source-to-target mapping, perform incremental follow-up runs, and verify the result through migration reports.
Use GMX's current IMAP settings and authentication requirements for the source, and the current EdbMails OAuth-based Microsoft 365 connection for the target.
GMX Mail to Office 365 Migration Planning
- Inventory GMX mailboxes, mailbox sizes, folders, aliases, and active accounts.
- Enable POP3/IMAP access in the GMX settings.
- Use imap.gmx.net, port 993, SSL/TLS.
- Prepare the password or app password required by the account's security configuration.
- Create/provision Microsoft 365 target mailboxes and assign licenses.
- Run a pilot mailbox and verify the target before production migration.
Pre-migration activities for GMX Mail to Office 365 Migration
GMX source
- Enable POP3/IMAP access in GMX settings.
- IMAP server: imap.gmx.net.
- Port: 993.
- Security: SSL/TLS.
- When two-factor authentication is enabled, use a GMX app password for the external IMAP connection.
- For bulk migration, prepare the EdbMails CSV and validate a small test set first.
Microsoft 365 target
- Create/provision target mailboxes and assign licenses.
- Use the current EdbMails OAuth-based Microsoft 365 target connection.
- Run a pilot before production migration.
Steps to Migrate GMX Mail to Office 365
Step 1: Download and install EdbMails IMAP migration software
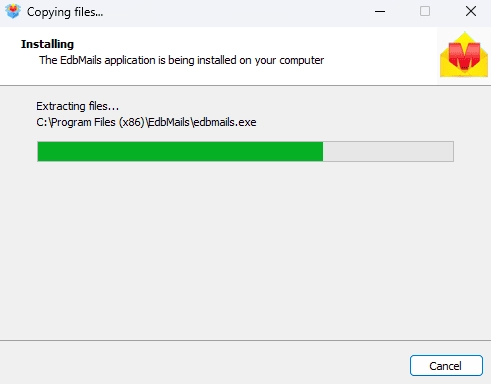
- Download EdbMails and install the application on any computer running on Windows OS that is connected to the source and target environment.
See a detailed list of EdbMails system requirements for IMAP migration.
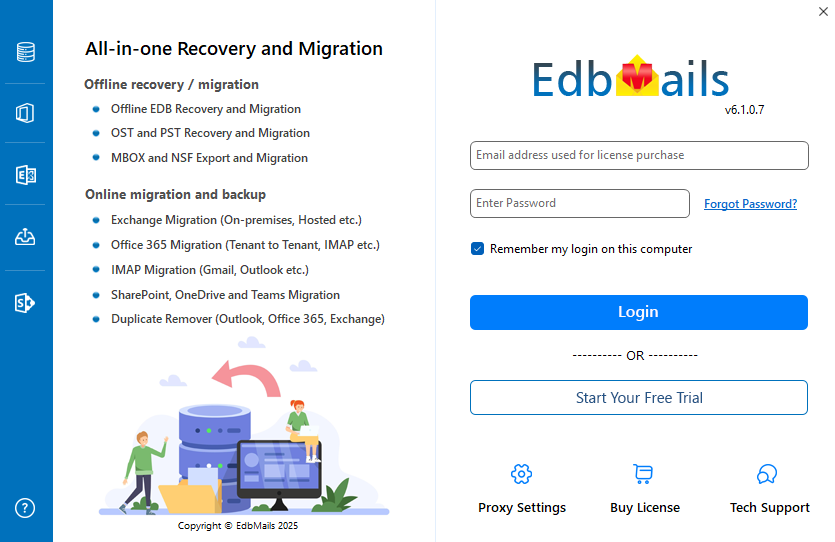
- Open the EdbMails application on your computer.
- Enter your registered email address and password, then click ‘Login’. If you have not created an account yet, choose ‘Start Your Free Trial’ to continue using the trial version.Note: The EdbMails IMAP trial lets you evaluate the workflow and migrate up to 30 items from each folder. To migrate all eligible items for licensed mailboxes, purchase the required IMAP migration license.
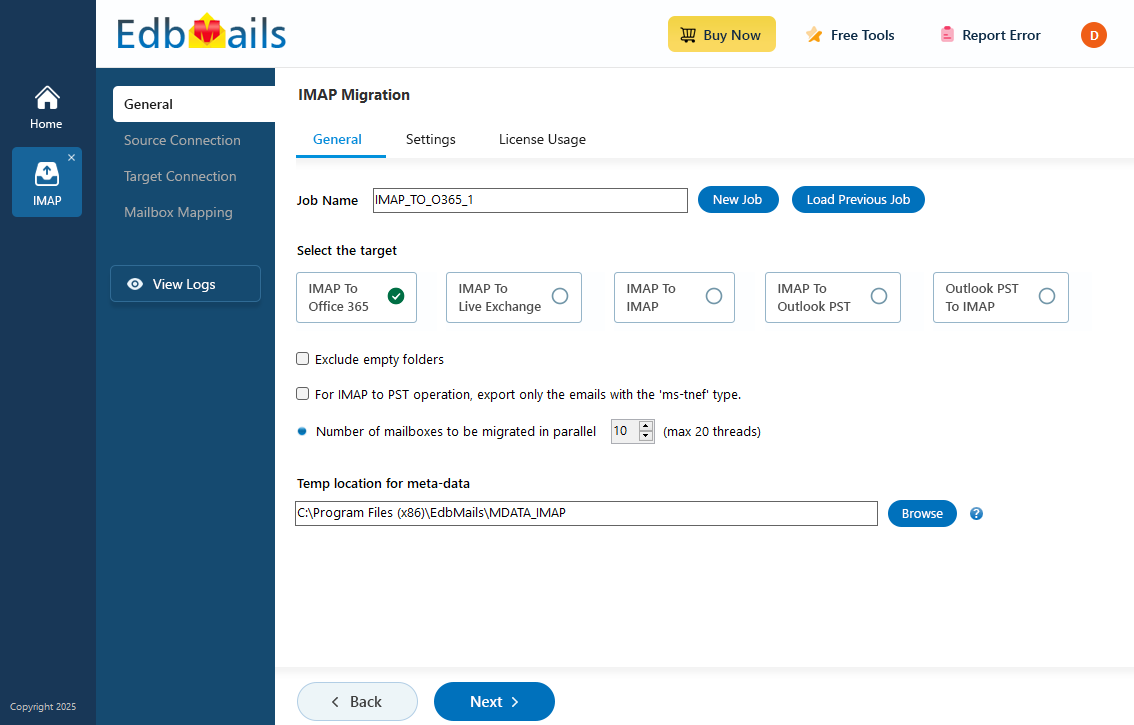
- Select the option ‘IMAP (Gmail, Outlook & more) Migration’.
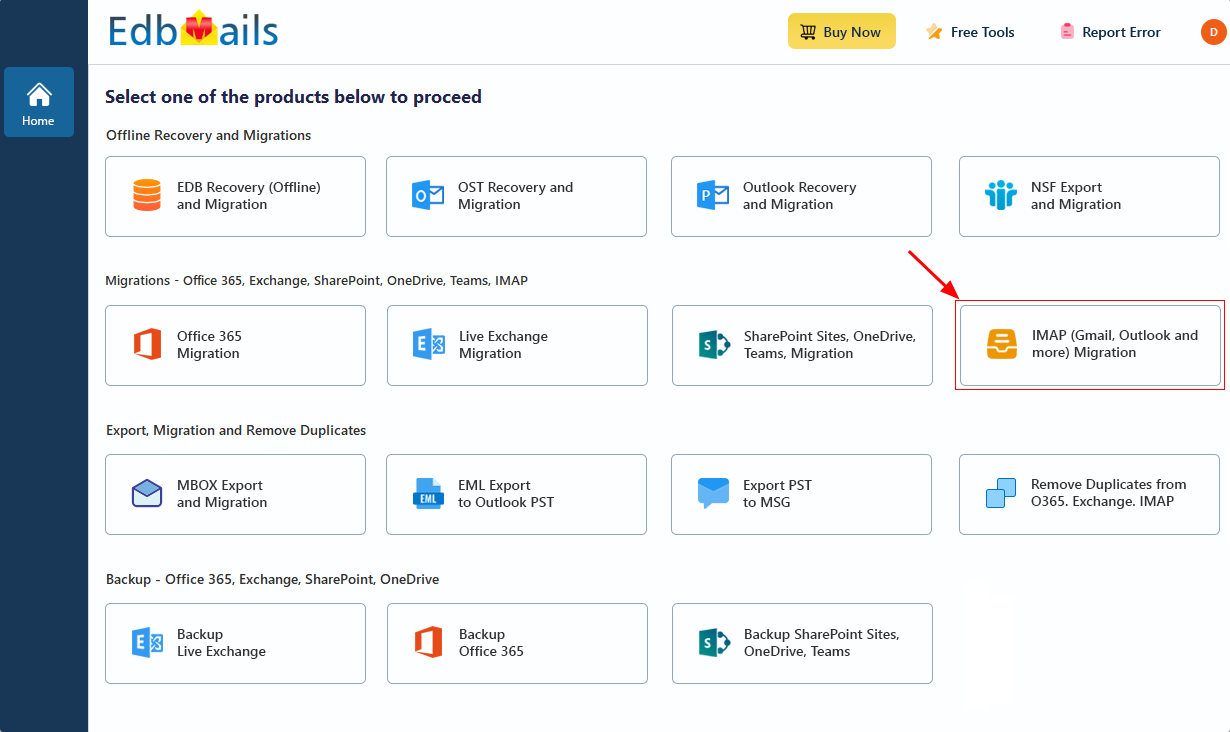
- Select ‘IMAP to Office 365 Migration’.
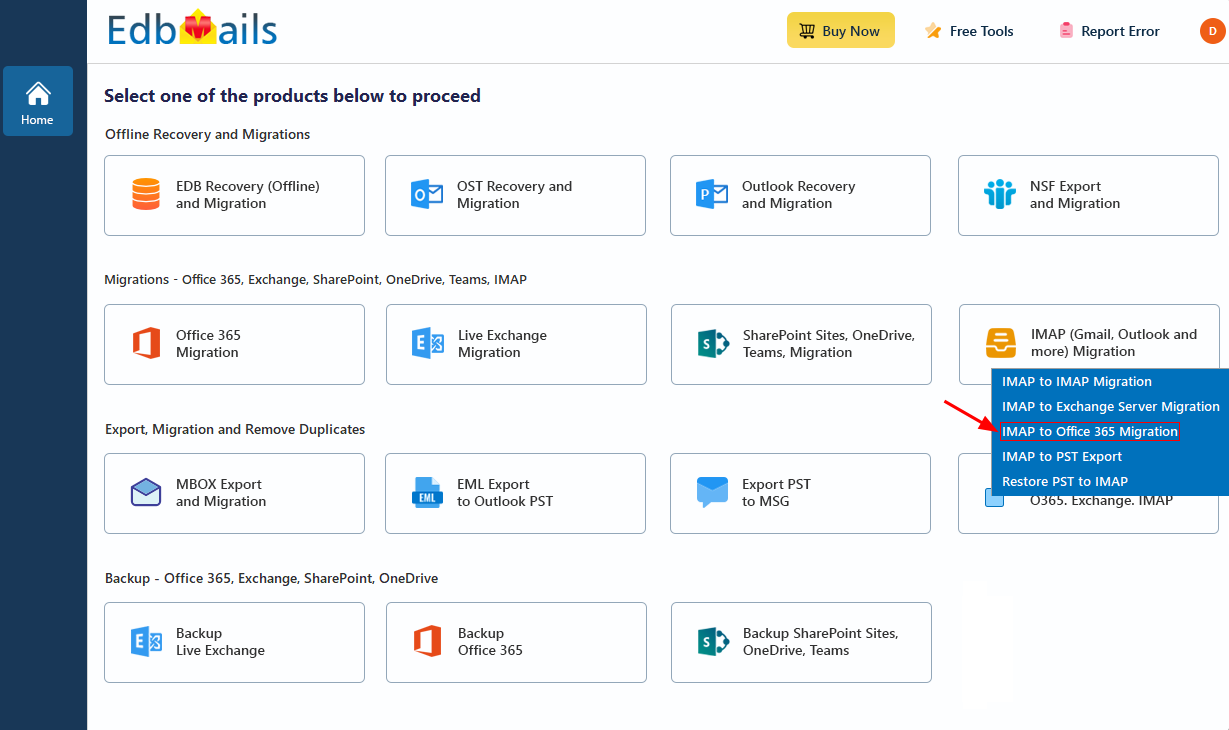
- A default job name is assigned automatically. If required, select ‘New Job’ and provide a custom name to make the job easier to identify during the migration process.
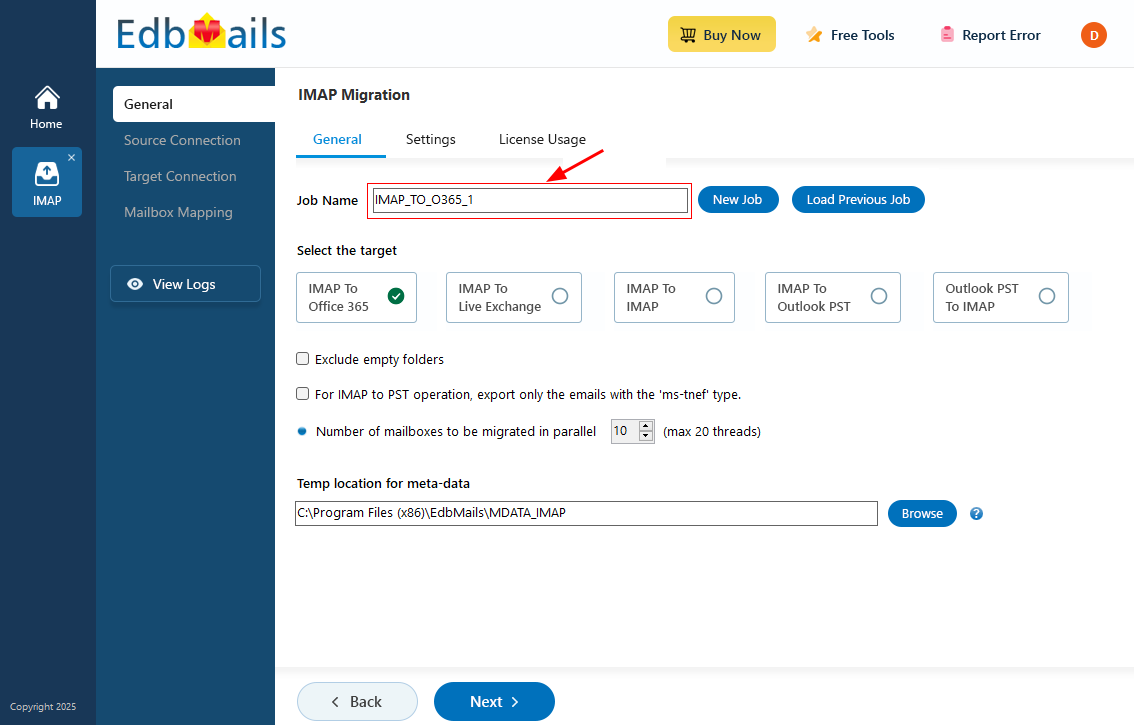
- Download EdbMails and install the application on any computer running on Windows OS that is connected to the source and target environment.
Step 2: Connect to source GMX Mail server
- To connect a single GMX mailbox, select ‘Single User / Account Migration’, choose ‘Connect to IMAP Server’, and click ‘Next’.
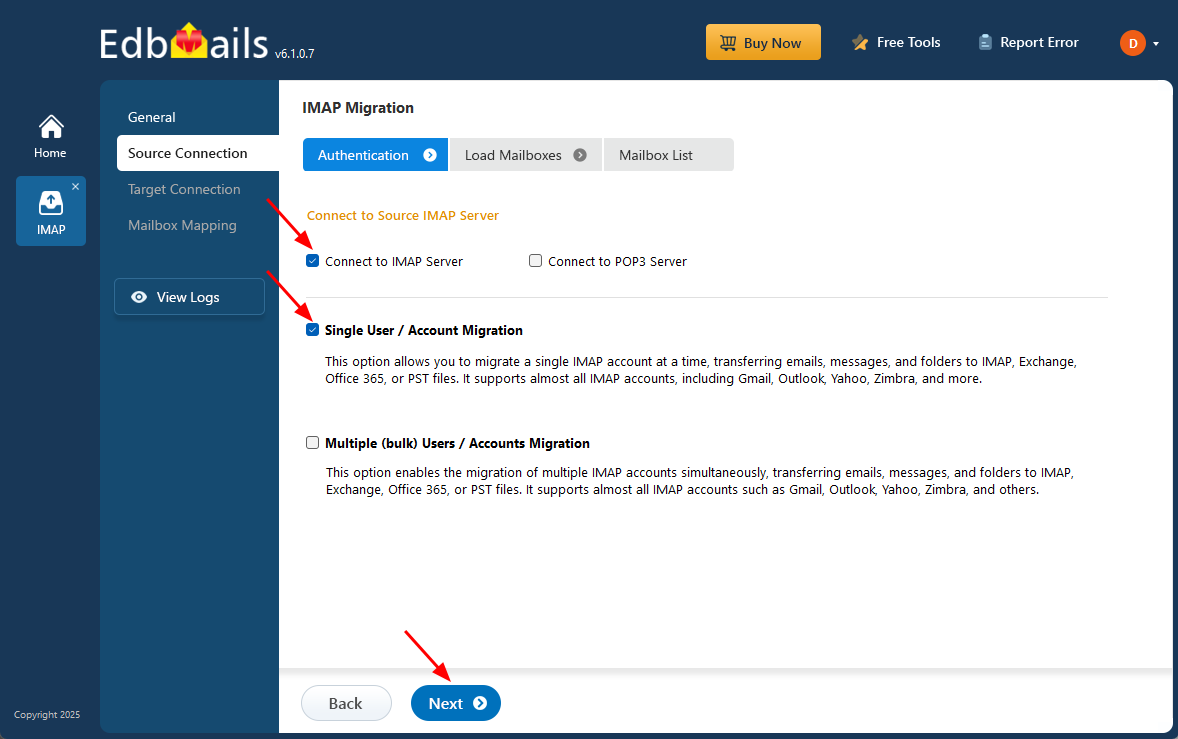
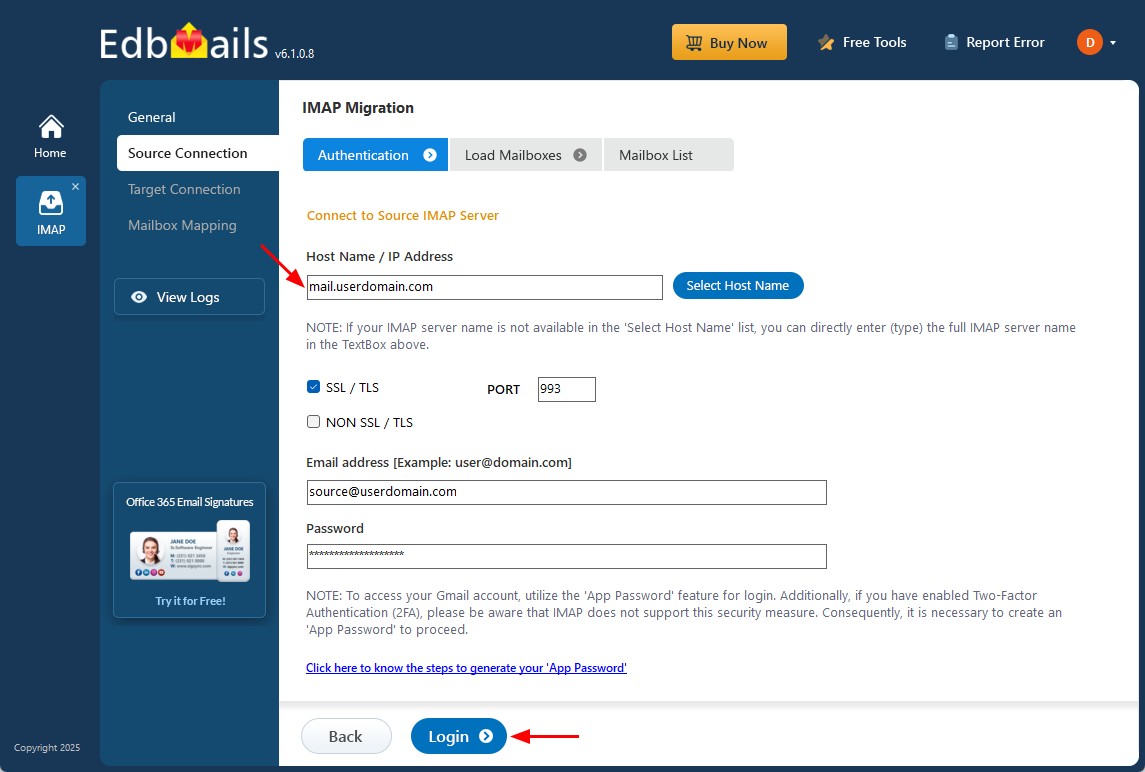
- Enter imap.gmx.net as the GMX IMAP server, use port 993 with SSL/TLS, and provide the full GMX email address with the password or app password required by the account's security settings.
- For GMX Mail, use GMX's own authentication requirements. If two-factor authentication is enabled, create and use a GMX app password for the external IMAP connection.
- Click the ‘Login’ button.
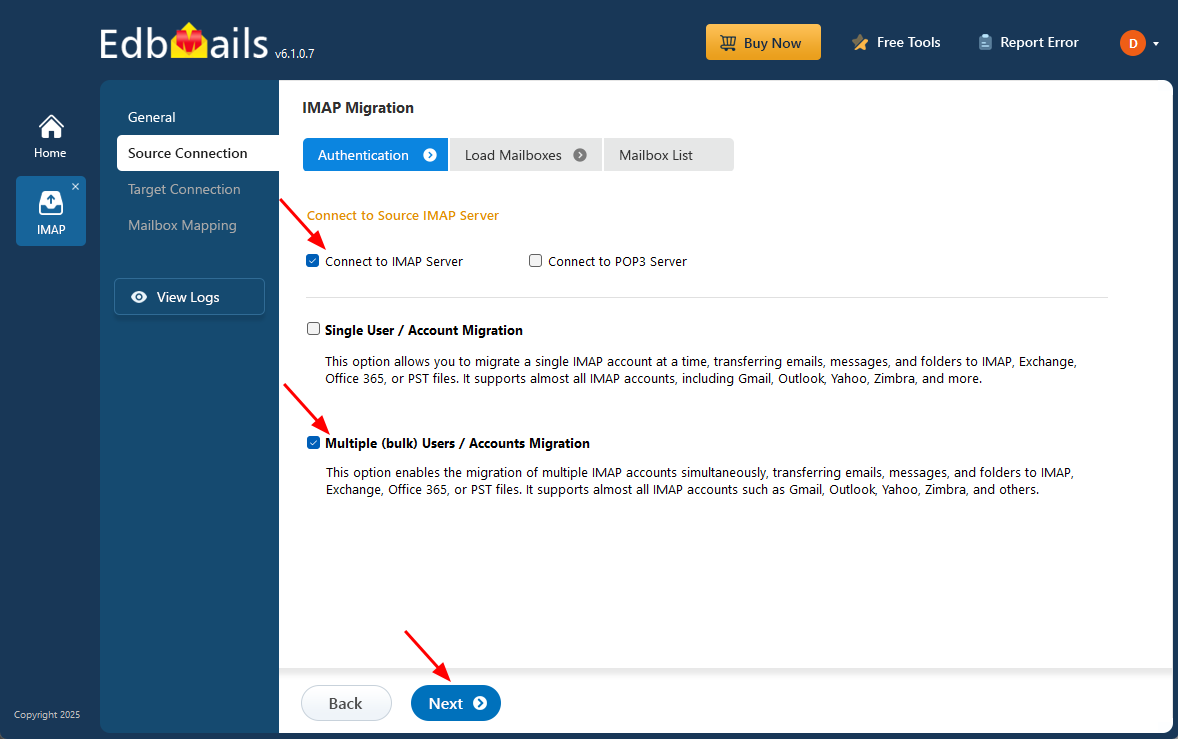
- To connect multiple GMX mailboxes, select ‘Multiple (Bulk) Users/Accounts Migration’, choose ‘Connect to IMAP Server’, and click ‘Next’.
- Then proceed by clicking ‘Next’.
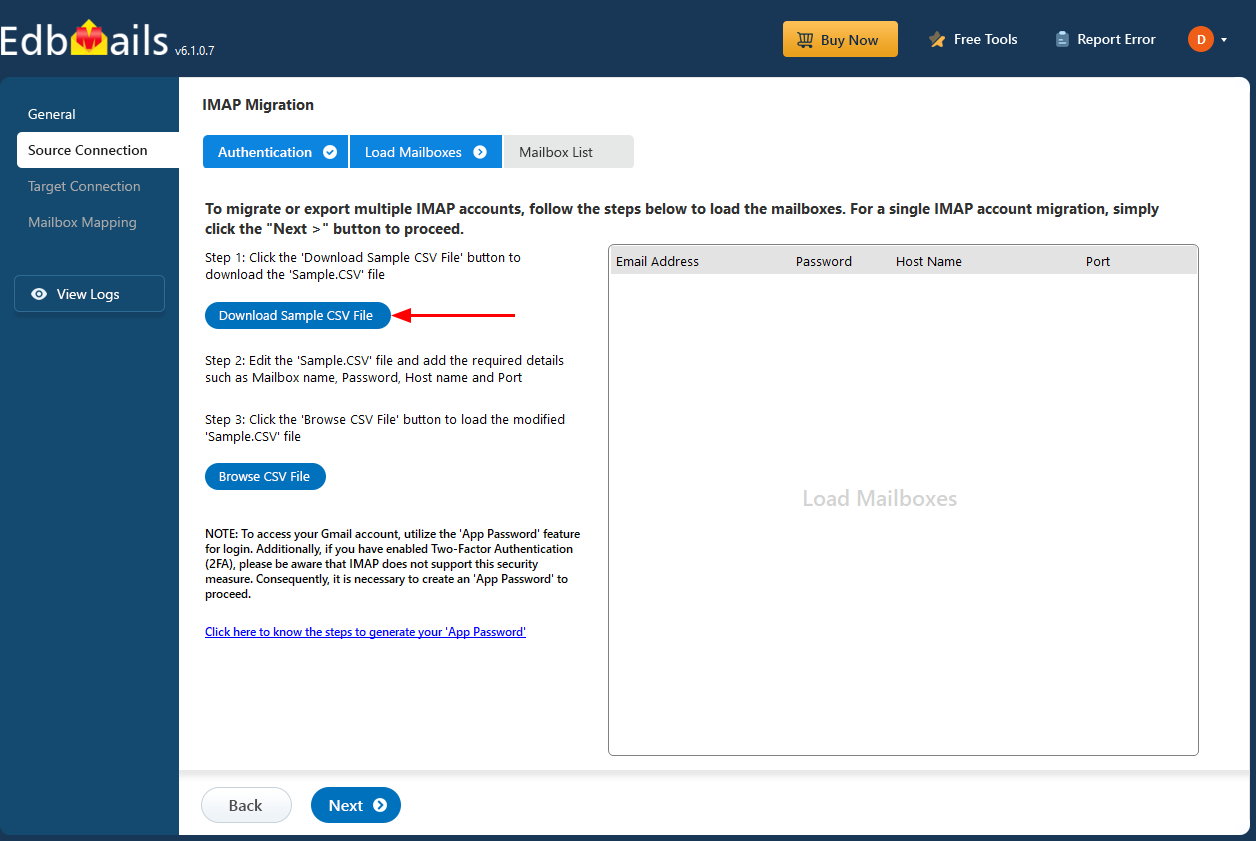
- Click ‘IMAP Migration CSV File’. It will load the sample CSV file to your local drive.
- Open the CSV file and fill in the necessary details, including the email address, password, IMAP server hostname, and port number for each mailbox. After completing the entries, save the file to proceed with the migration.
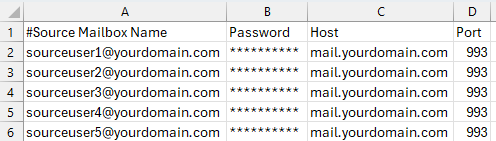
- After entering the required details in the CSV file, save your changes and close the file to continue with the next steps.
- Then, click the 'Load Modified CSV File' button, open the CSV file and click ‘Next’ to proceed.
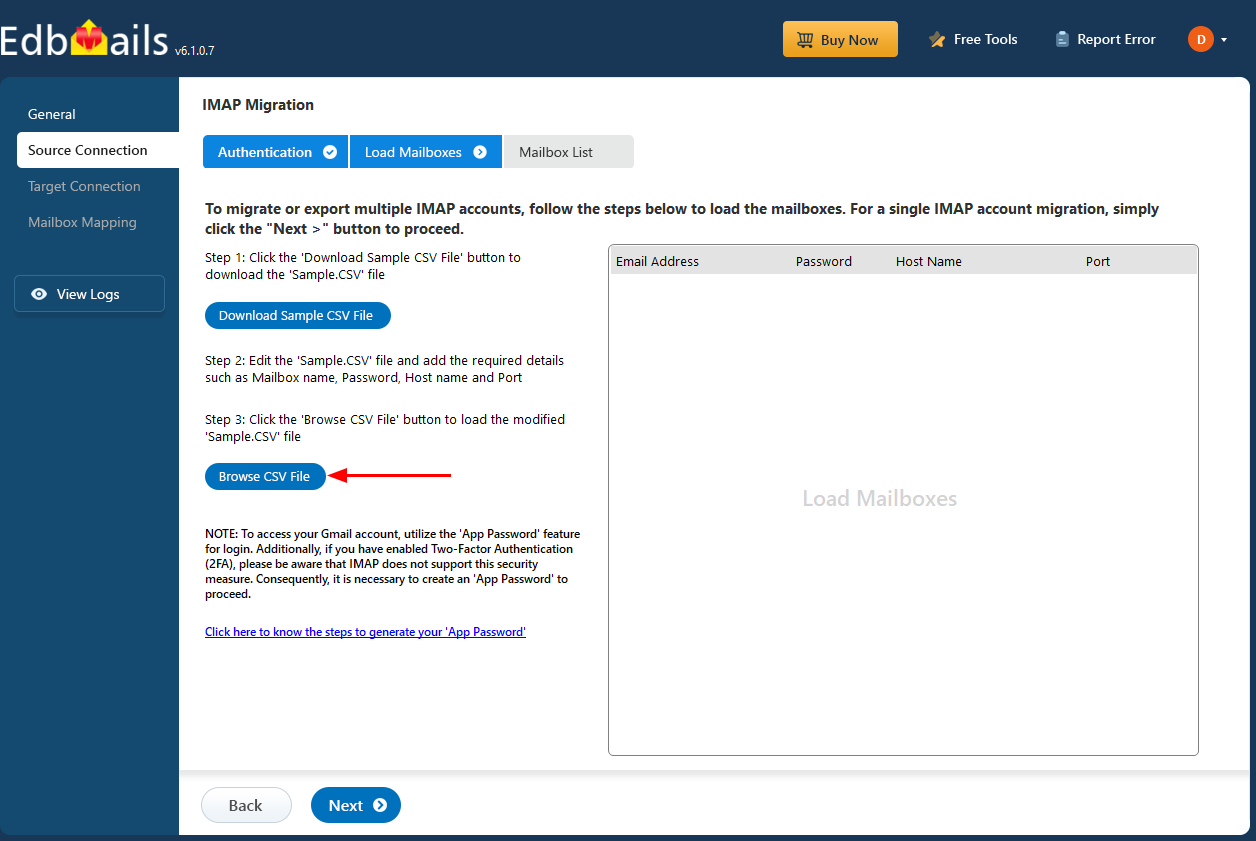
- To connect a single GMX mailbox, select ‘Single User / Account Migration’, choose ‘Connect to IMAP Server’, and click ‘Next’.
Step 3: Select source GMX Mail server mailboxes
- Choose the specific mailboxes or individual folders you wish to migrate. Once your selection is complete, click ‘Next’ to continue.
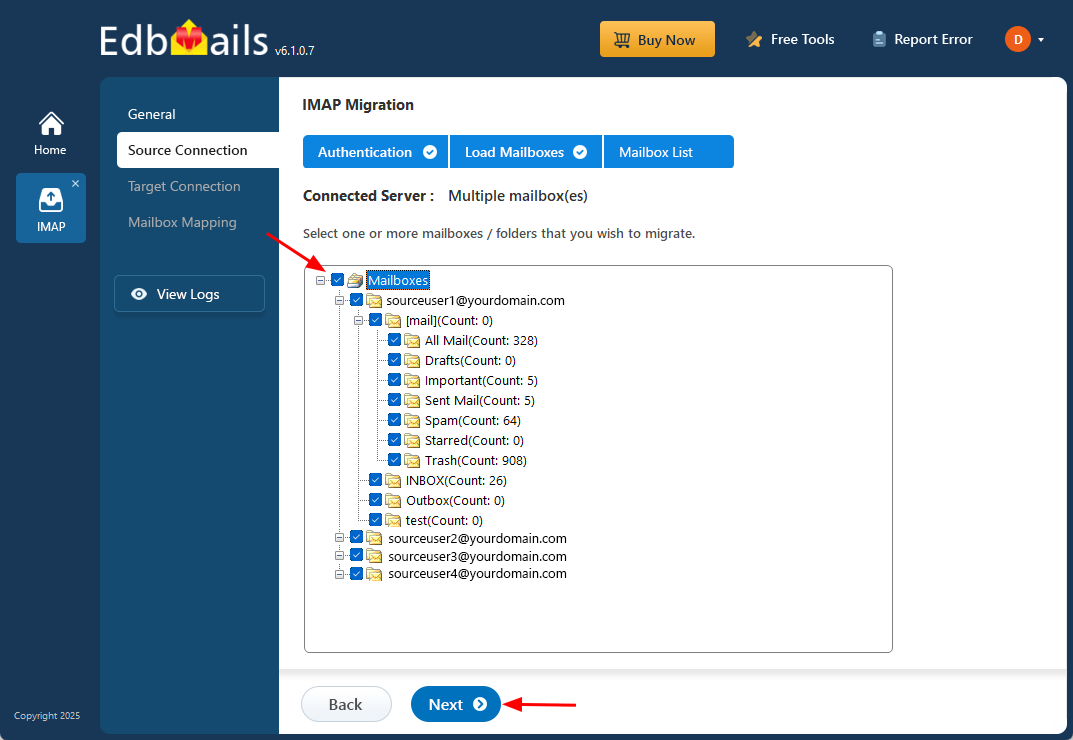
- Choose the specific mailboxes or individual folders you wish to migrate. Once your selection is complete, click ‘Next’ to continue.
Step 4: Connect to target Office 365
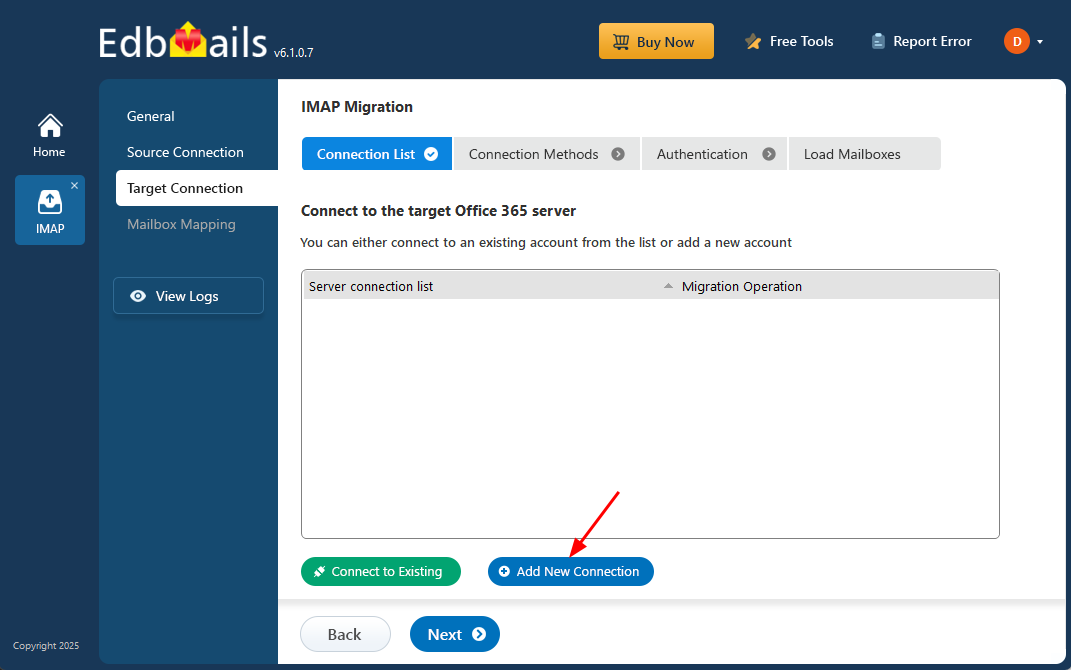
- Click the ‘Add New Connection’ button to create a new connection to your target Office 365 server. To use an existing connection, simply select it from the list and click ‘Connect to Existing’ to continue.
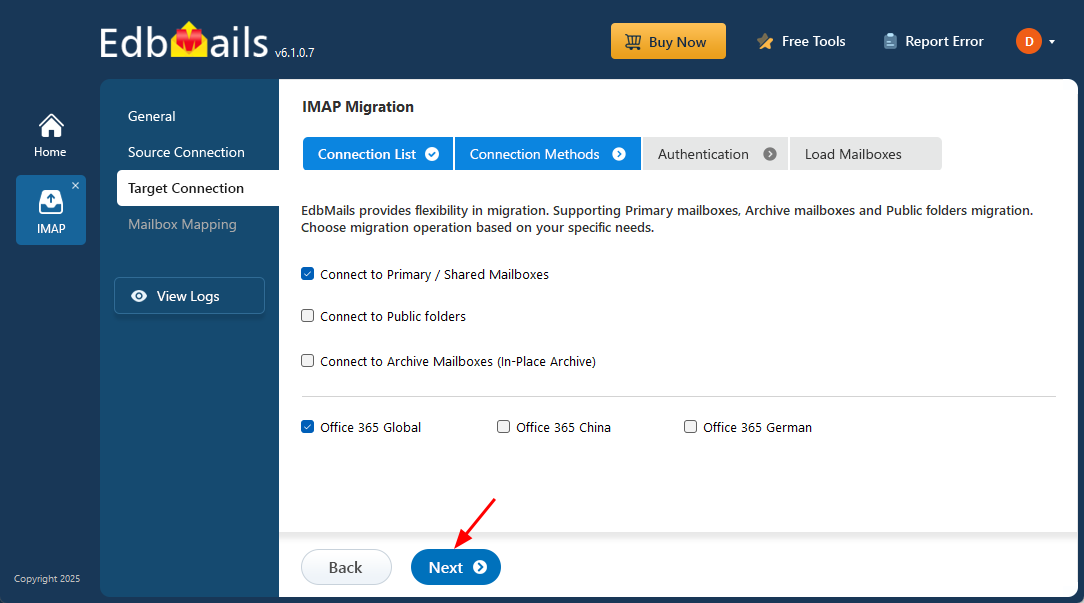
- Select the Microsoft 365 mailbox connection option appropriate for the destination mailbox used for this IMAP email migration, then continue with the current EdbMails OAuth-based authentication workflow.
- Click ‘Next’ to proceed with the setup.
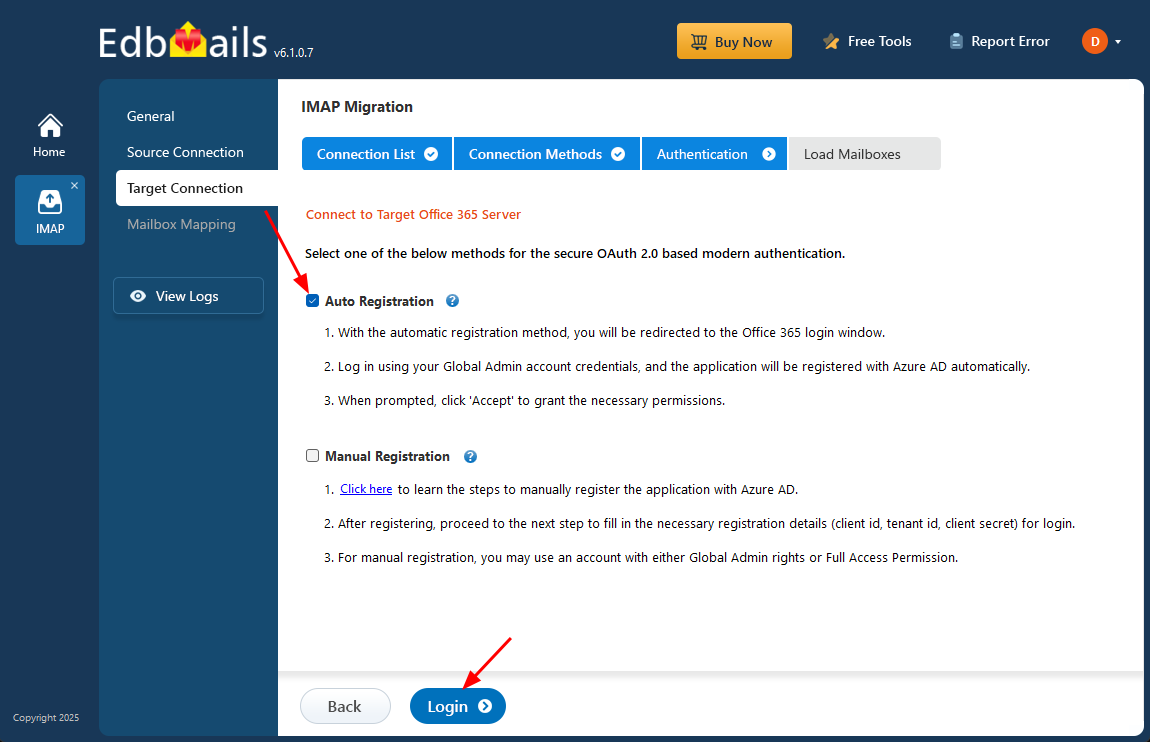
- Select any of the available options to establish a secure connection using OAuth 2.0 modern authentication.
- Choose Auto Registration for a quick setup. Sign in with a Global Admin account and grant the required permissions to automatically register the application in Azure AD.
- Alternatively, select Manual Registration if you prefer to enter the Azure AD application details yourself. This method supports both Global Admin accounts and accounts with Full Access permissions.
- Click ‘Login’ to proceed.
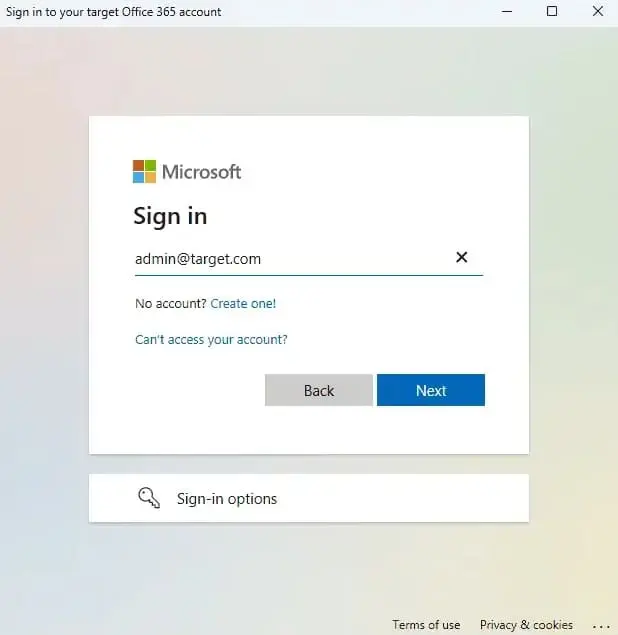
- Authenticate on Microsoft sign-in page.
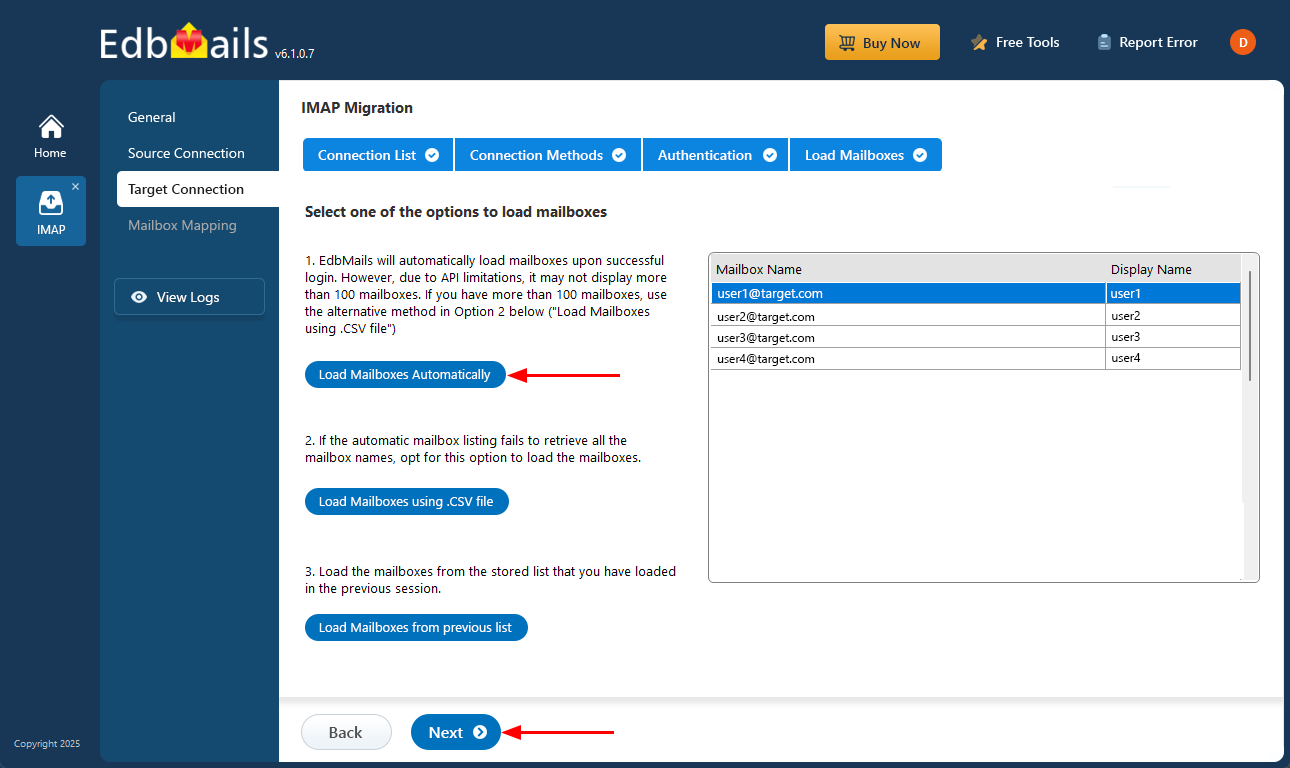
- Select one of the methods to load the mailboxes.
- You can Select ‘Load Mailboxes Automatically’, ‘Load Mailboxes using .CSV file’ or ‘Load Mailboxes from previous list’.
- Choose the required method to load target Microsoft 365 mailboxes. If the automatic mailbox list does not return every required target, use the supported CSV-loading option and verify the destination mailbox list before continuing.
- Click the ‘Add New Connection’ button to create a new connection to your target Office 365 server. To use an existing connection, simply select it from the list and click ‘Connect to Existing’ to continue.
Step 5: GMX Mail to Office 365 mailboxes mapping
- Select a suitable mapping option to accurately associate source GMX mailboxes with their corresponding Office 365 target mailboxes.
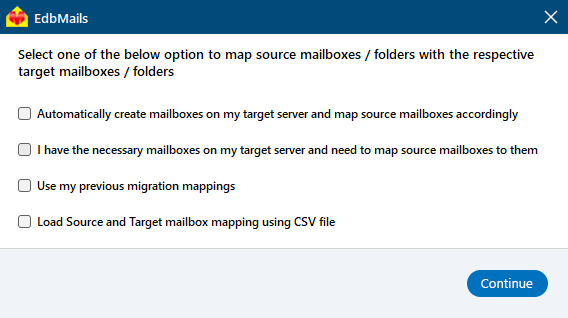
- Where supported and selected, EdbMails can assist with target mailbox creation and automatic mapping. Verify Microsoft 365 licensing and review every source-to-target mailbox mapping before starting the production migration.
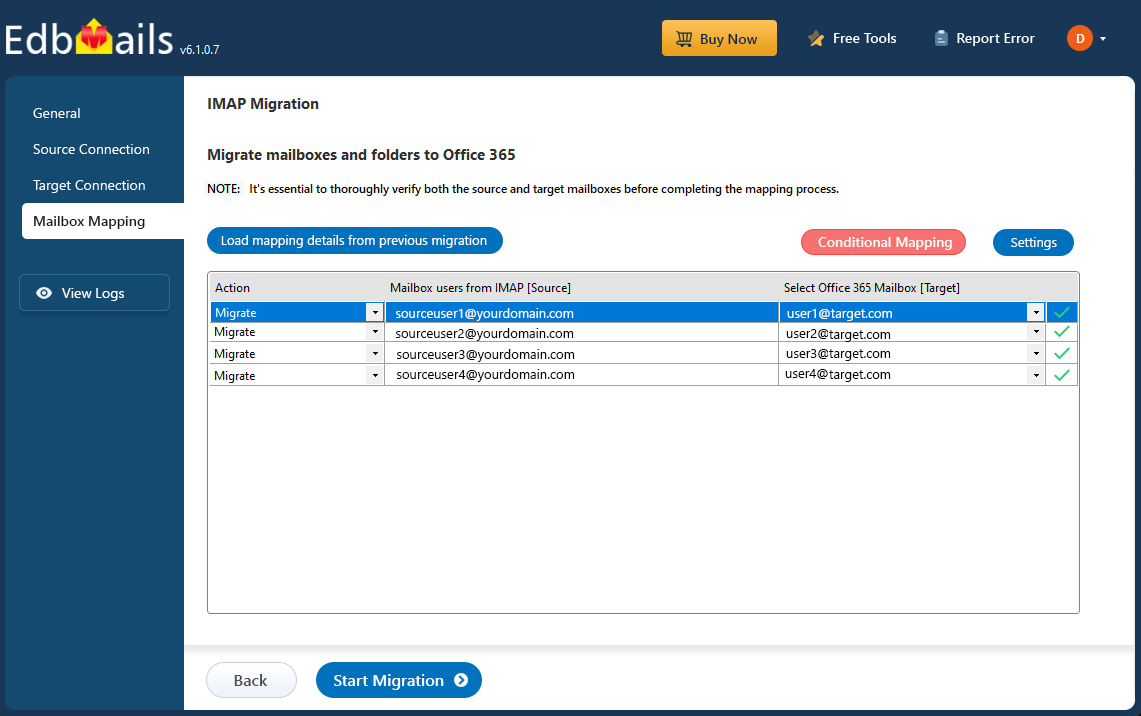
- Select a suitable mapping option to accurately associate source GMX mailboxes with their corresponding Office 365 target mailboxes.
Step 6: Start GMX Mail to Office 365 migration
- Once the mailboxes are mapped, click the 'Start Migration' button to begin the migration process.
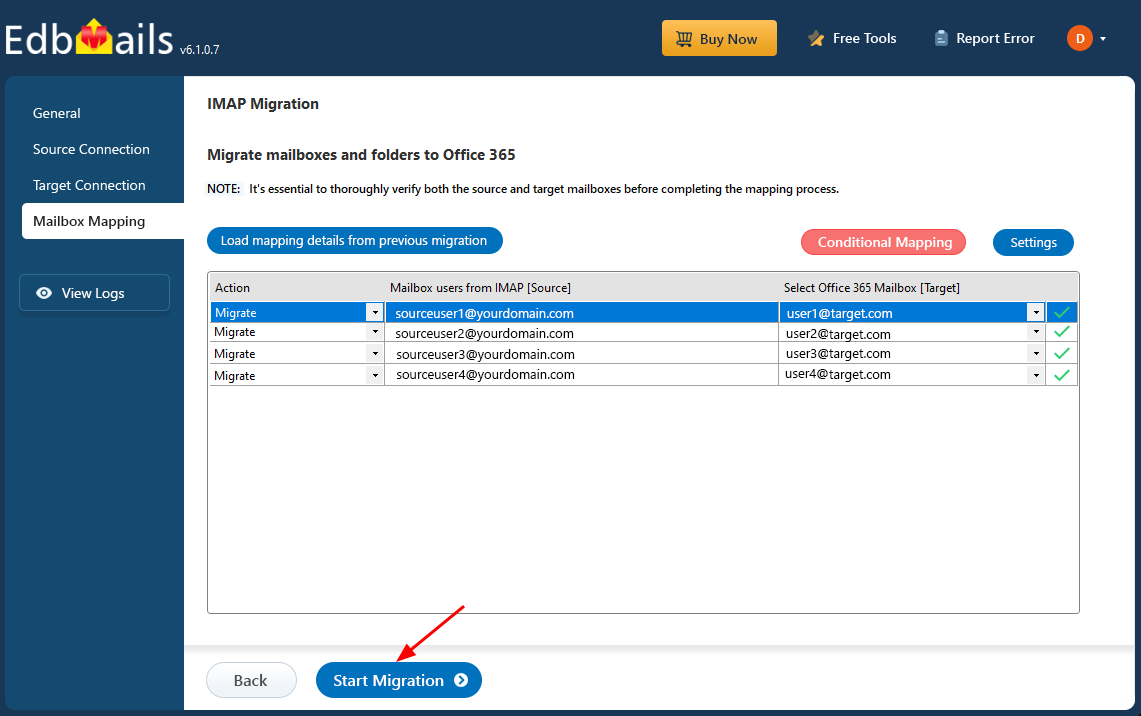
- Click the 'View Logs' button to access the migration report, which provides comprehensive details on each migrated folder and mailbox. The report includes mailbox mapping, the count of migrated items, and any errors encountered, allowing you to verify and audit the migration process effectively.
- Also log into your target server to verify the migrated items.
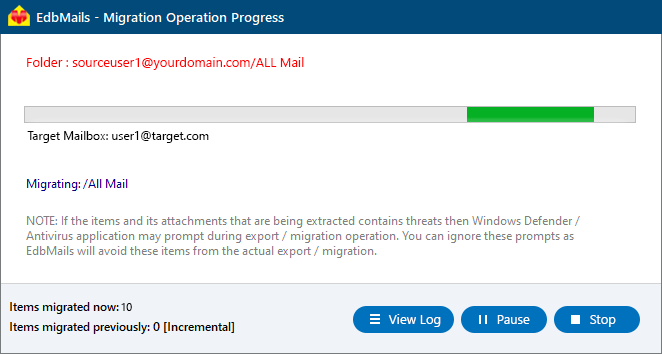
- Once the mailboxes are mapped, click the 'Start Migration' button to begin the migration process.
GMX Mail to Office 365 Post-migration Tasks
- Verify the Microsoft 365 target
Review migration reports and check representative folders, messages, attachments, item counts, and user access.
- Update mail DNS when ready
If Microsoft 365 becomes the production mail service, update the required MX/DNS records only after target validation.
- Validate Outlook/client access
Confirm Microsoft 365 sign-in and Autodiscover behavior and recreate Outlook profiles only where required.
- Retain the source during validation
Keep the GMX Mail mailbox available for the agreed transition period before decommissioning the old email service.
- Verify the Microsoft 365 target
Troubleshooting Guide for GMX Mail to Office 365 Migration
For troubleshooting, check out our knowledge base articles. If you have additional questions, browse the FAQs or contact our dedicated support team for personalized assistance.