Rackspace to Gmail migration
Migrating from Rackspace to Gmail provides businesses and individuals with enhanced email functionality and a more intuitive experience. While Rackspace is known for its reliability and 100% uptime, many users are now seeking advanced features, cost efficiency, and better collaboration tools. Gmail, as part of Google Workspace, offers seamless integration with Google Docs, Sheets, and Slides tools that Rackspace lacks along with robust real-time collaboration and cloud storage. Gmail also stands out with its superior security features, including two-factor authentication and end-to-end encryption, offering more protection for modern businesses. Although migrating from Rackspace to Gmail may seem complex, the process can be quick and hassle-free when done correctly. With its user-friendly interface and integration into the Google ecosystem, Gmail provides a scalable solution that enhances productivity and efficiency. Transitioning to Gmail isn’t just about changing email providers; it’s about future-proofing your business for success.
EdbMails IMAP migration software simplifies this migration by providing a seamless, secure, and efficient way to transfer all your emails, attachments, and user data from Rackspace to Gmail, ensuring a smooth transition without any data loss or downtime.

User Query
Hi folks! I've been using Rackspace for a while, but after discovering all the benefits of Gmail, I'm looking to migrate my email from Rackspace to Gmail. Can anyone suggest an easy, secure, and efficient way to make this migration? Appreciate any help! Thanks!
Reasons to migrate from Rackspace to Gmail
There are several compelling reasons why users are migrating from Rackspace to Gmail, including:
- Vertical scaling complexities: Rackspace lacks efficient options for vertical scaling, making it challenging for users to scale their resources as needed.
- Limited external instance storage: Rackspace imposes limitations on external instance storage, which can hinder users who require additional storage capacity.
- Limited features in the cloud environment: Rackspace offers a limited set of features compared to the robust cloud environment provided by Gmail, restricting users from accessing advanced functionalities.
- Single region association: Rackspace accounts are tied to a single region, limiting the flexibility for users who require a distributed or multi-region setup.
- Inadequate technical support: Users have reported unsatisfactory technical support services from Rackspace, which can impede timely issue resolution and support.
- Lack of diverse templates: Rackspace lacks a variety of templates, limiting customization options for users who want to personalize their email communications.
How does EdbMails simplify Rackspace to Gmail migration process?
EdbMails offers a powerful IMAP migration tool that specializes in Rackspace to Gmail migration seamlessly. With its user-friendly interface, you can easily select and transfer your desired Rackspace emails to Gmail, ensuring a smooth and efficient transition without clutter. EdbMails stands out with its concurrent migration feature, enabling users to transfer multiple mailboxes simultaneously, significantly reducing migration time. It supports universal language compatibility, making it ideal for global teams regardless of language barriers. As a cost-effective solution, EdbMails offers up to 75% off regular prices, providing exceptional value for businesses and individuals alike. The platform also enhances security with Multi-Factor Authentication (MFA), ensuring that your data remains protected throughout the migration process. With EdbMails, you can be confident that your Rackspace to Gmail migration will be efficient, secure, and hassle-free, allowing you to transition to Gmail’s robust ecosystem with zero downtime and maximum reliability.
Rackspace to Gmail migration planning
Before you begin Rackspace to Office 365 migration, thorough planning is essential to ensure a successful and seamless transition. To help you with the process, here is a checklist of important points to consider:
- Remove any unused mailboxes, redundant mail items, and duplicate files from the source server to streamline the migration.
- Before proceeding with the migration, create an inventory of important items. Here are some key items to include:
- User accounts, email addresses, and login credentials.
- Source and target server details, including information about browsers and operating systems used.
- Network settings, DNS configurations, MX records, and firewall settings.
- Outlook settings and version utilized within your organization.
- Licensing plans associated with your current source server.
- List of data and permissions from Rackspace that need to be transferred.
- Determine the size of the data and the number of mailboxes that will be migrated to Office 365.
- Decide whether to opt for a cutover migration (migrating all data at once) or a staged migration (migrating data in phases) based on your requirements.
- Estimate the approximate time required for the migration, taking into account factors such as data size and network capabilities.
- Create user mailboxes on gmail
- Verify that your network has sufficient capacity and bandwidth to handle the migration process effectively.
- Communicate the migration plan and upcoming changes to your end users and stakeholders to ensure a smooth transition.
- Perform a test migration to identify and address any potential issues before initiating the actual migration.
- Start the migration process, ensuring endpoints are correctly configured and MX records are updated as necessary.
- Develop a plan for decommissioning any unused apps and their associated settings after the migration is complete.
Pre-migration activities for Rackspace to Gmail migration
- Ensure that IMAP settings are enabled on both the source (Rackspace) and target (Gmail / G Suite) servers to facilitate migration.
- Keep a record of the email addresses and passwords for all users you plan to migrate from the Rackspace server.
- Confirm that you have the email addresses for all users on Gmail. If using Gmail, create an app password for the account.
Click here for steps to create an app password for a Gmail account.
Steps to migrate from Rackspace to Gmail using EdbMails
Step 1: Download and Install EdbMails software
- Download EdbMails application and install it on any computer with Windows operating system.
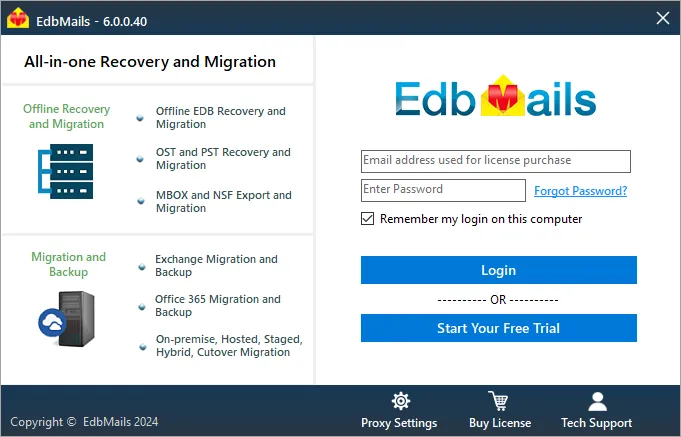
- Launch the application and click ‘Login’ or ‘Start Your Free Trial’ button.
Check the complete list of system requirements for IMAP migration with EdbMails.
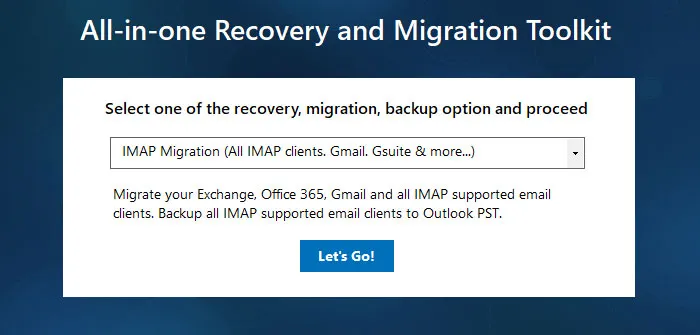
- Choose 'IMAP Migration' as the preferred migration method in the main interface.
Step 2: Connect to source Rackspace server
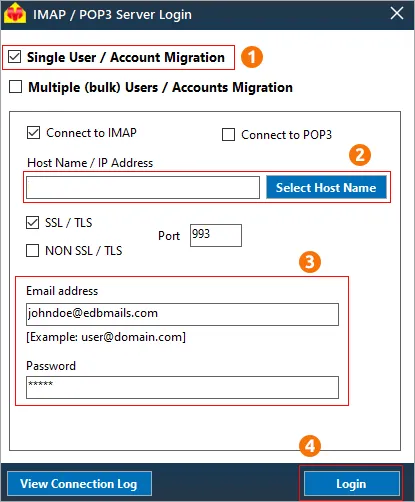
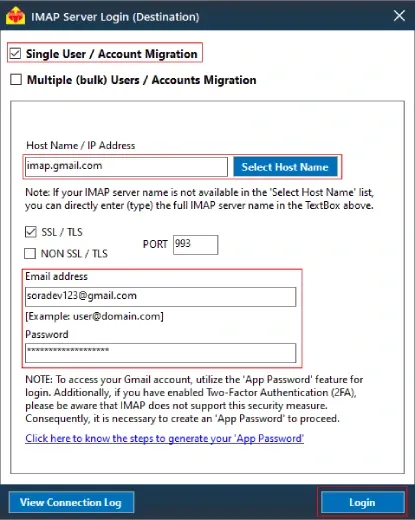
- If you want to migrate a single mailbox, enter the Host Name , Port Number (993 for SSL), and account credentials to connect to Rackspace as shown.
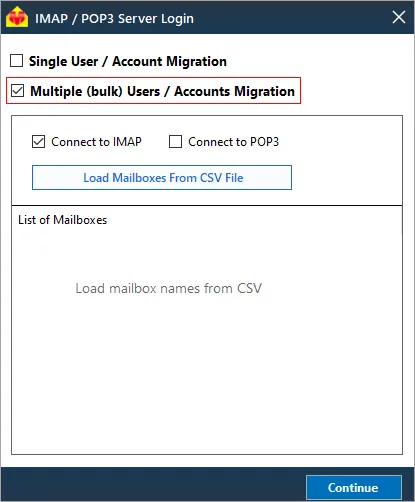
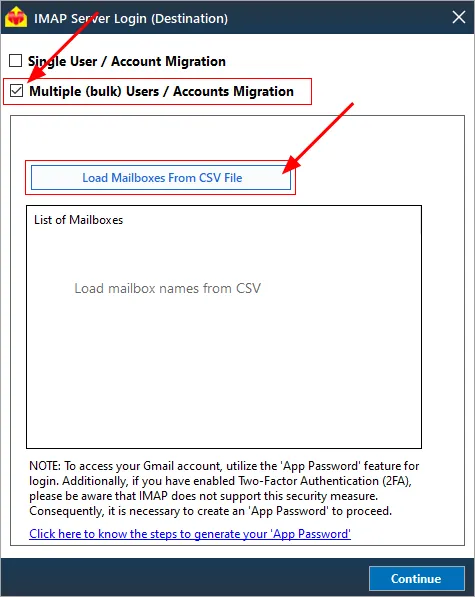
- For migrating multiple mailboxes, choose the 'Multiple (bulk) Users/Accounts Migration' option. Start by downloading the sample CSV file from EdbMails and complete the necessary fields, including mailbox name, password, host name, and port. Once the CSV file is populated, upload it into the application and verify the list of mailboxes to proceed with the migration process.
Steps to connect to single and multiple users in EdbMails IMAP migration
- If you want to migrate a single mailbox, enter the Host Name , Port Number (993 for SSL), and account credentials to connect to Rackspace as shown.
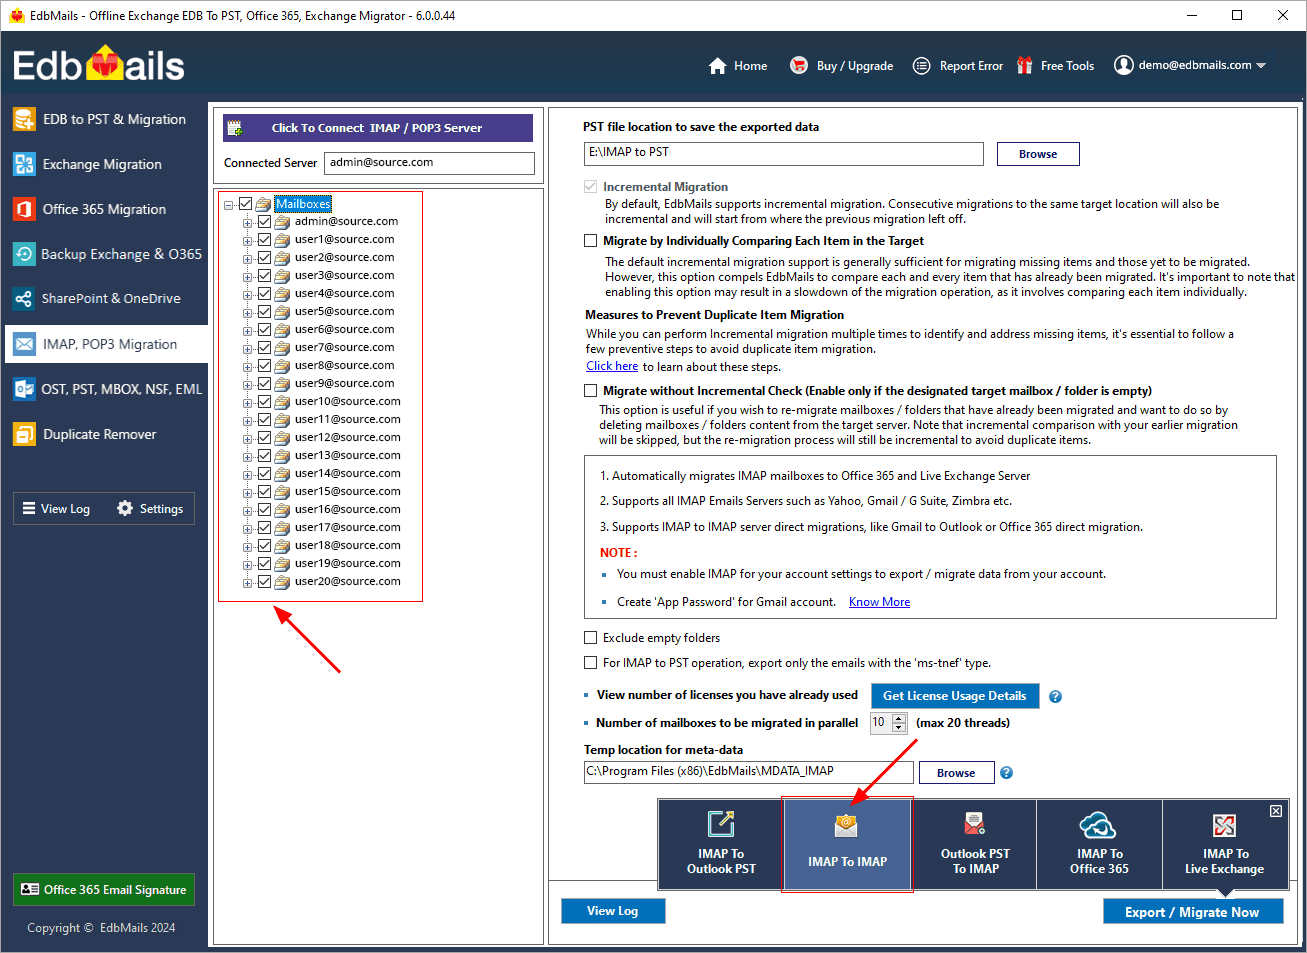
Step 3: Select source Rackspace server mailboxes
- Select the required mailboxes and folders from the source Rackspace server.
- Click ‘IMAP to IMAP’ and proceed with the target server connection.
Step 4: Connect to target Gmail server
- Connect to the target Gmail server using the correct credentials and choose the migration option for either a ‘single user or multiple users’ based on your needs.
- For multiple users, load the mailboxes from a CSV file.
- Connect to the target Gmail server using the correct credentials and choose the migration option for either a ‘single user or multiple users’ based on your needs.
Step 5: Rackspace to Gmail mailboxes mapping
- Choose the required mailbox mapping option.
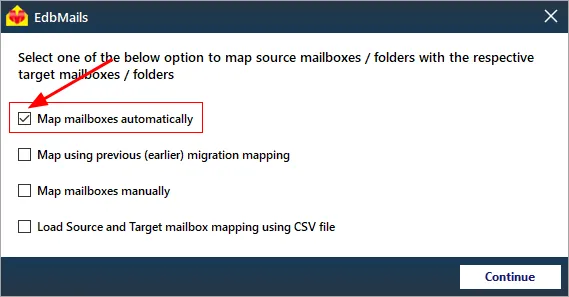
- After selecting the export option, map the appropriate folders and mailboxes. EdbMails simplifies this process by automating the mapping, saving significant time, especially when migrating numerous mailboxes.

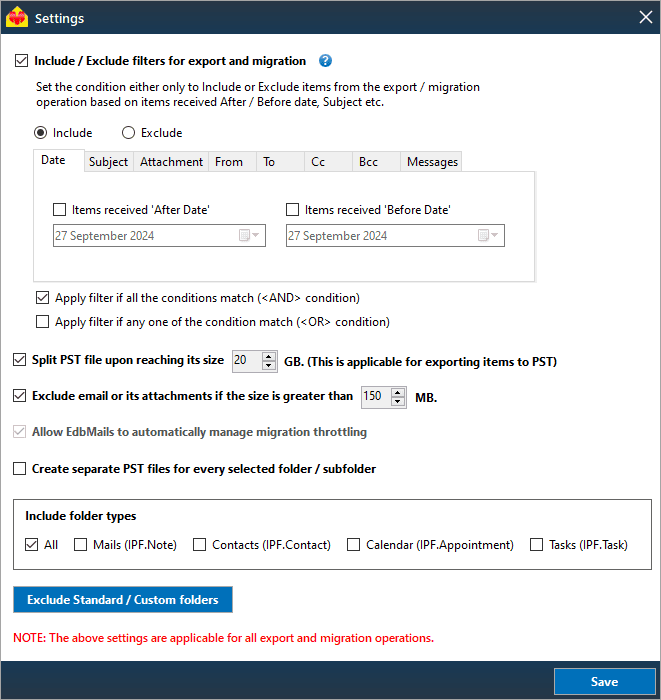
- Click the ‘Folder and Item Filter’ option to configure filters for your migration. For example, apply a date filter to migrate only specific data within a defined range. You can also choose to exclude certain folders, both standard and custom, from the migration process.
- Choose the required mailbox mapping option.
Step 6: Start Rackspace to Gmail migration
- Once the mailboxes are mapped, assign a job name and begin the migration process. To review the migration report, click the ‘View Log’ button, which provides a comprehensive report detailing the number of emails, folders, and mailbox items successfully migrated.
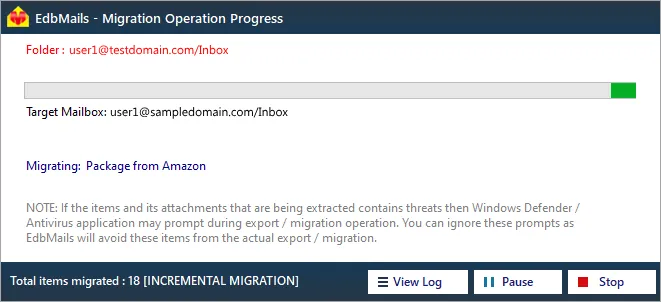
- Once the mailboxes are mapped, assign a job name and begin the migration process. To review the migration report, click the ‘View Log’ button, which provides a comprehensive report detailing the number of emails, folders, and mailbox items successfully migrated.
Rackspace to Gmail post-migration tasks
- Step 1: Update DNS records (MX record) to point to Gmail
- Updating MX Records:
To redirect incoming email traffic to Gmail instead of Rackspace, you need to make changes to the MX records in your DNS provider's portal. This step ensures that emails are properly directed to your Gmail account. - Configuring AutoDiscover (CName):
Include the AutoDiscover (CName) setting in your DNS configuration. This setting assists in the automatic configuration of email clients, enabling a seamless transition to Gmail. By configuring the AutoDiscover (CName) correctly, email clients can easily connect to the Gmail server without any manual configuration. - Setting up Rackspace Mail Forwarding:
To prevent any email loss during the migration process, it is essential to set up mail forwarding in your Rackspace account. This ensures that any incoming messages are forwarded to your Gmail account until the transition is complete. By enabling mail forwarding, you can stay connected and receive all your emails during the migration period
- Updating MX Records:
- Step 2: Decommission or delete the user mailboxes on Rackspace server
Once you have confirmed that you are successfully receiving emails on Gmail, you can proceed with decommissioning and disabling user mailboxes on the Rackspace source. Additionally, make sure to remove any licenses that have been assigned in Rackspace. Follow these steps to perform the necessary actions:
- Log in to the Rackspace Cloud Control Panel.
- Navigate to the ‘Email’ section and click on ‘Mailboxes.’
- Select the desired mailbox(es), whether it's a single mailbox or multiple ones.
- Click on ‘Manage’ next to the respective mailbox and then click on ‘Delete Mailbox’ in the upper-right corner.
- Step 1: Update DNS records (MX record) to point to Gmail
Rackspace to Gmail migration troubleshooting
For troubleshooting, visit Knowledge Base.
For more queries, check Frequently Asked Questions or contact support.
Benefits of EdbMails to migrate from Rackspace to Gmail
The EdbMails Rackspace to Gmail migration tool offers several benefits that streamline the migration process and enhance the overall experience:
- Bulk conversion: With EdbMails, you can migrate multiple emails from Rackspace to Gmail in a single operation. By selecting multiple Rackspace accounts using a CSV file, you can efficiently transfer a large volume of data with ease.
- Selective migration: EdbMails provides the flexibility to choose specific emails for migration. You can apply filters based on email address, date interval, and subject to migrate only the required data, saving time and effort.
- No limitations: There are no limitations imposed on the number of emails and attachments you can migrate from Rackspace to Gmail. Whether you have a small or large-scale migration requirement, EdbMails can handle it without restrictions.
- Preserves folder structure: During the migration process, EdbMails ensures the preservation of the original folder hierarchy from your Rackspace mailbox. This means that your emails will be organized in the same way in your Gmail account, maintaining a logical structure.
- Maintains data integrity: EdbMails maintains all email attributes during the migration process. This includes essential details such as sender information, recipient information, subject, email addresses, text formatting, images, hyperlinks, and more. Your emails will retain their original formatting and data integrity.
- Free trial version: EdbMails offers a free trial version that allows you to evaluate the software's performance. You can transfer a few email items from Rackspace to Gmail, giving you a hands-on experience of its capabilities before making a purchase.
- Safe processing: EdbMails prioritizes the security and integrity of your data. The migration process is carried out securely, ensuring that your sensitive information remains protected throughout the conversion.