Office 365 to Hosted Exchange Migration
Office 365 to Hosted Exchange migration involves transferring email data such as mailboxes, contacts, calendars, and public folders from Office 365 to a Hosted Exchange server. This type of migration is often pursued by organizations seeking increased control over their email environment, enhanced stability, or specific management features that Hosted Exchange provides.
Hosted Exchange solutions offer benefits like greater administrative control and customizable settings, which can better meet certain business requirements. Evaluating different Hosted Exchange providers, such as Intermedia Exchange, Rackspace, Liquidweb, and Bluehost, helps determine which solution aligns best with your organization's needs.
Key considerations for a successful Office 365 to Hosted Exchange migration include evaluating data volume, assessing mailbox configurations, and ensuring compatibility with the target Hosted Exchange environment. Using a specialized tool like EdbMails Office 365 migration software can significantly streamline the process. EdbMails offers a range of powerful features, such as incremental migration, which ensures that only changes made since the last migration are transferred, saving time and bandwidth. Automatic mailbox mapping simplifies the migration by automatically matching mailboxes between the source and destination servers. A comprehensive migration log report provides detailed records of every step in the migration, offering full transparency. With batch migration, large volumes of mailboxes can be migrated simultaneously, further accelerating the process. Additionally, automatic throttling management ensures that migration speeds are optimized while respecting server limits, preventing migration interruptions due to throttling or bandwidth restrictions. These advanced features collectively ensure a smooth, efficient, and secure migration process with zero downtime and data loss.
The following sections will outline the steps involved in planning, executing, and managing the migration from Office 365 to Hosted Exchange, ensuring the transition aligns with your organization’s needs.
Planning a migration from Office 365 to Hosted Exchange server
The most critical aspect of migration is planning. A well-thought-out plan saves time and ensures the operation runs smoothly and without stress. Here is a checklist of key factors to consider when migrating from Office 365 to Hosted Exchange:
- Prepare a comprehensive inventory of the items you want to migrate from Office 365.
- Decide whether to use cutover, hybrid, or staged migration methods.
- Determine if you will migrate Public folders and Shared mailboxes along with the primary mailboxes.
- Determine if you will migrate Public folders and Shared mailboxes along with the primary mailboxes.
- Assess the size of mailbox data and the number of mailboxes to migrate.
- Communicate any changes to end users and inform stakeholders.
- Select a suitable Hosted Exchange provider and purchase the appropriate mailbox license plan.
- Prepare the domains and necessary Active Directory services on the target environment.
- Create mailboxes and Public folders on the target Exchange server.
- Ensure adequate network capacity and bandwidth for the migration.
- Consider throttling and message size limits on both the source and target systems.
- Perform a test (pilot) migration before starting the full migration.
- Initiate the migration, verify the endpoint, and update the DNS records.
- Create new Outlook profiles for users and verify that email is being received correctly.
- Remove permissions and licenses from the source Office 365 tenant.
Pre migration activities for Office 365 to Hosted Exchange migration
On the source Office 365 server:
- Ensure you have a global admin account with a mailbox for the automatic registration of the EdbMails application on your Entra ID (Azure Active Directory). Alternatively, you can use either a global admin account or a user account with full access rights for manual registration.
- Ensure that your network and bandwidth meet the requirements for the migration.
See network and migration planning, performance factors and best practices for Office 365 to Exchange migration.
On the target Hosted Exchange server:
- Create mailboxes on the target Hosted Exchange server
Before you migrate, ensure that you create mailboxes on the target Hosted Exchange server and assign suitable licenses to them.
- Assign the required permissions on the target server
If you are using an admin account to connect to the Hosted Exchange server, ensure that you set the impersonation rights to list and migrate other user mailboxes. Alternatively, you can migrate multiple users by assigning full access rights to any user. You can also load multiple users using a CSV file.
- Configure the throttling and message-size limits
Depending on your Hosted Exchange provider, you may have to change the EWS throttling and message size limits on the Hosted Exchange server.
Steps to migrate Office 365 to Hosted Exchange server
Step 1: Download and install EdbMails Office 365 migration software
- Download and install the EdbMails application on your computer. See a detailed list of EdbMails system requirements for Office 365 to Hosted Exchange migration.
Step 2: Launch EdbMails Software
- Enter the required details and click the 'Login' button, or select 'Start Your Free Trial' to access the EdbMails application.
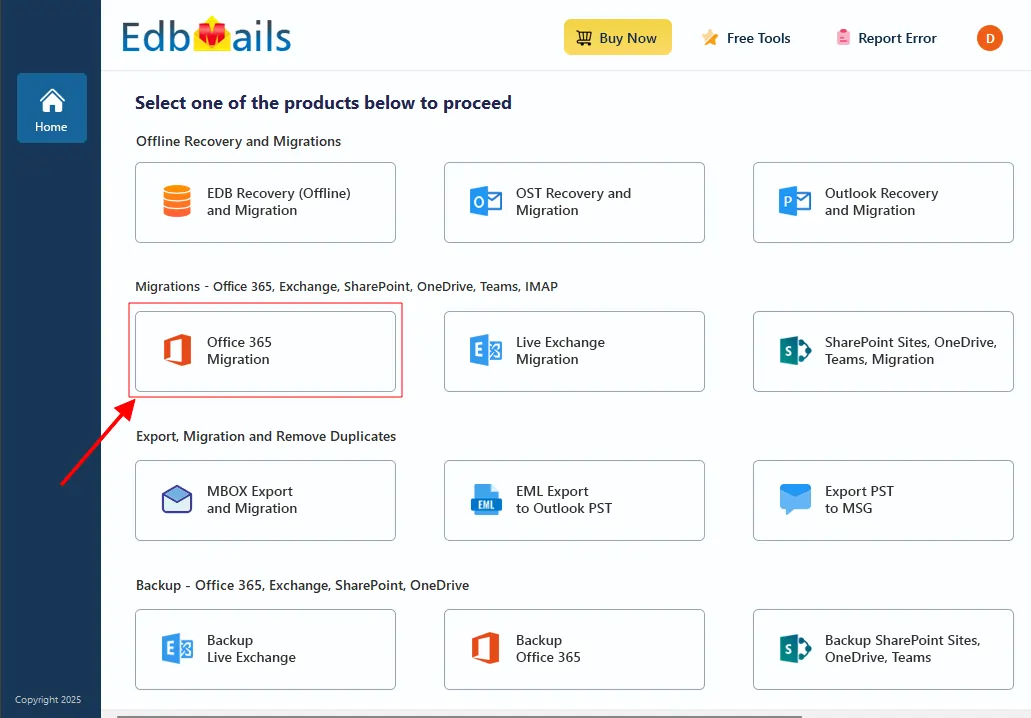
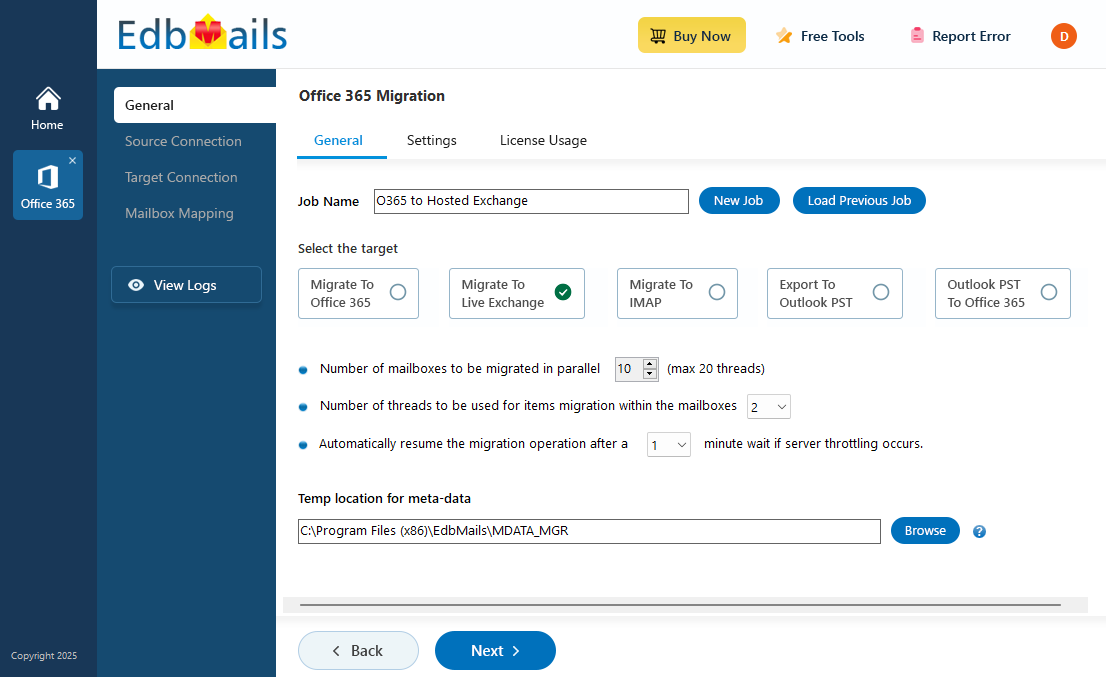
- Select ‘Office 365 Migration’ as migration option from the products list
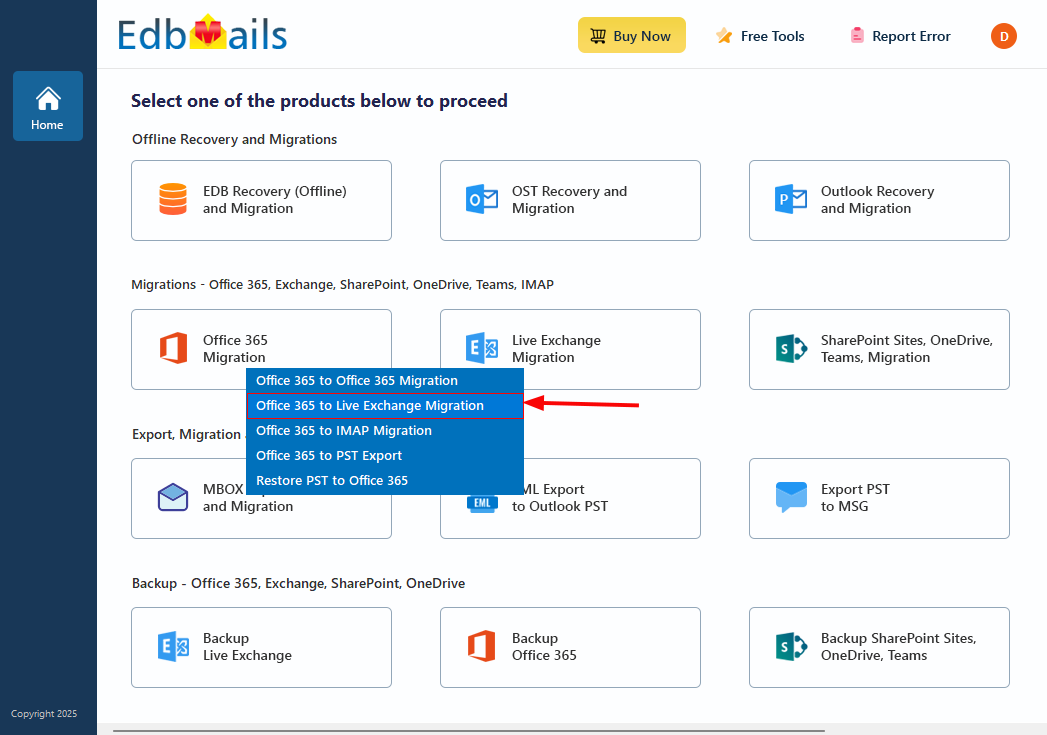
- Choose the option 'Office 365 to Live Exchange Migration'.
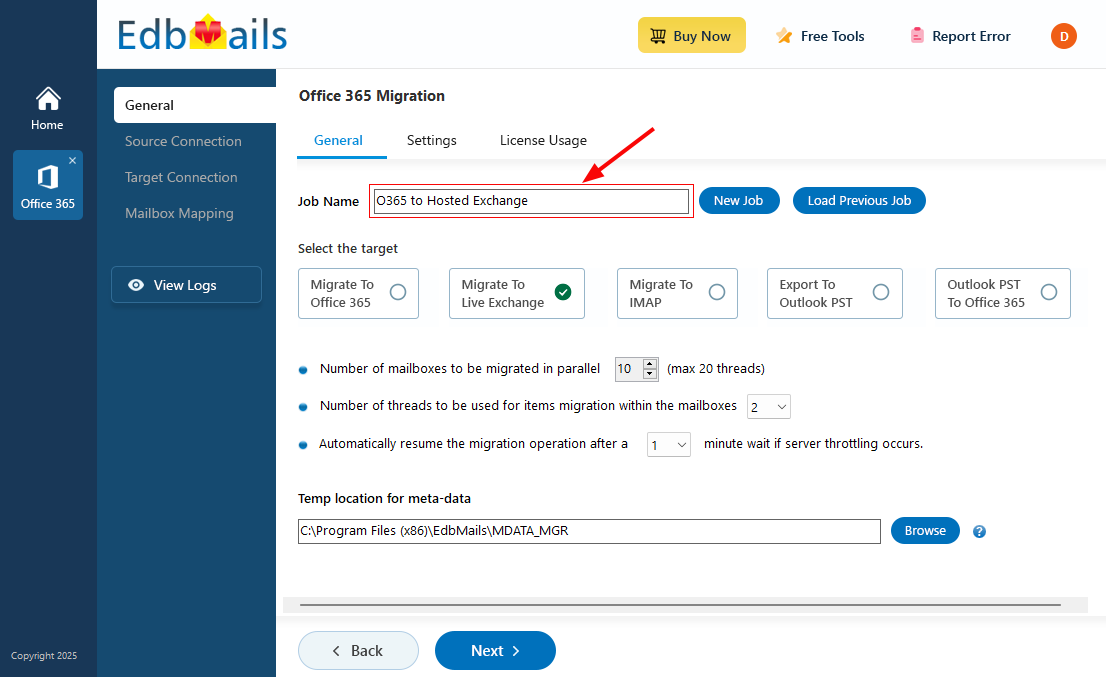
- Keep the default job name or click the ‘New Job’ button to give it a name of your choice.
Step 3: Connect to the source Office 365 server
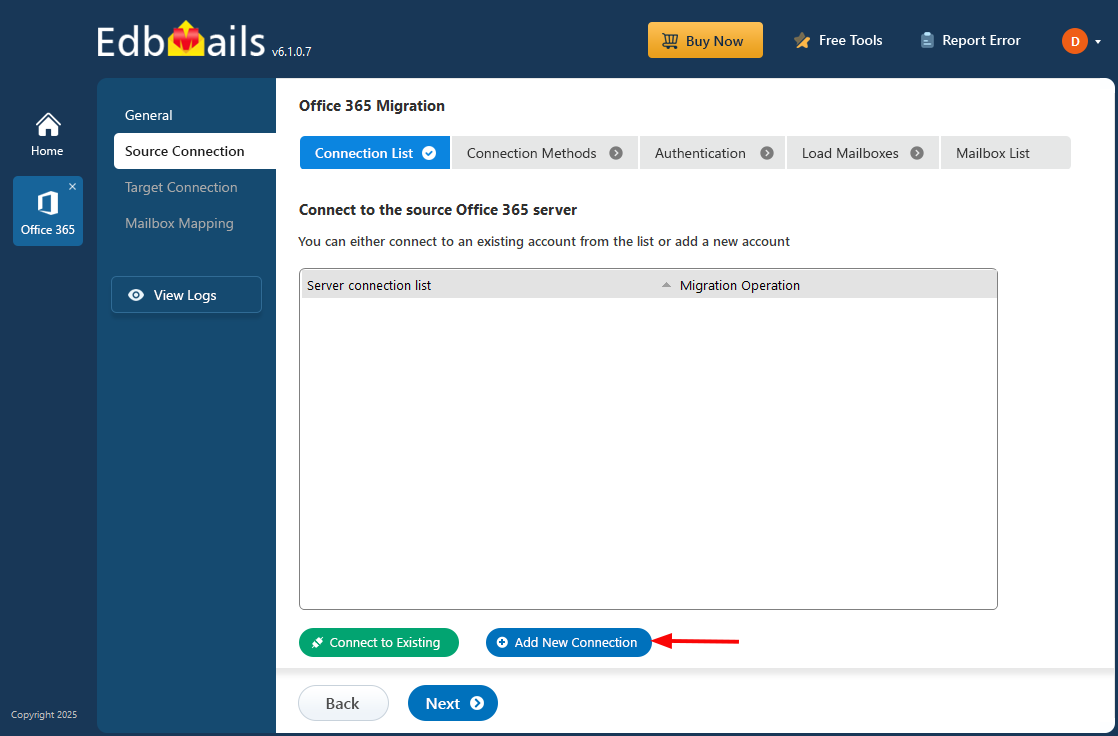
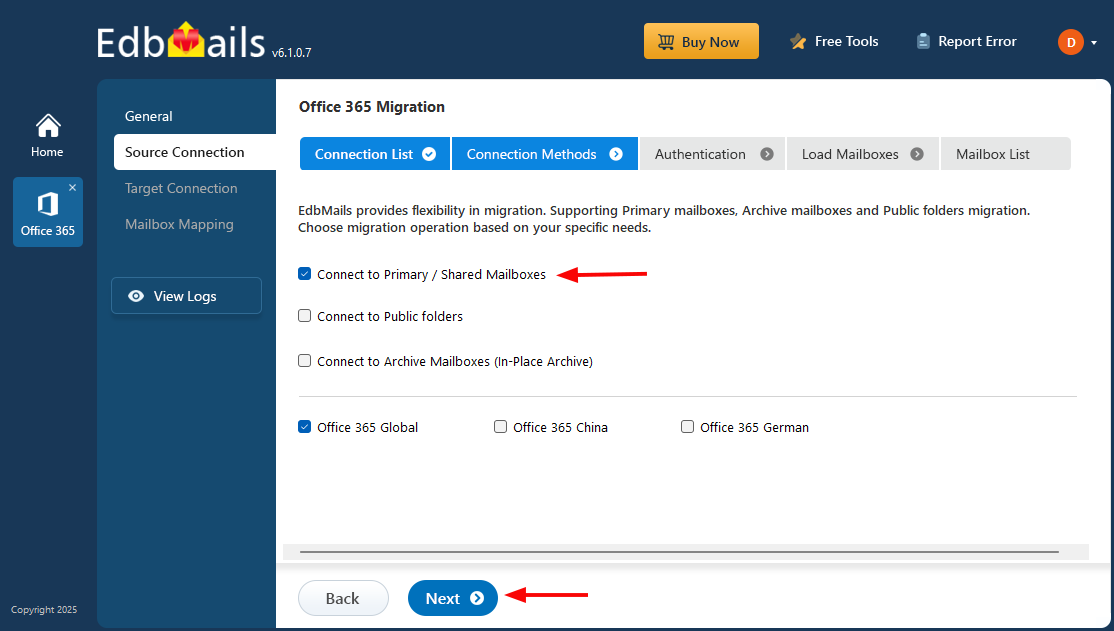
- Click the 'Add New Connection' button to create a new connection to the source Office 365. If you'd prefer to use a previous connection, choose it from the connection list and click the 'Connect to Existing' button to continue.
- Select the required connection option and click the ‘Next’ button to proceed.
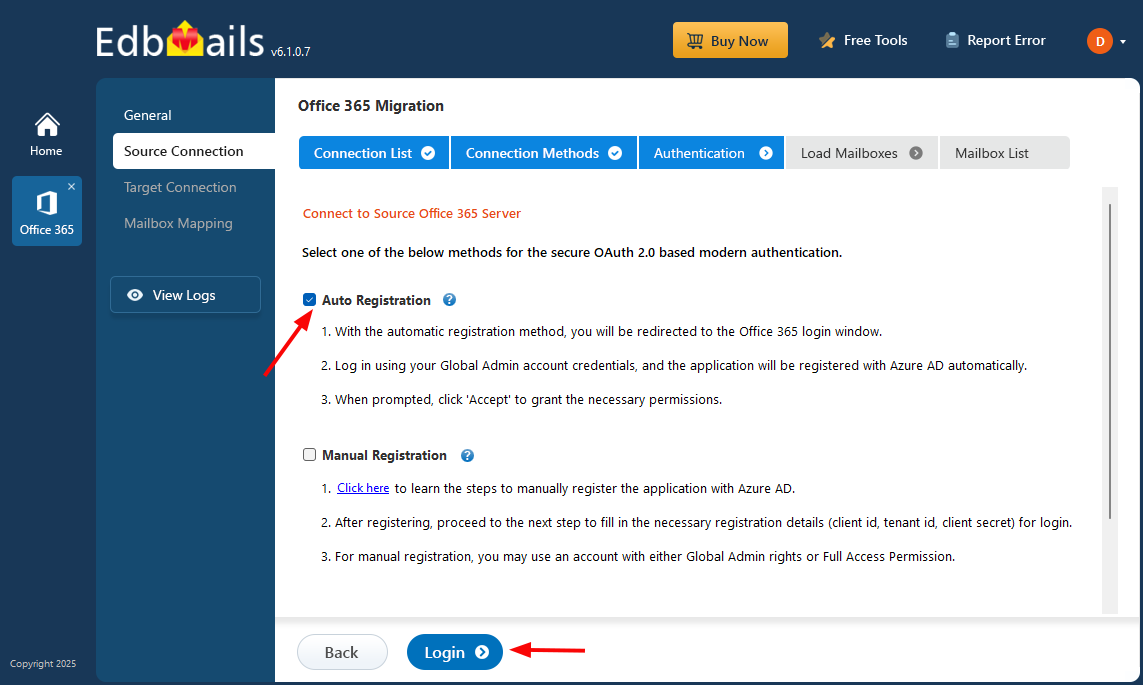
- Select one of the available methods for secure OAuth 2.0 modern authentication.
- Click the ‘Login’ button to continue.
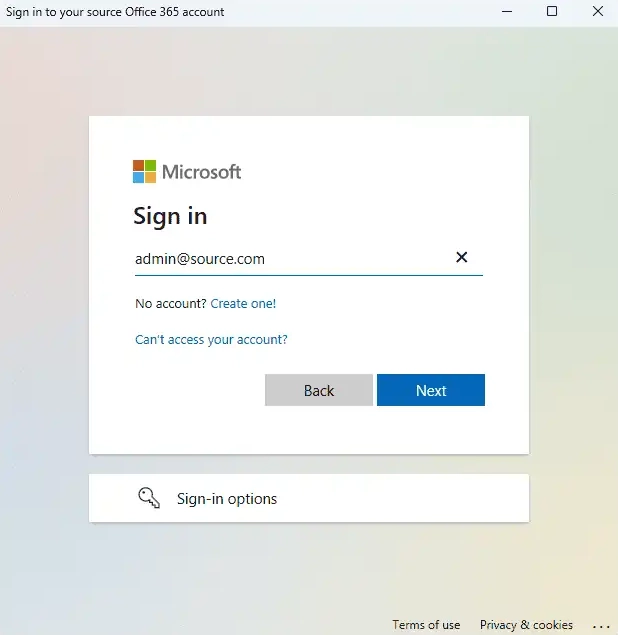
- Authenticate on the Microsoft sign-in page with the global admin account having a mailbox.
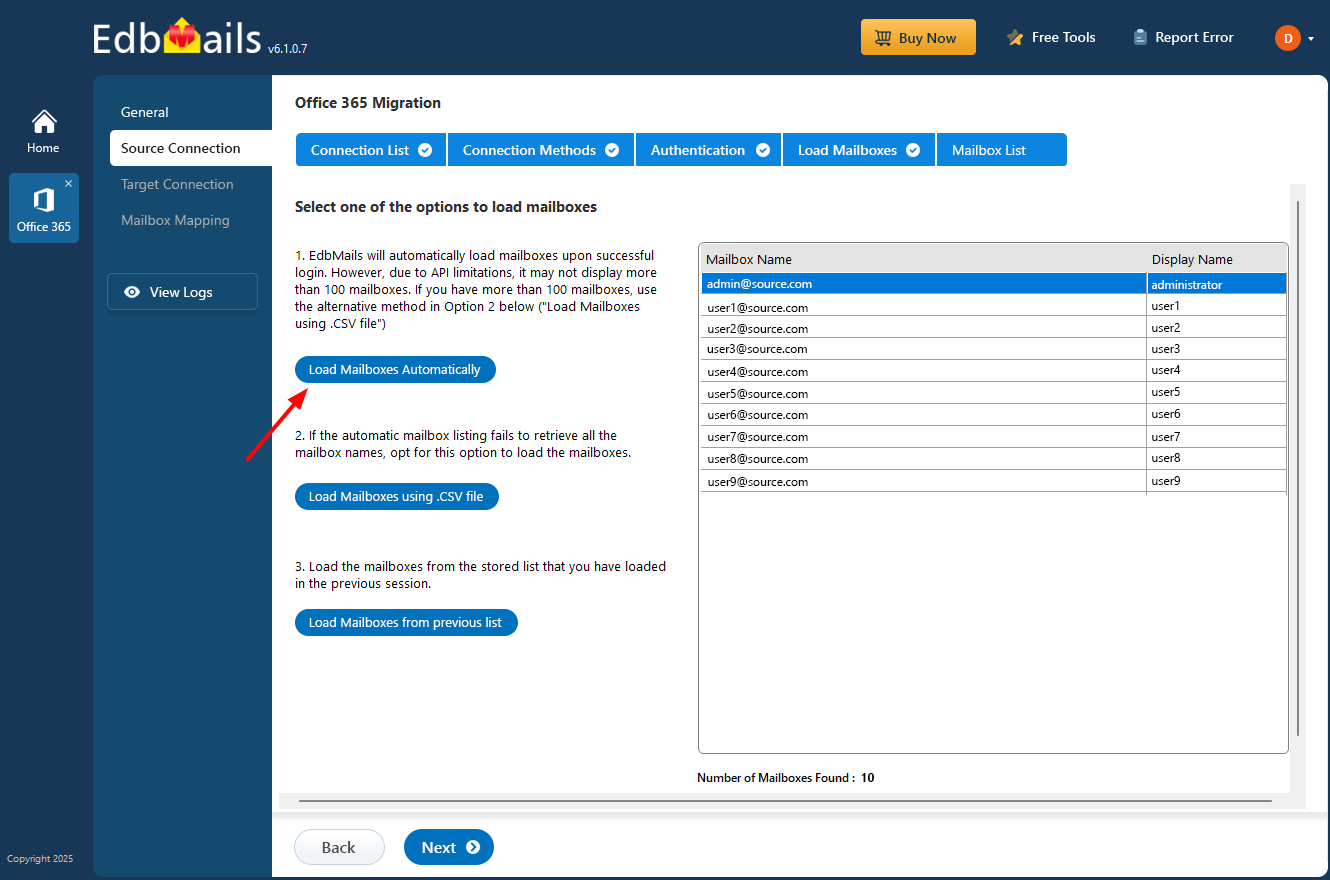
- Once authentication is successful, select a method to load the mailboxes. Alternatively, you can load and migrate mailboxes using a CSV file.
Step 4: Select the mailboxes for migration
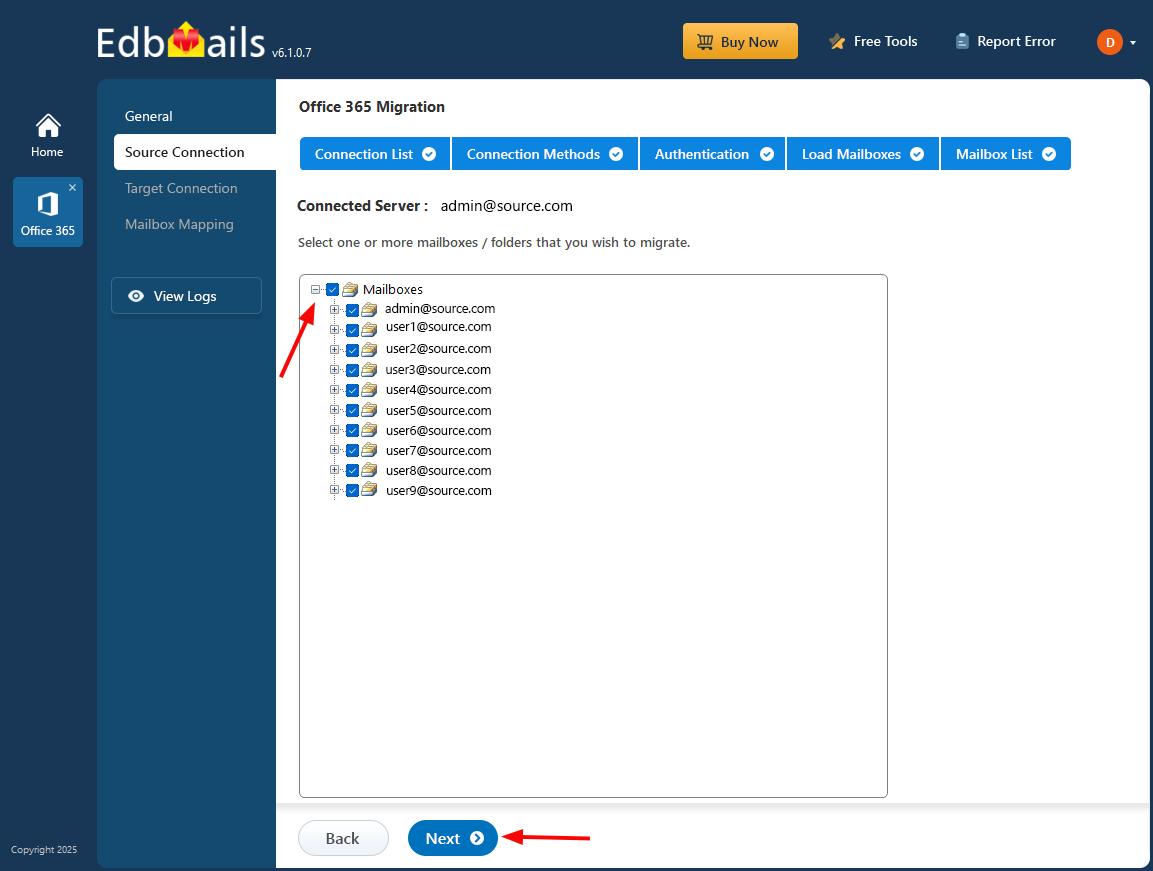
- Select the mailboxes you want to migrate from the left pane, then click ‘Next’ button to continue.
Tip: If this is the first time you’re migrating with EdbMails, the migration is a full migration. On subsequent migrations from the same source to the target, the migration is incremental.
- Select the mailboxes you want to migrate from the left pane, then click ‘Next’ button to continue.
Step 5: Connect to target Hosted Exchange server
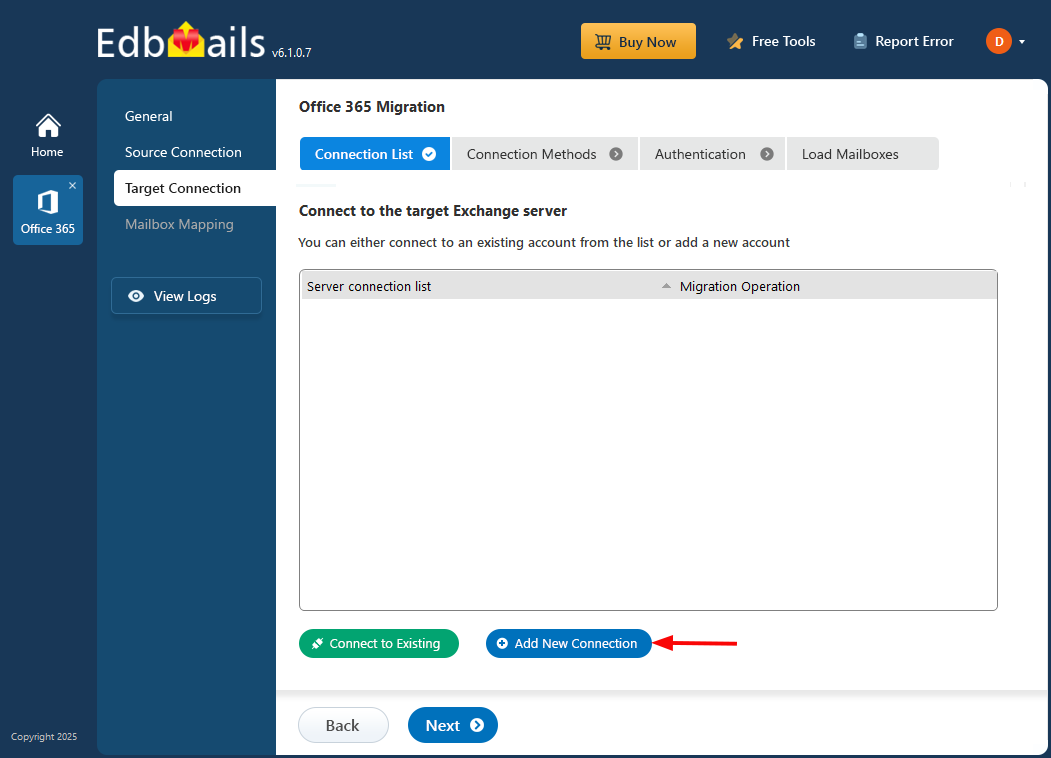
- Click the 'Add New Connection' button to create a new connection to the target Hosted Exchange server. If you'd like to use an existing connection, select it from the list and click 'Connect to Existing' to proceed.
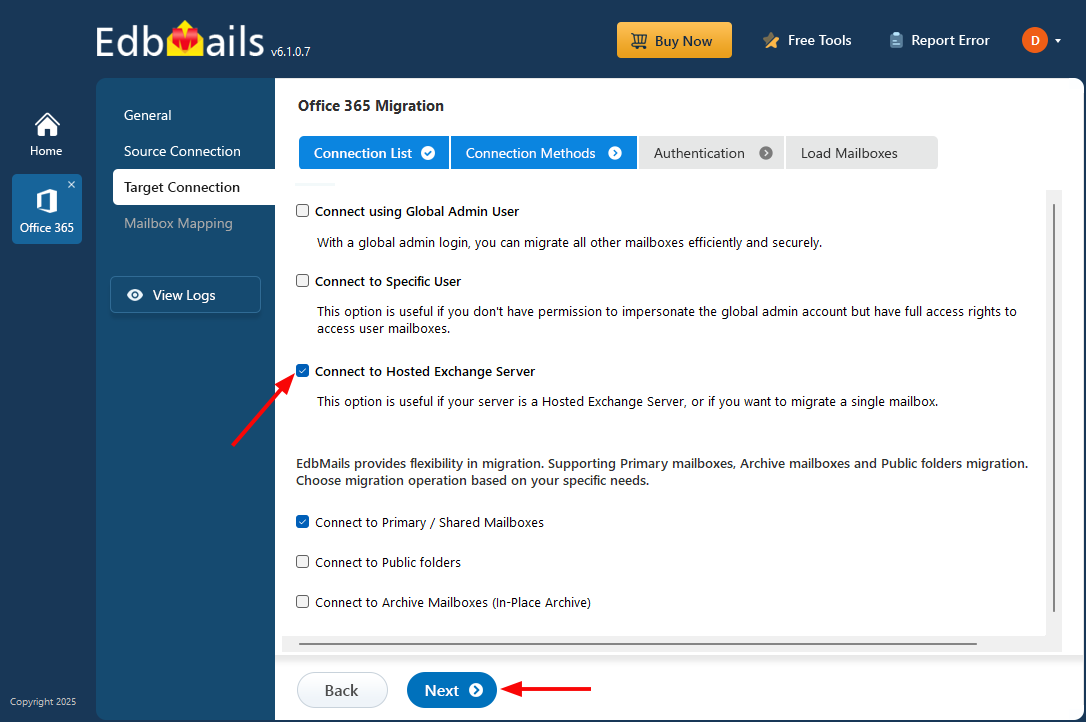
With EdbMails, you can migrate mailboxes, public folders, and archive mailboxes from Microsoft 365 to Hosted Exchange server.
- Select the ‘Connect to Hosted Exchange server’ option.
- Click the ‘Next’ button
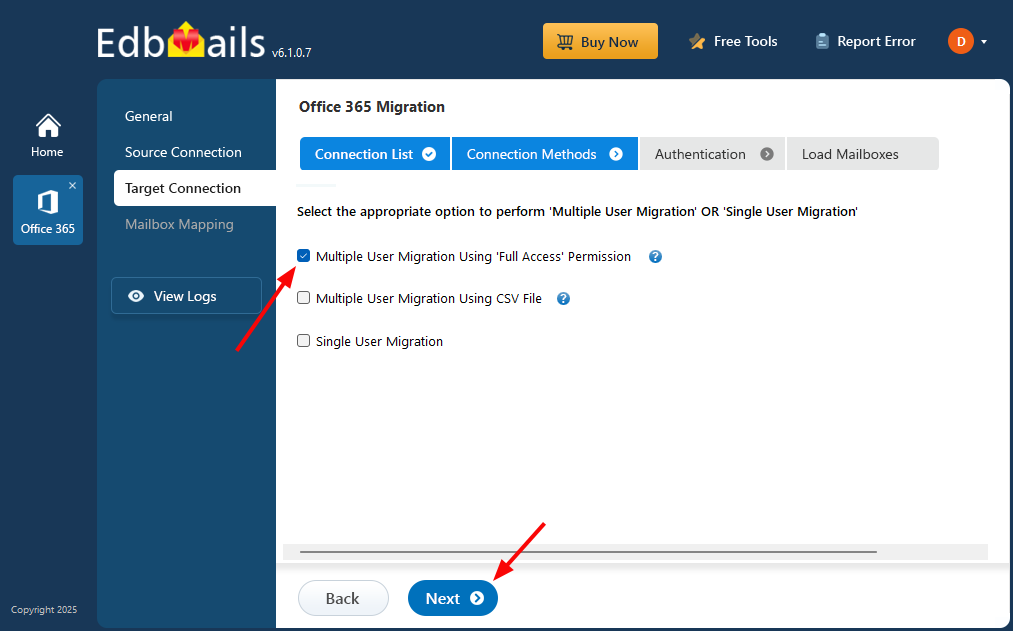
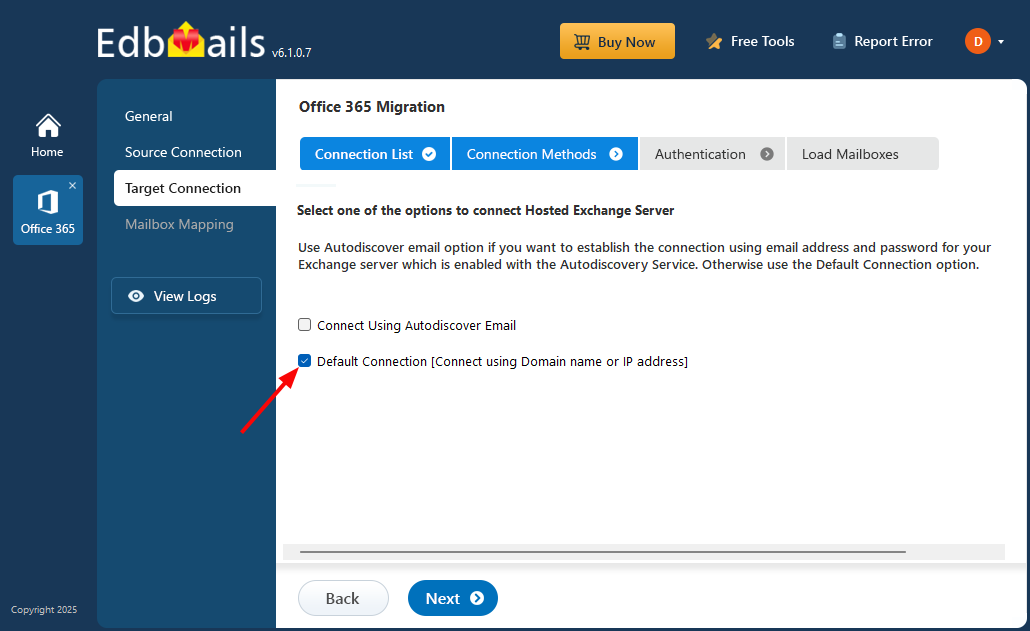
- Choose the appropriate option to connect to your target Hosted Exchange server and click ‘Next’ to continue.
Click here to know more details about various methods to connect to Hosted Exchange server
- You can use the ‘Connect Using Autodiscover Email’ option if you want to connect using an email address and password enabled with the Autodiscover service, or choose ‘Default Connection’ to connect using the Exchange server's domain name or IP address.
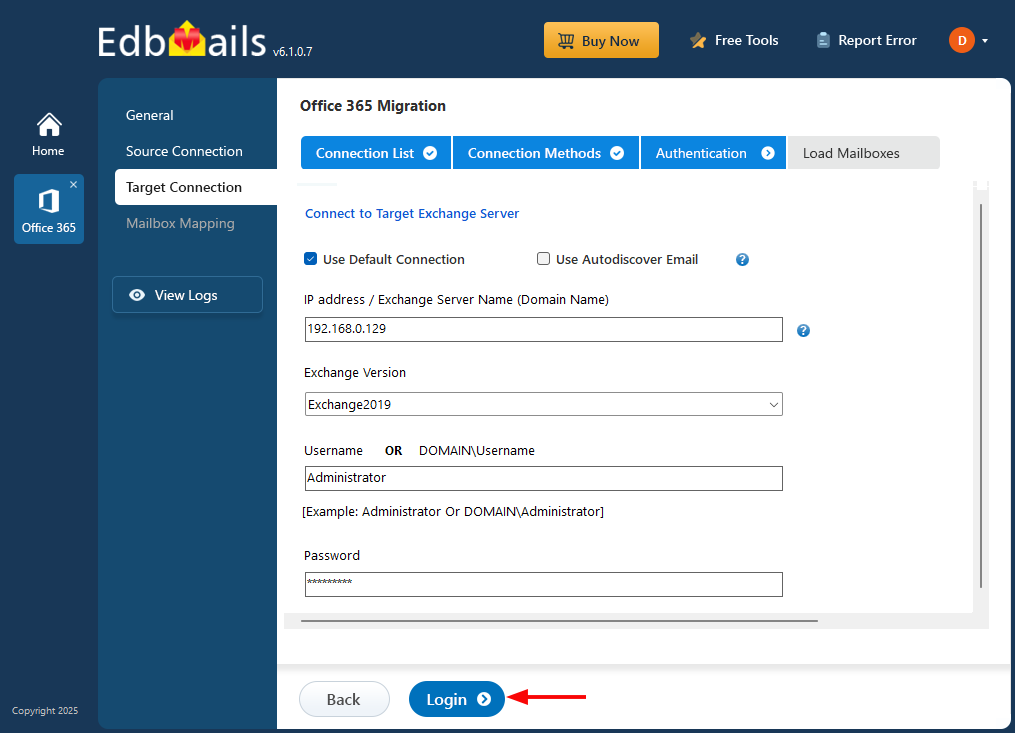
- Enter the target Hosted Exchange server login details and click the ‘Login’ button
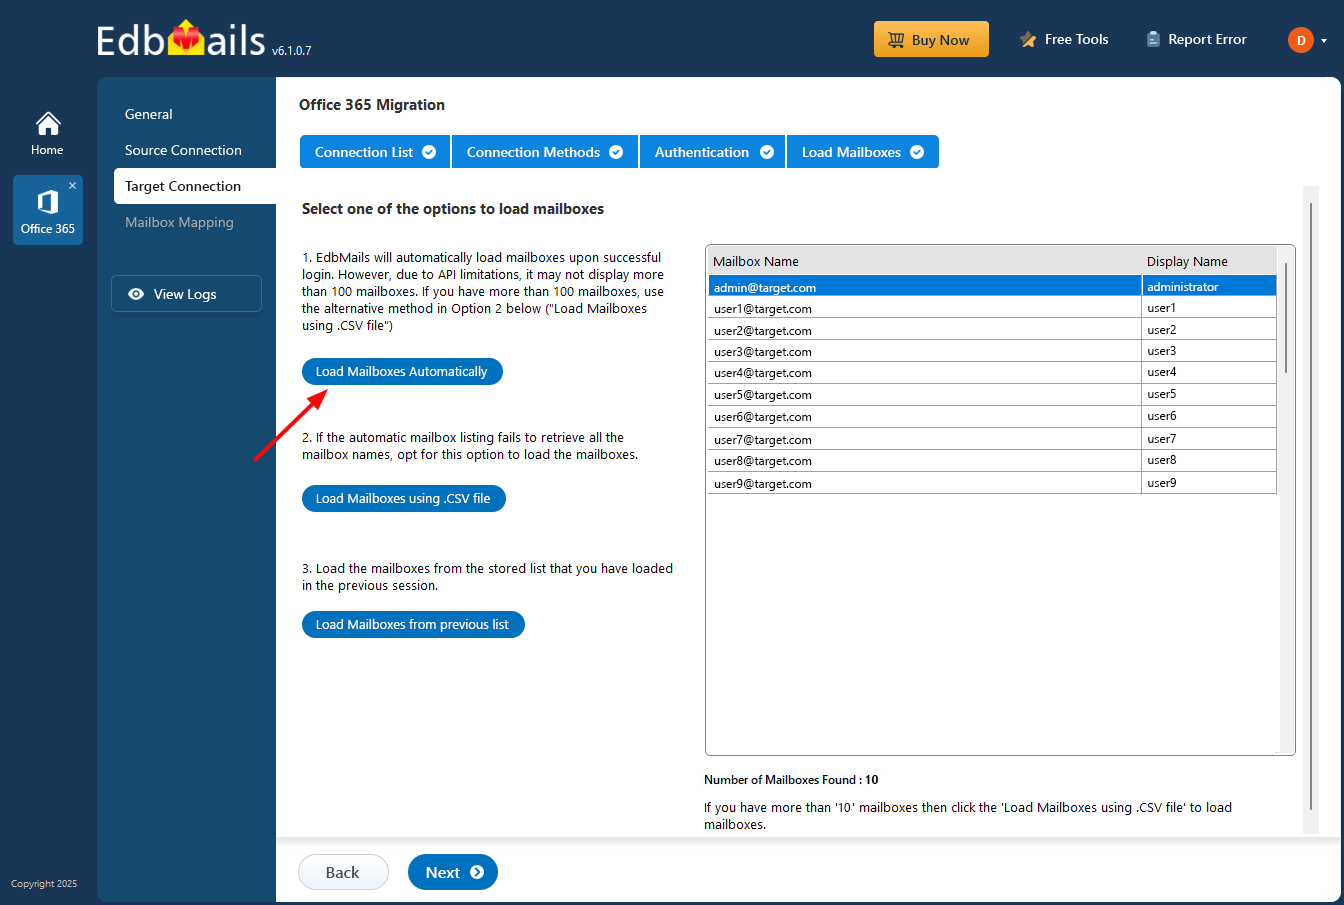
- Select one of the methods to load the mailboxes.
- Click the 'Add New Connection' button to create a new connection to the target Hosted Exchange server. If you'd like to use an existing connection, select it from the list and click 'Connect to Existing' to proceed.
Step 6: Map source and target mailboxes
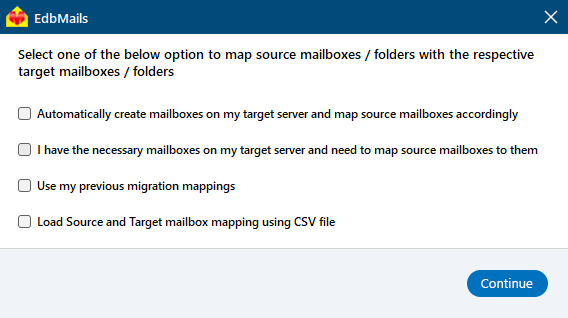
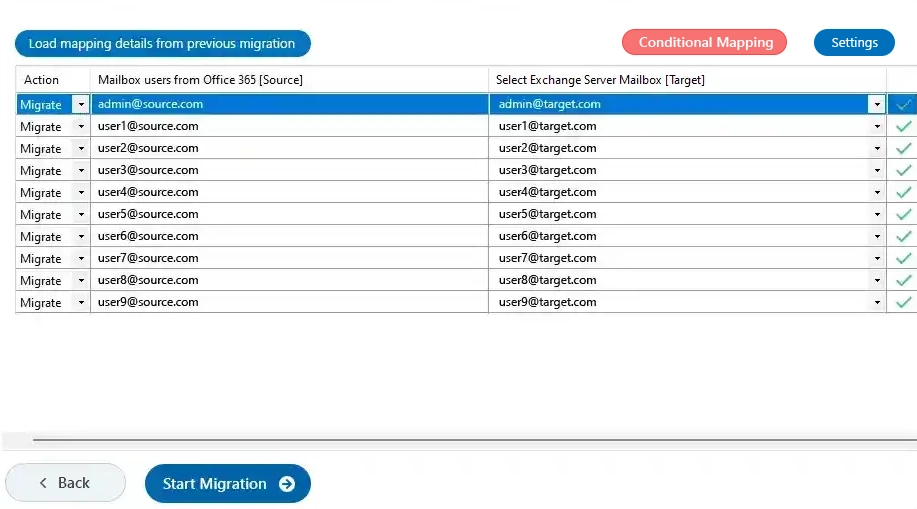
- Select the appropriate mapping option. Click here know about user-defined mailboxes / folders mapping
- EdbMails automatically maps mailboxes and folders between the source and target servers, which is especially useful for large-scale migrations. Alternatively, you can manually map source folders and subfolders to specific target locations as needed.
Step 7: Start Office 365 to Hosted Exchange migration
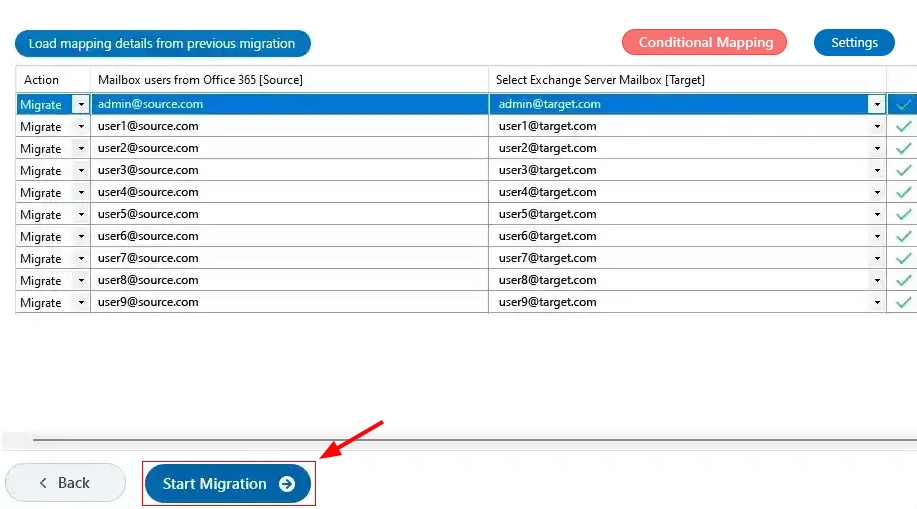
- After completing the mailbox mapping, click the ‘Start Migration’ button to proceed.
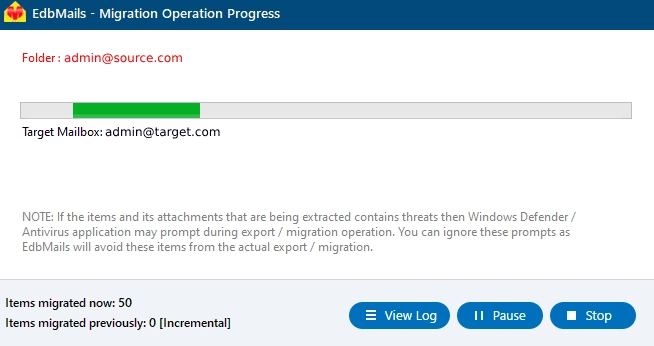
- You can track the migration progress in real-time, and a confirmation message will appear once it's complete.
- Click on ‘View Log’ to review the detailed migration report. You can also sign in to the target Hosted Exchange server to confirm that all items have been successfully transferred.
Post-migration Activities
- Step 1: Update the MX records to point to the Exchange server
To receive messages on your target server, update the DNS records (MX records) to enable email functionality with the new server you have migrated to. Additionally, configure the Autodiscover record to allow Outlook to connect to the migrated mailboxes.
- Step 2: Create a new Outlook profile for users in the new domain
Configure a new Outlook profile for each user in your domain if Outlook encounters issues connecting to the Office 365 mailboxes.
- Step 3: Remove the old Office 365 subscription plan
Once the migration is successful and you have verified the data, remove the Office 365 subscription plan and any associated domains if you no longer plan to use them.
- Step 1: Update the MX records to point to the Exchange server
Office 365 migration troubleshooting
See the troubleshooting solutions for Office 365 to Hosted Exchange migration. For more details about EdbMails Office 365 migration, see the frequently asked questions.
Benefits of EdbMails for Office 365 to Hosted Exchange migration
- Seamlessly migrate directly from Office 365 to a Hosted Exchange server, ensuring a smooth and efficient data migration process.
- Utilize cutover, staged, or PST migration methods, selecting the approach that best suits your organization’s specific requirements.
- Eliminate the need for complex PowerShell scripts, simplifying the Office 365 to Hosted Exchange migration for mailbox data.
- Migrate mailboxes, public folders, archive mailboxes, and shared mailboxes accurately from the source to the target server.
- Ensure automatic mailbox mapping between source and target servers, streamlining the process and reducing the risk of errors.
- Achieve a secure migration with full data consistency, zero downtime, and no risk of data loss, maintaining business continuity.
- Access comprehensive migration reports, providing real-time insights to track progress and ensure a successful transition.
- Benefit from 24x7 technical support throughout the migration, ensuring expert assistance is always available when needed.


