Restore multiple PST files to Office 365
Importing PST files into Office 365 is essential for consolidating data, migrating old email archives, and integrating personal or legacy PST files into a unified Office 365 environment. This process is also beneficial for combining data from former employees, organizing scattered data sources, and ensuring compliance with data retention policies. Centralizing all important information in Office 365 makes it easier to search and access, enhancing overall data management.
EdbMails Office 365 migration software makes it straightforward to import multiple PST files into Office 365. Its user-friendly interface simplifies the migration process, allowing users to manage import operations with minimal technical knowledge. The software automatically maps mailboxes from PST files to the correct Office 365 mailboxes, reducing the need for manual efforts. Users can view and select target Office 365 folder listings to ensure data is placed accurately and the original email structure is preserved.
The software maintains data integrity throughout the import operation, ensuring that all the items emails, attachments, contacts, and calendar items remain intact. The migration reports provide transparency into the import process, allowing users to monitor progress, address any issues, and confirm that the migration is completed successfully.
EdbMails handles various import scenarios, including the simultaneous migration of multiple PST files and efficient management of large data volumes. This flexibility ensures a tailored migration experience, making the transition to Office 365 smooth and reliable. The below sections detail Prerequisites, steps to import multiple PST files using EdbMails.
Prerequisites to import bulk PST files to Office 365
- To migrate PST files to Office 365, ensure that Microsoft Outlook is installed on the computer where you are performing the import operation and that an Outlook profile is configured.
EdbMails automatically creates Office 365 mailboxes and assigns licenses on target servers. However, if you want to manually create mailboxes for your organization's users and assign the appropriate licenses to them navigate through the below links
- Explore the different Office 365 licensing plans to find one that best suits your needs. You can start with a 30-day free trial and later choose a plan that aligns with your requirements. Utilize available resources to compare various Office 365 business and enterprise plans before making a decision. Compare Office 365 business plans and compare Office 365 enterprise plans.
- If you intend to migrate PST files to public folders on Office 365, ensure that you create and configure the corresponding public folders on the target server.
- To connect to In-Place Archives on the target server, ensure that the archive mailbox is enabled. See the steps for enabling online Archive in Office 365.
- Use a global administrator account with a mailbox for Automatic Registration of EdbMails on Entra ID (Azure Active Directory).
- Configure Office 365 to send and receive large messages.
Follow the steps to increase the message size on Office 365 to 150MB.
Steps to import multiple PST files to Office 365 using EdbMails
Step 1: Download and install EdbMails software
- Download and install EdbMails application on your computer
See EdbMails system requirements to import multiple PST files to Office 365.
- Download and install EdbMails application on your computer
Step 2: Launch EdbMails Software
- Launch the EdbMails application. Enter your email address and password, then click the 'Login' or 'Start Your Free Trial' button.
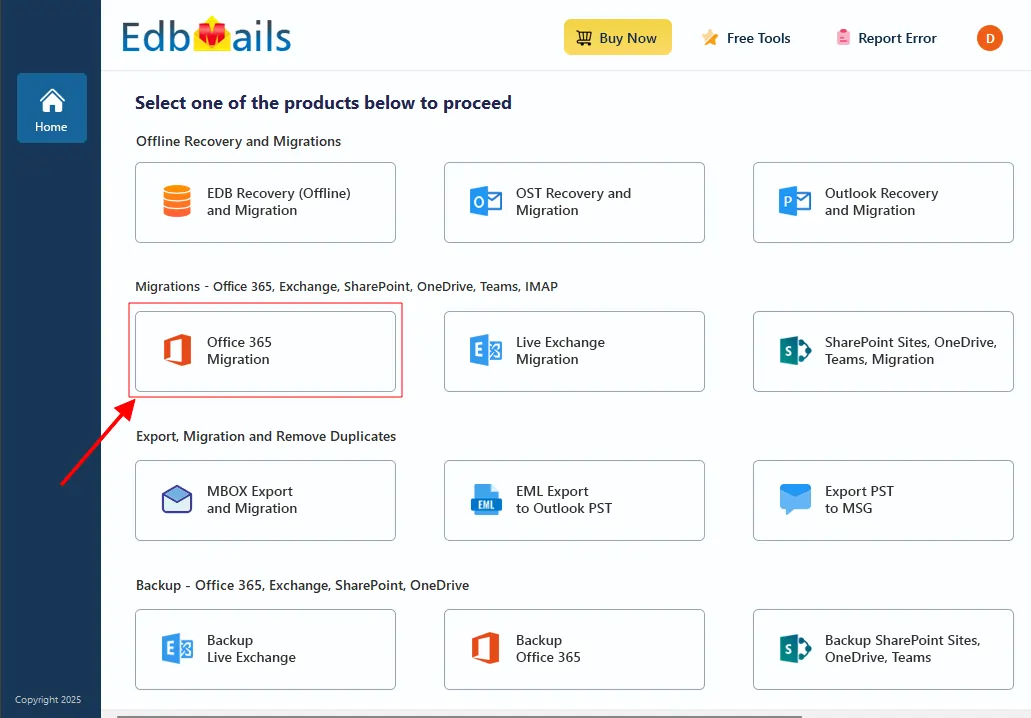
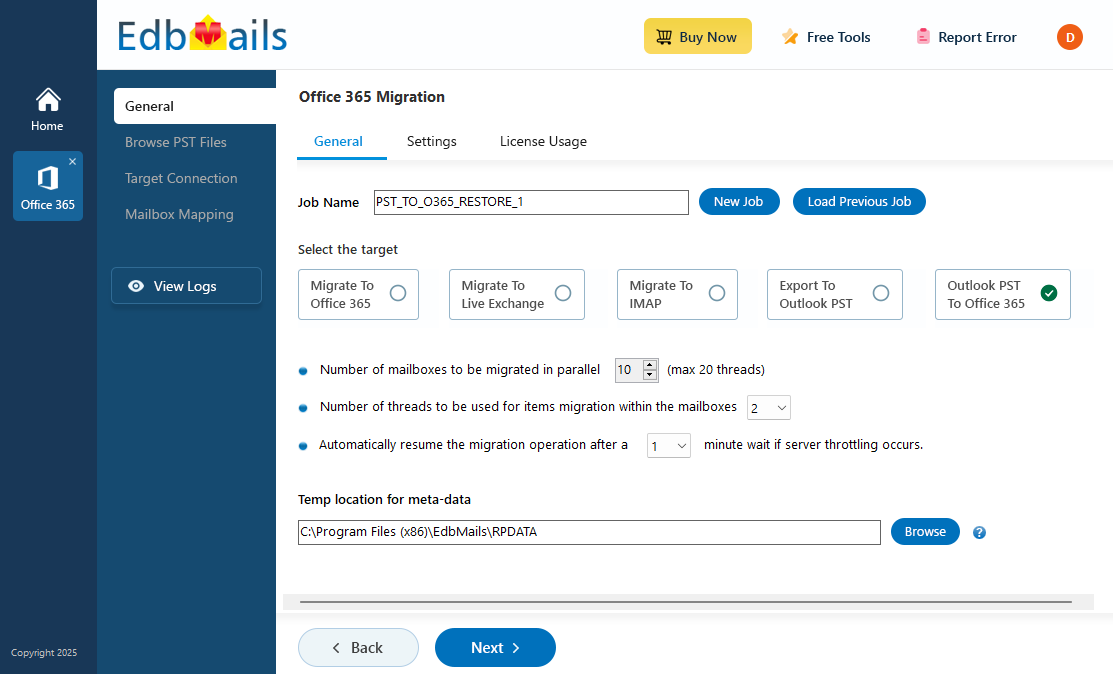
- Select ‘Office 365 Migration’ option
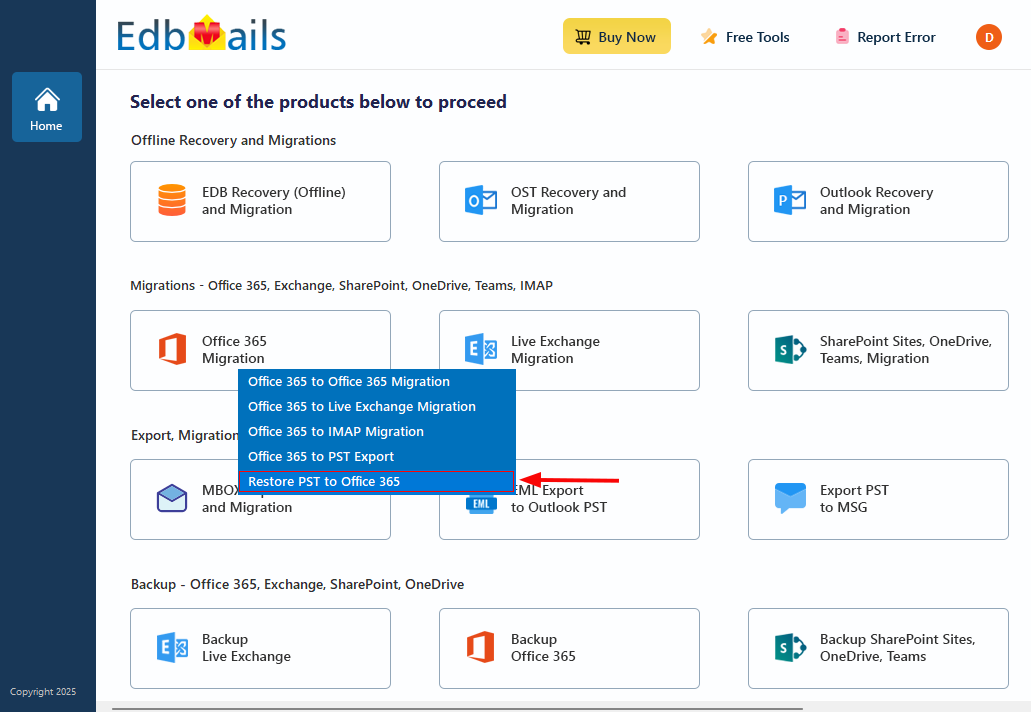
- Select ‘Restore PST to Office 365’.
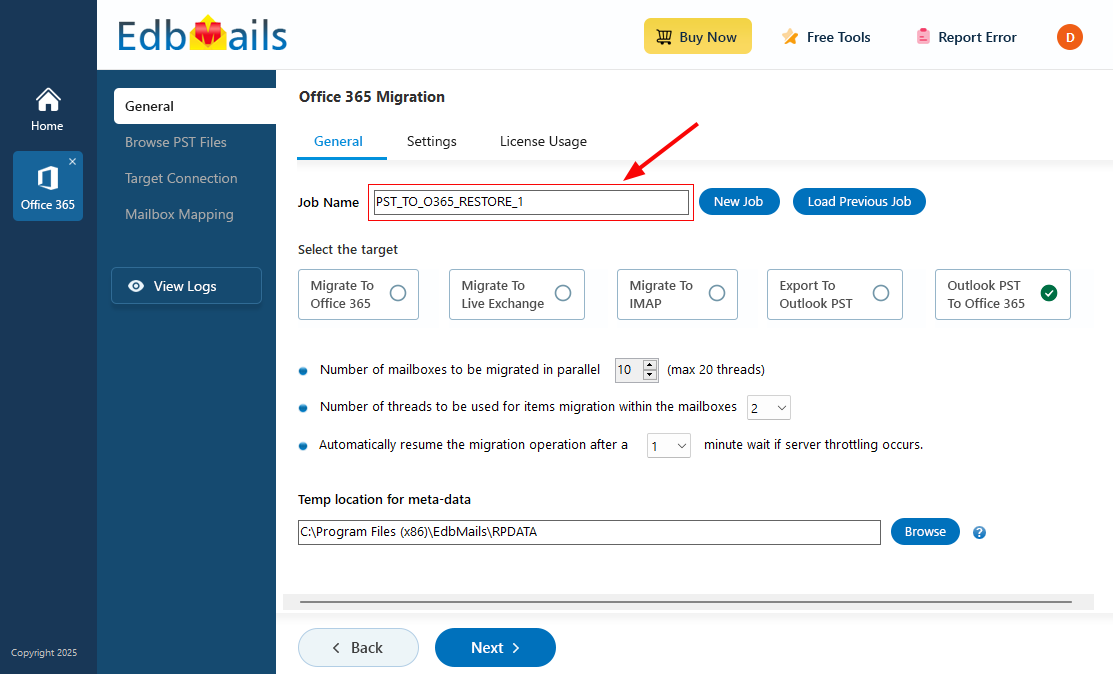
- You can either keep the default job name or click the ‘New Job’ button to modify it to a name of your choice.
Step 3: Add multiple PST files
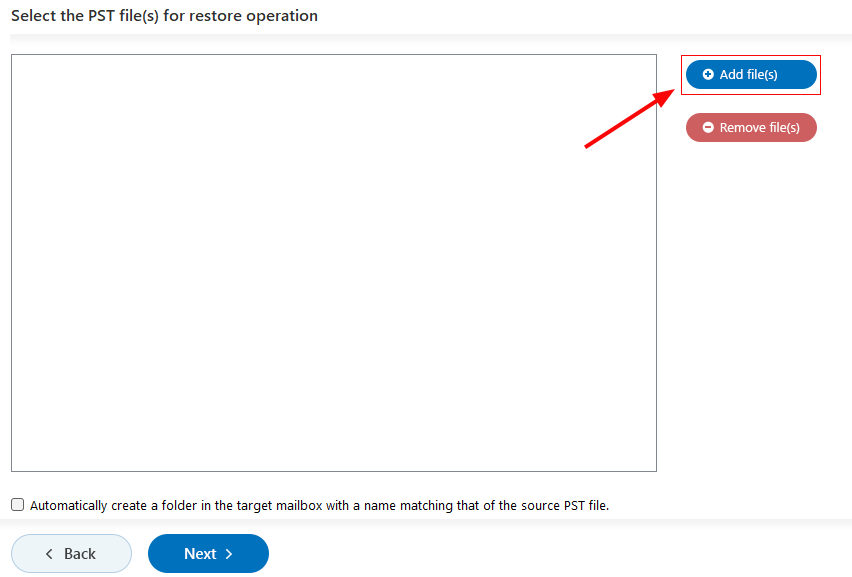
- Click the ‘Add file(s)’ button to add PST files to the user interface.
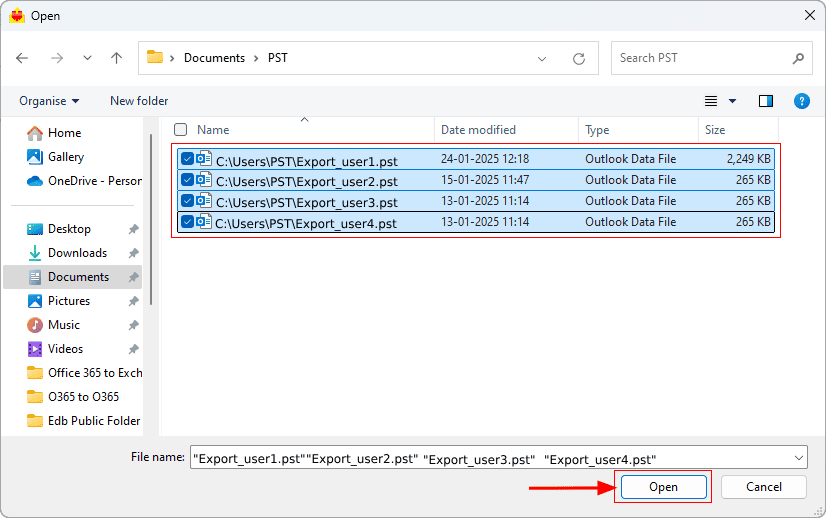
- Choose the multiple PST files you wish to select from your computer drive.
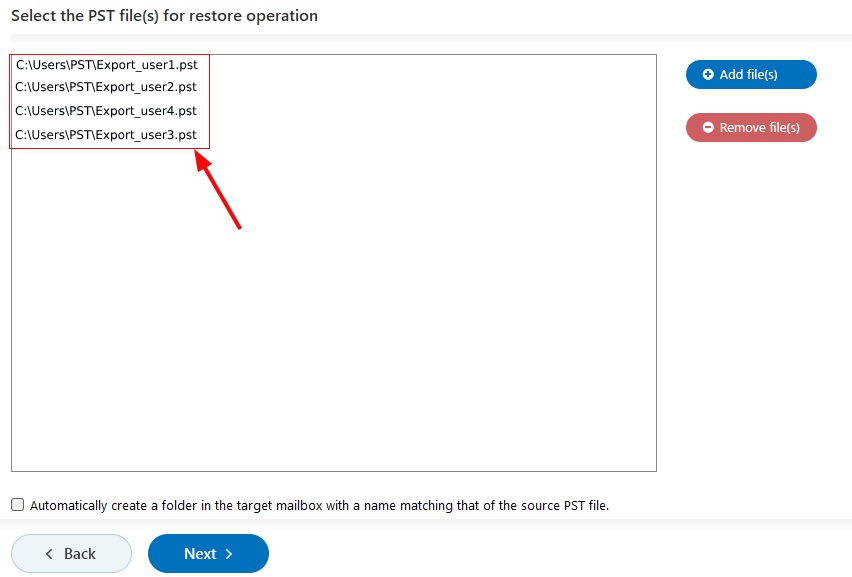
- Verify the selected PST files.
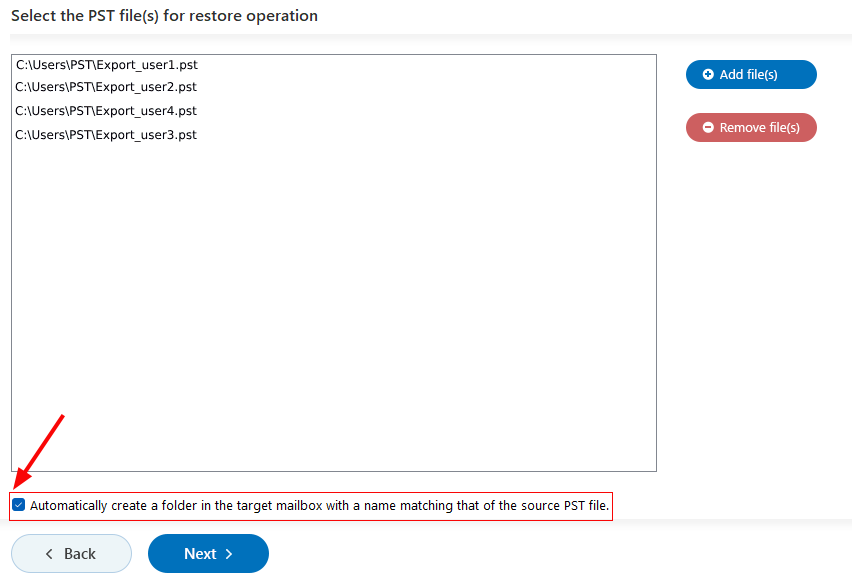
- To create a folder in the target mailbox with a name that matches the source PST file, enable the option highlighted in the screenshot below. Click the ‘Next’ button to proceed.
Step 5: Connect to target Office 365 server
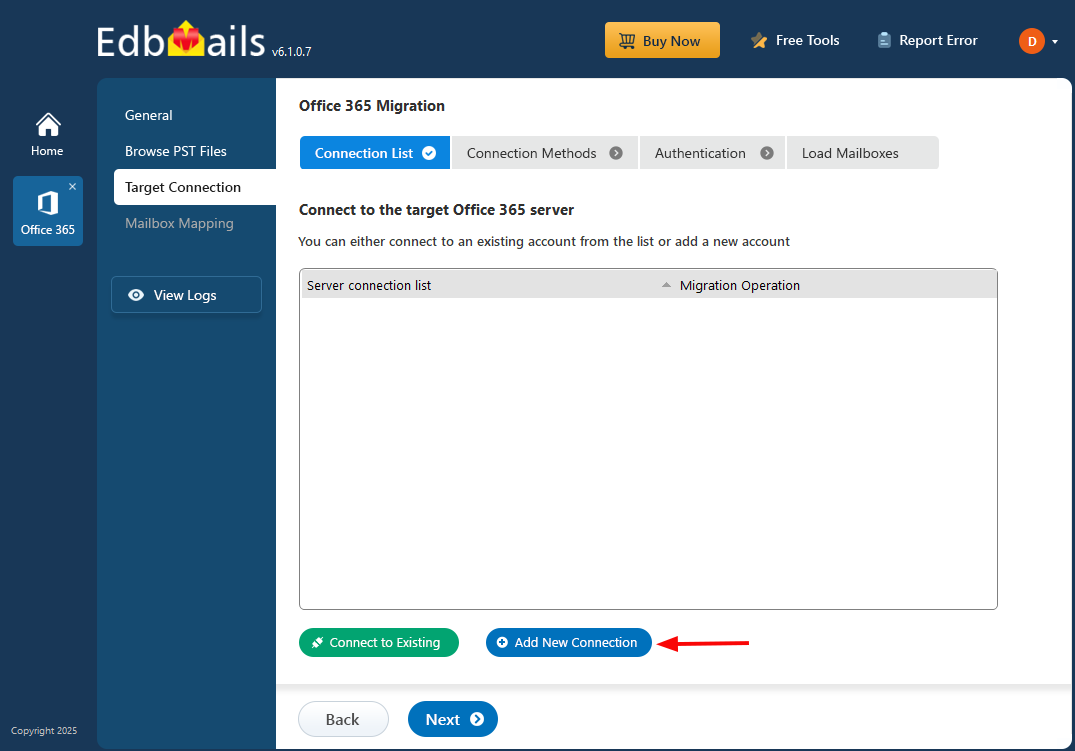
- Click the ‘Add New Connection’ button to set up a new connection with the target Office 365 server. To use an existing connection, select it from the list and click ‘Connect to Existing’ to continue.
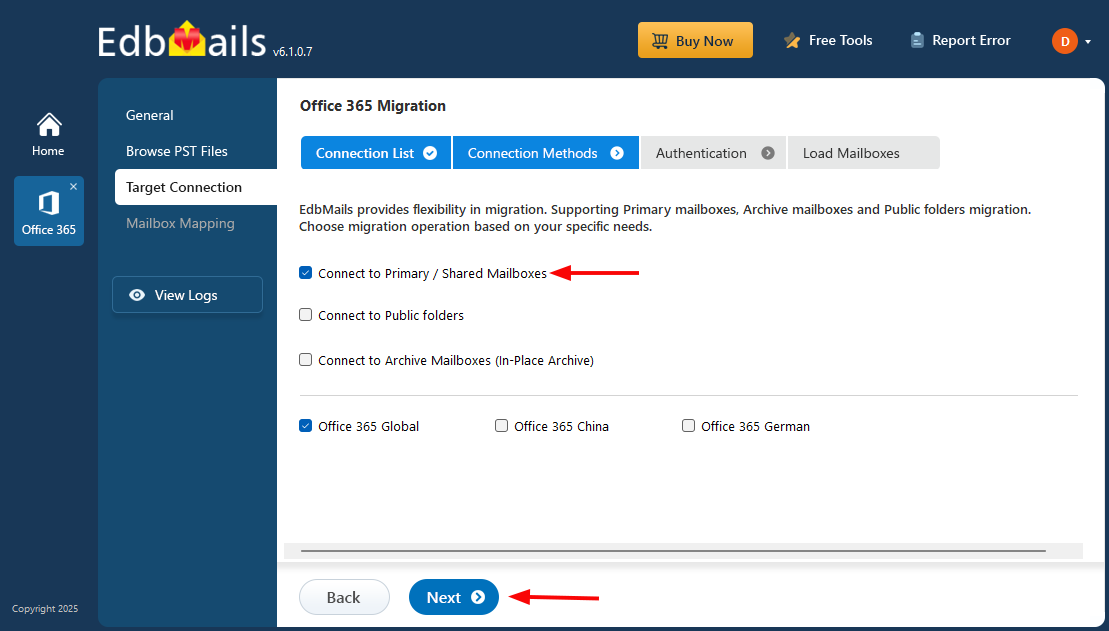
- Select the required connection options and click the ‘Next’ button
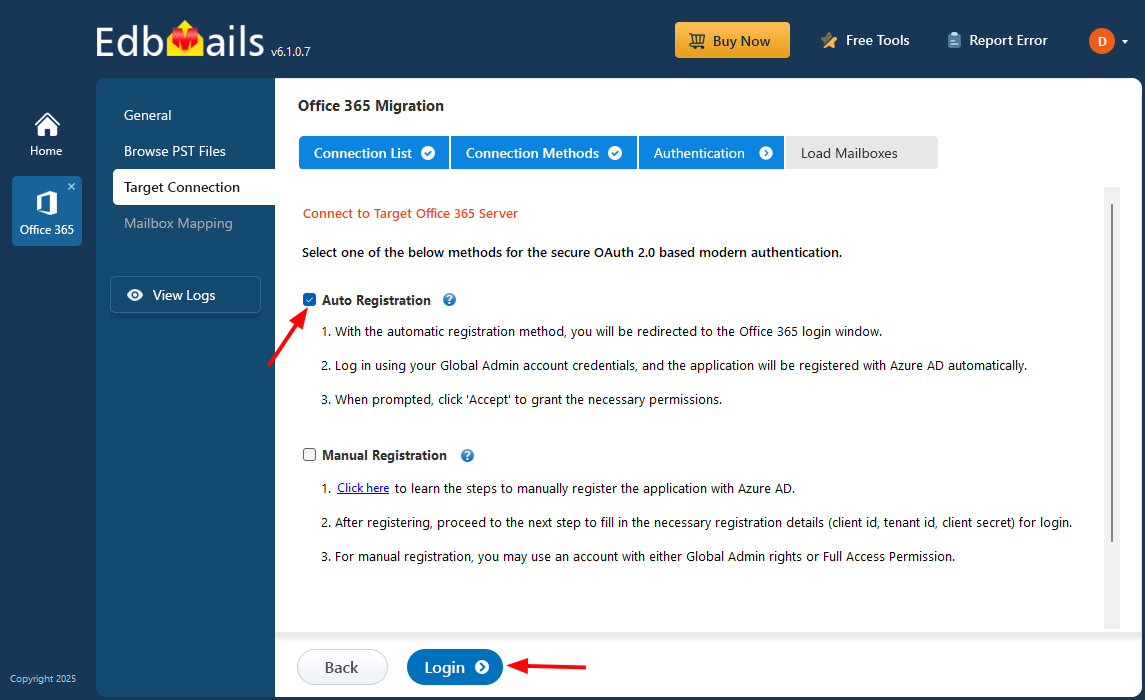
- Choose the desired target connection method. Then, click the ‘Login’ button to proceed.
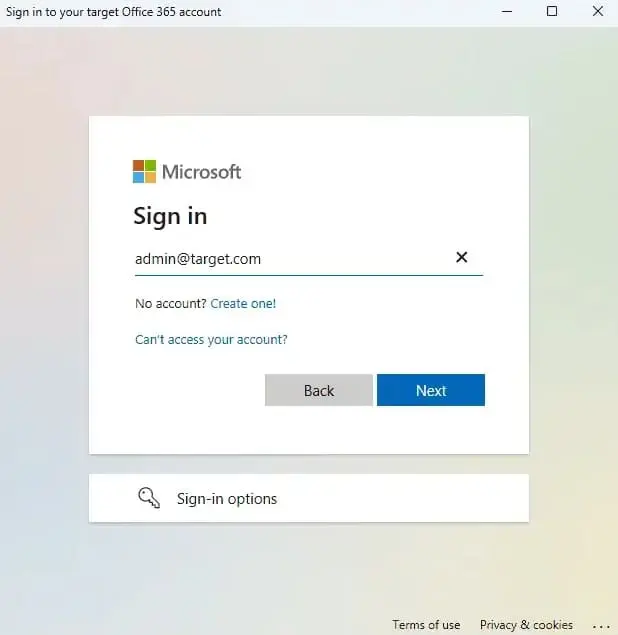
- After selecting the desired migration option, proceed with the login on the Microsoft sign-in page.
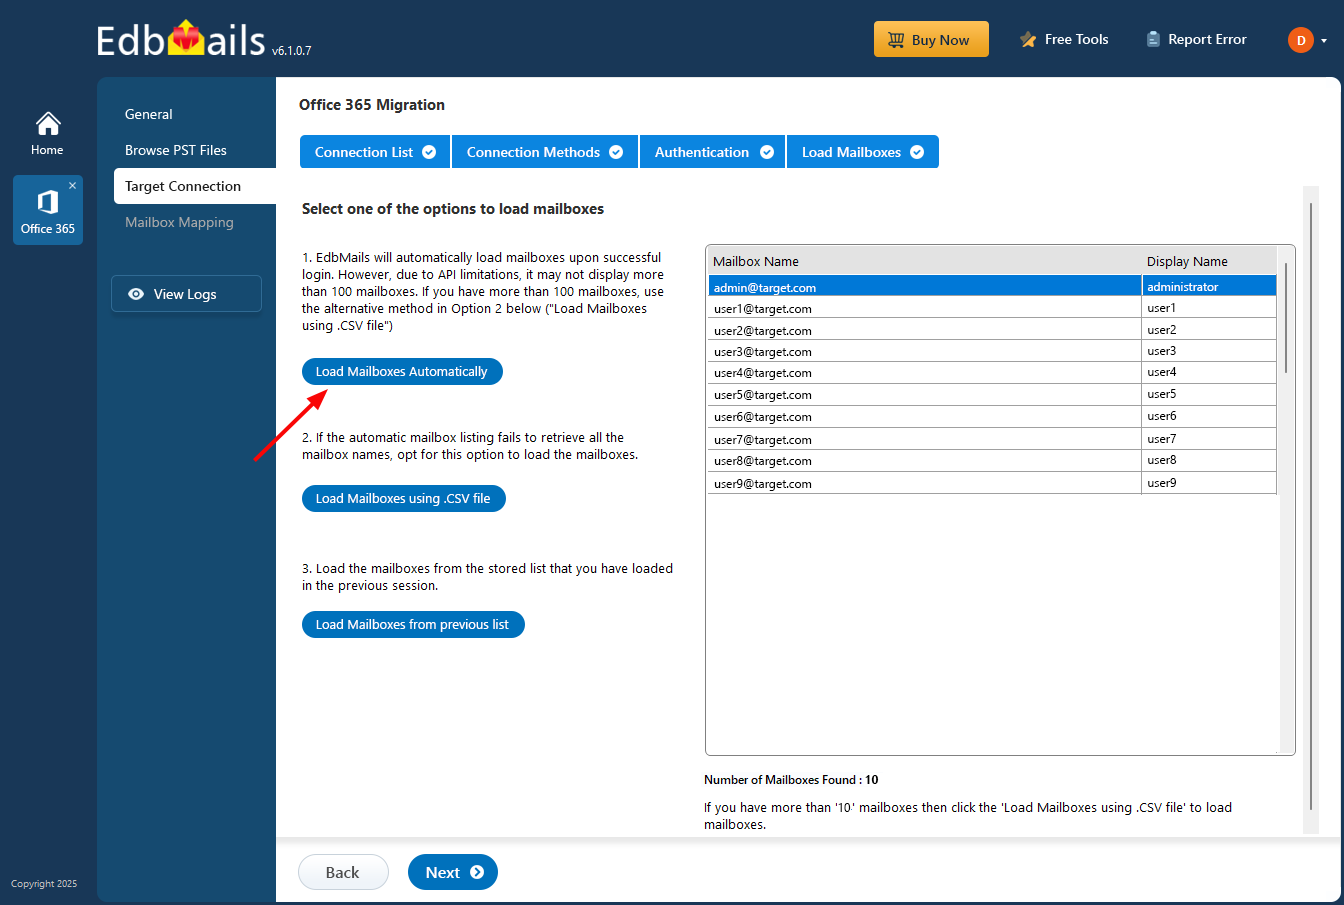
- After you authenticate and log in successfully, select one of the methods to load the mailboxes. You can also load and migrate the mailboxes using a CSV file.
Step 6: Map source and target mailboxes
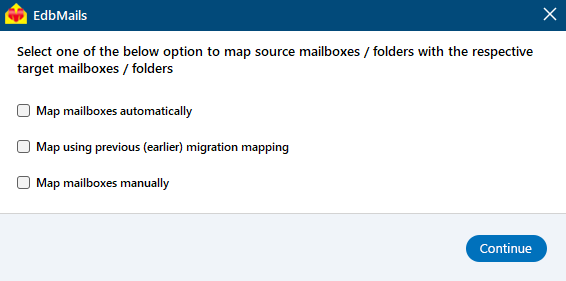
- Select the required option for mapping.
EdbMails automatically maps mailboxes and folders between source and target tenants, which is particularly beneficial for large-scale migrations. Alternatively, you have the flexibility to manually map source folders and subfolders to specific target locations as needed.
- Select the required option for mapping.
Step 7: Start PST to Office 365 migration
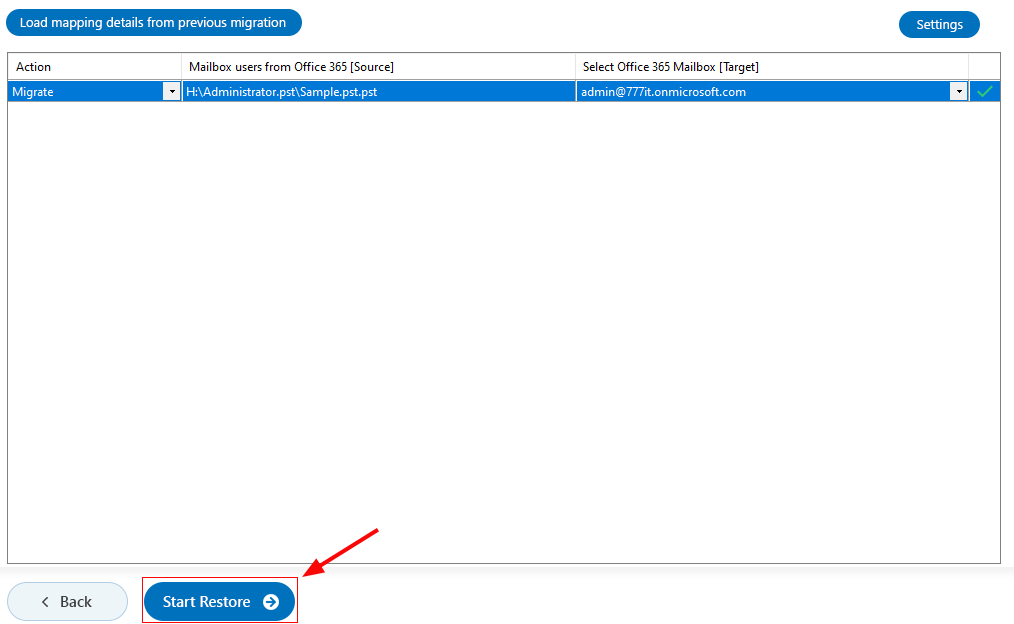
- After completing the mailbox mapping, click the ‘Start Restore’ button to begin the process.
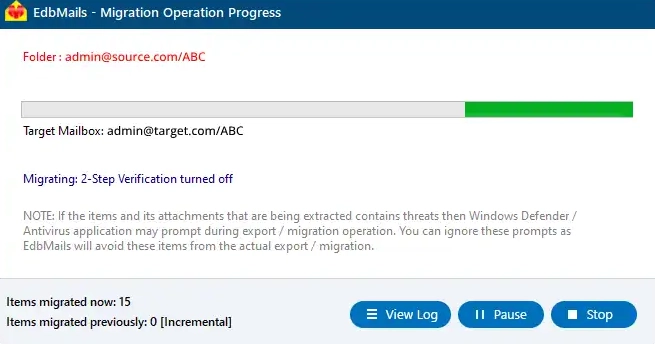
- Upon migration completion, a message will appear. You can click the ‘View Log’ button and check the migration report.


