Office 365 to Exchange migration
Organizations often migrate from Office 365 to Exchange for reasons such as compliance requirements, specific feature needs, cost considerations, control over data, and enhanced network performance. EdbMails simplifies this migration process with Office 365 Migration software. You can manage the entire migration from a single or multiple computers using an intuitive interface that eliminates the need for complex PowerShell commands. EdbMails securely connects to your source Office 365 and target Exchange servers, directly migrating mailbox data regardless of the Exchange server versions, including Exchange 2019, 2016, 2013, 2010, and 2007. The migration is organized into flexible, job-based tasks, allowing migration of mailboxes, public folders, shared mailboxes, group mailboxes, archive mailboxes from Office 365 to Exchange. EdbMails ensures a swift and efficient migration operation, ideal for scenarios requiring quick mailbox transfers. Explore the below Office 365 to Exchange migration guide for detailed insights and step-by-step instructions on optimizing your migration process.
Office 365 to Exchange migration : Pre-migration activities
On source Office 365 server:
- Make sure you have a Global Admin account with a mailbox for Auto Registration of the EdbMails application on your Entra ID (Azure Active Directory). For Manual Registration, you can use either a Global Admin account or a user account with full access permissions.
- Ensure that your network and bandwidth meet the requirements for the migration.
See network and migration planning, performance factors and best practices for Office 365 to Exchange migration.
On target Exchange server:
Step 1: Check that your system meets the Exchange server setup requirements.
Navigate through the below links to set up your target Exchange server environment based on the Exchange version you want to migrate to. Learn more about the network, hardware and operating system requirements for installing Exchange server.
Step 2: Prepare your target server with the following prerequisites
Complete the following prerequisites for Active Directory, Windows Mailbox server, and Windows Edge Transport servers before installing the Exchange server.
Step 3: Set up Exchange Server for migration
Given below is a list of key points for installing and preparing the Exchange server for migration.
- Prepare AD and domains
- Before installing Exchange Server you need to prepare your Active Directory forest and its domains for the new version of Exchange.
- If you have a separate team to manage the Active Directory schema, you need to first extend the active directory schema, else proceed to the next step to prepare the Active Directory.
- If you have multiple domains you need to additionally prepare the Active Directory domains.
- Install Exchange server on your computer
Before installing the Exchange server, ensure that you meet the system requirements and prerequisites as outlined previously. Next, follow the link to install Exchange 2016 or install Exchange 2019 from the setup wizard.
- Prepare a clean Exchange target environment
- Create and configure a Send connector to send mail outside the Exchange organization.
- By default, Exchange automatically creates receive connectors for inbound mail flow when the mailbox server is installed. If you need to configure receive connectors, follow the steps in the link.
- Add accepted domains to allow recipients to send and receive email from another domain.
- Configure the default email address policy to add the accepted domain to every recipient in the organization.
- Configure external URLs (domains) on the virtual directories in the Client Access (frontend) services on the Mailbox server to allow clients to connect to your server from the internet (outside the organization’s network).
- Configure internal URLs on the virtual directories in the Client Access (frontend) services on the Mailbox server to allow clients to connect to your server from the internal network.
- Configure SSL certificates from a third-party certificate authority for services such as Outlook Anywhere and Exchange ActiveSync.
- Verify the Exchange server installation by running the command Get-ExchangeServer on the Exchange Management Shell (EMS).
- Create mailboxes and Public folders on the Exchange server
EdbMails automatically creates mailboxes on the target Exchange server. However, if you want to manually create mailboxes, refer to the steps to create mailboxes in Exchange server.
If you are planning Public folder migration from Office 365 to Exchange, see steps to create public folder in Exchange server
- Set impersonation rights to global Admin account
If you are using global admin account to connect to Exchange server set impersonation rights to migrate all other mailboxes
See the steps to set impersonation rights for a global admin account on the Exchange server.
- Verify the mailbox of the admin account
Check to see if the admin account that has been assigned management roles has a valid and non-hidden mailbox on the Exchange server.
- Settings related to throttling and message-size limits
- If Microsoft throttles the migration, change the EWS throttling settings on Exchange server
- If the migration is stuck due to the large size of a message, set the message size limits to the maximum on the Exchange server.
- Prepare AD and domains
Migrate from Office 365 to Exchange server with EdbMails
Step 1: Download and Install EdbMails application
- Download and install EdbMails on your computer.
- Double click the EdbMails setup (EdbMailsSetup.exe) to install the application.
- Follow the instructions that appear to complete the installation.
- Click 'Login' or 'Start Your Free Trial' to access the application
Step 2: Select Office 365 to Exchange Migration option
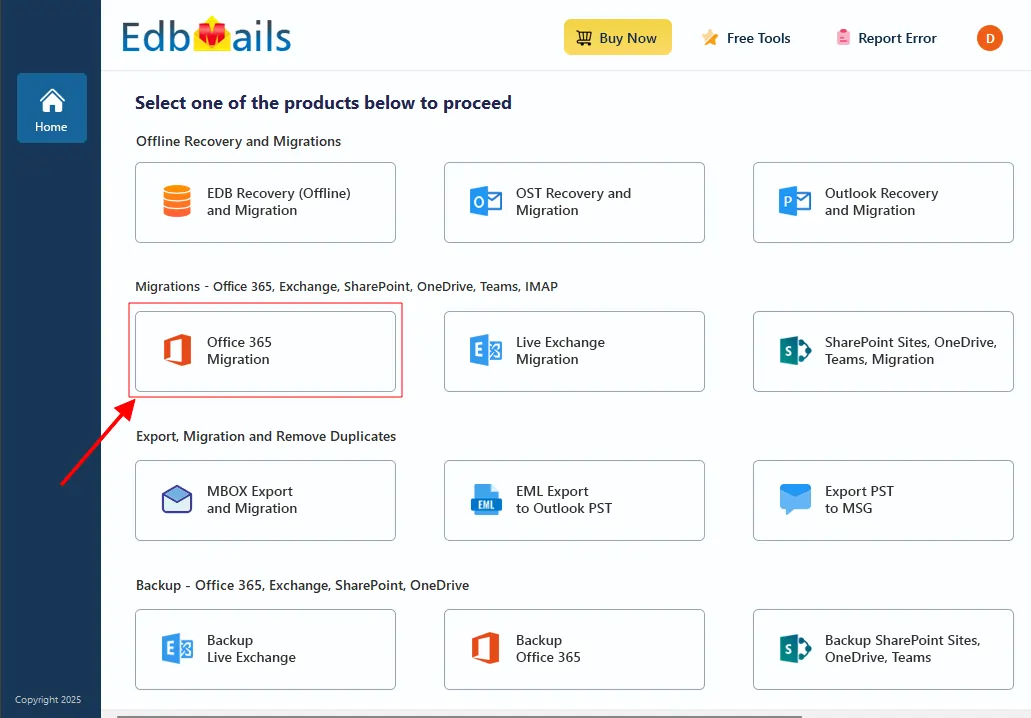
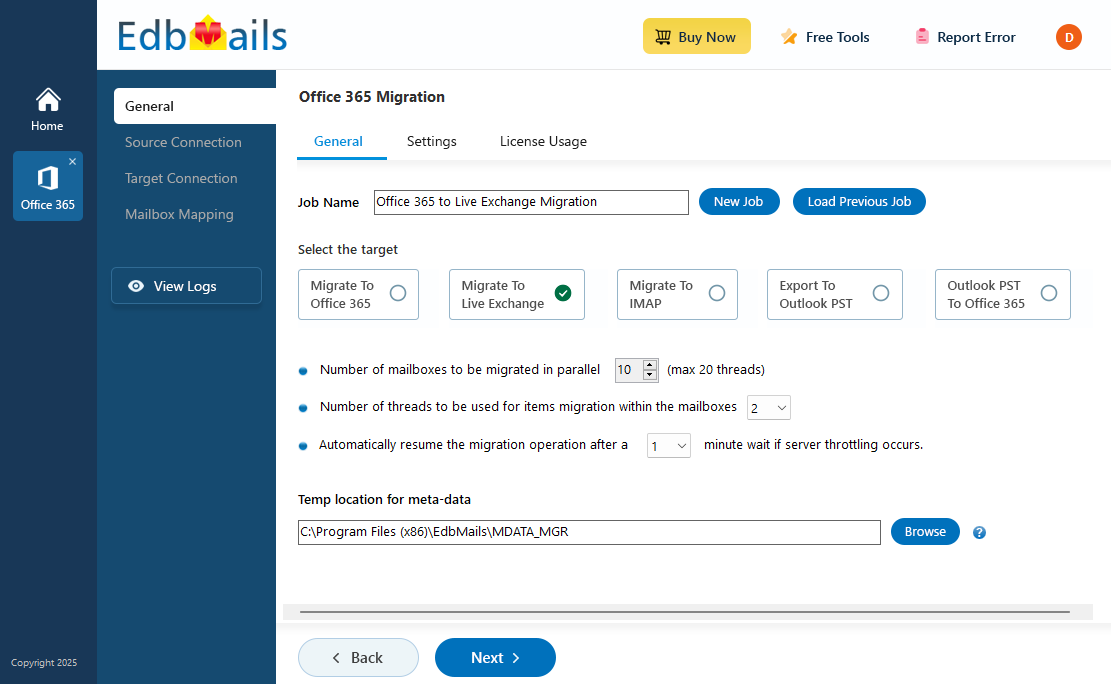
- Select the option 'Office 365 Migration'
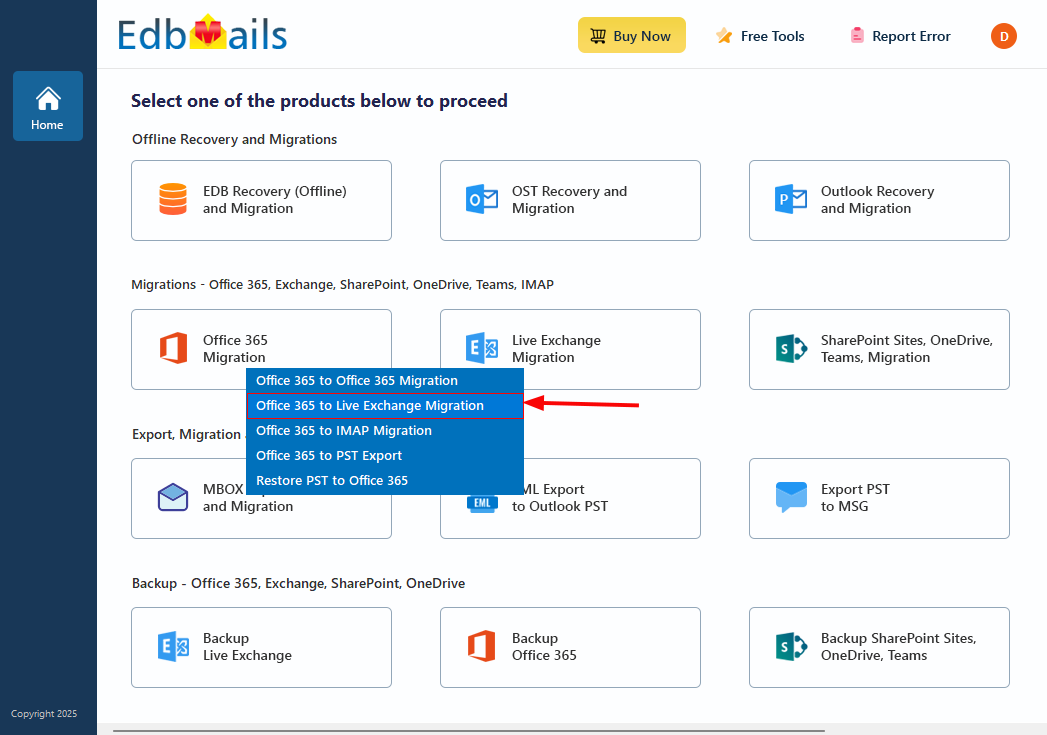
- Select ‘Office 365 to Live Exchange Migration’
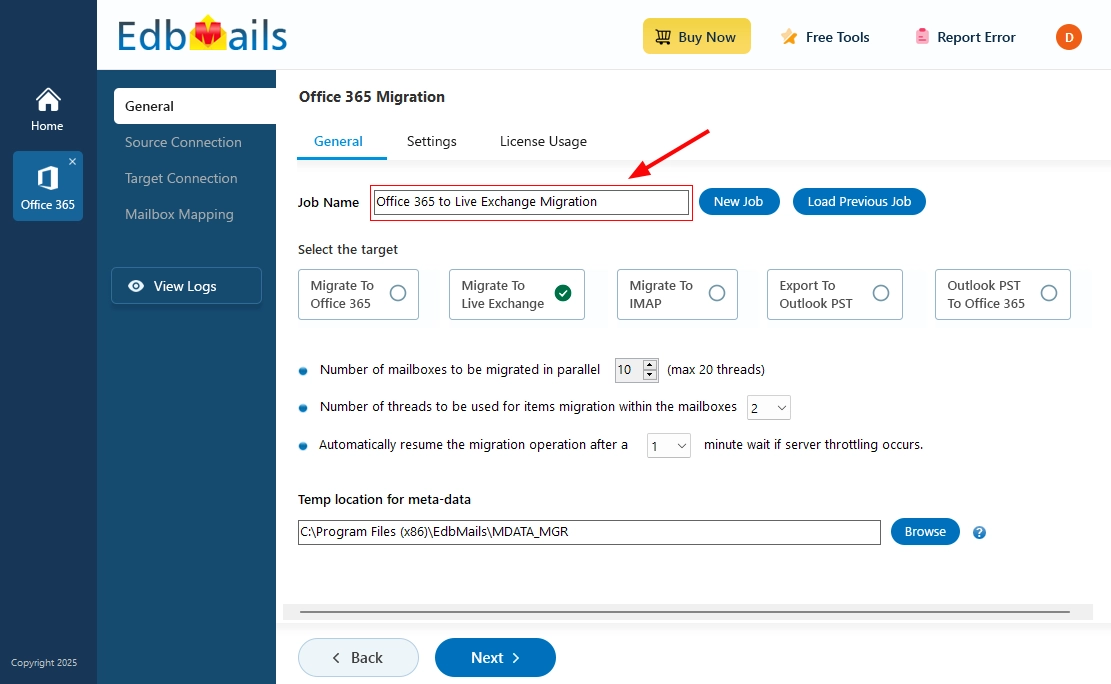
- Keep the default job name, or click ‘New Job’ button to change the name of your choice.
Step 3: Connect to source Office 365 server
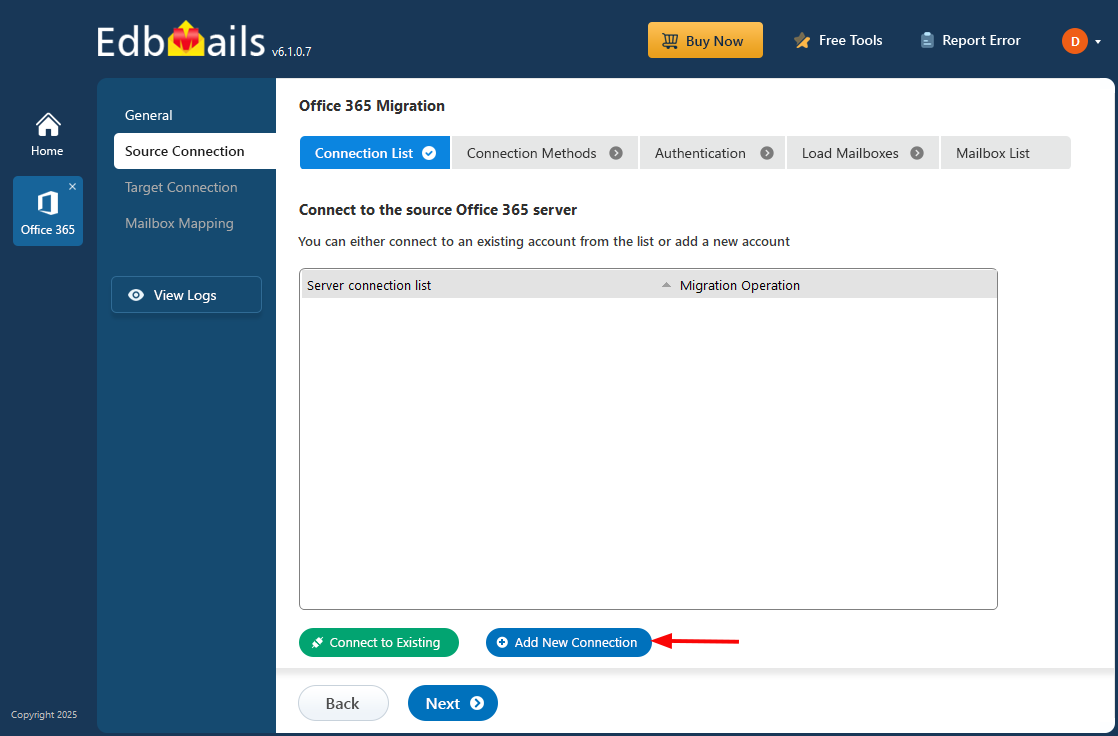
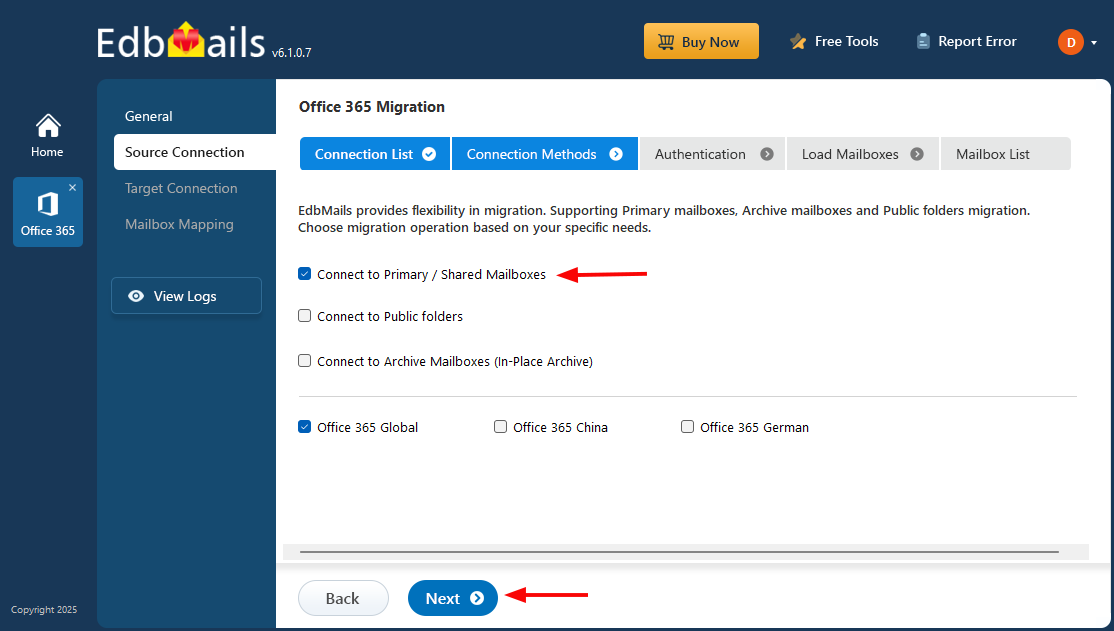
- Click the 'Add New Connection’ button to establish a new connection to the source Office 365. To use the previous connection, select it from the connection list and click the ‘Connect to Existing’ button to proceed.
- Choose the required connection options and click the ‘Next’ button
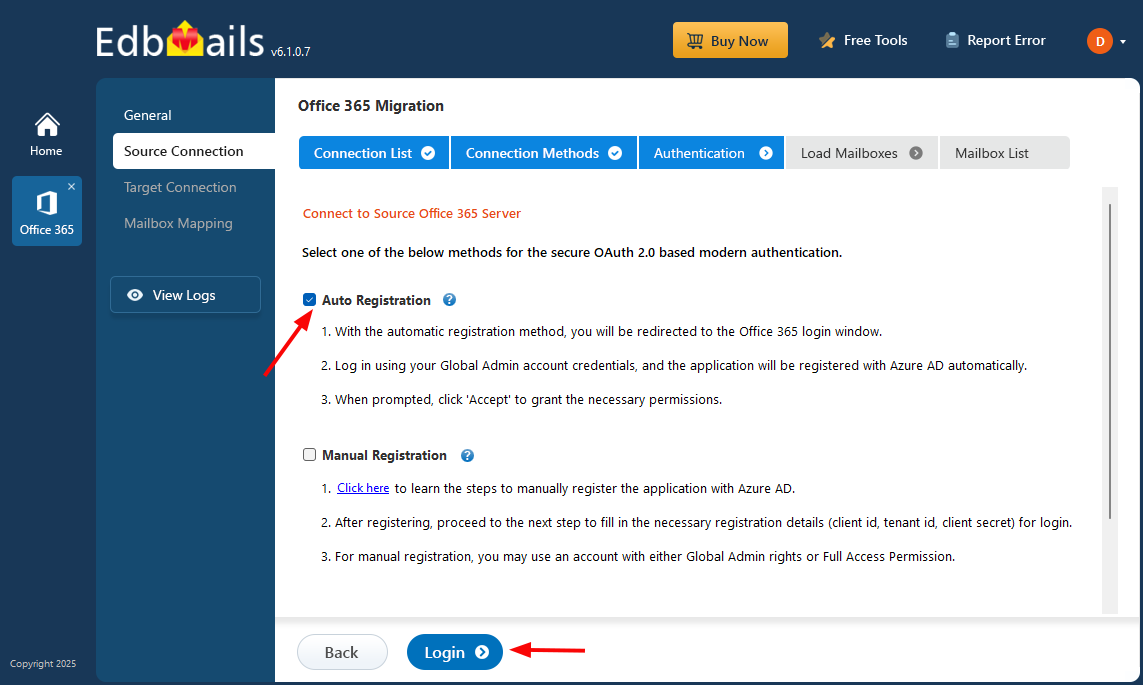
- Select the appropriate connection method and click the ‘Login’ button to continue.
Connect to Office 365 server using secure modern authentication
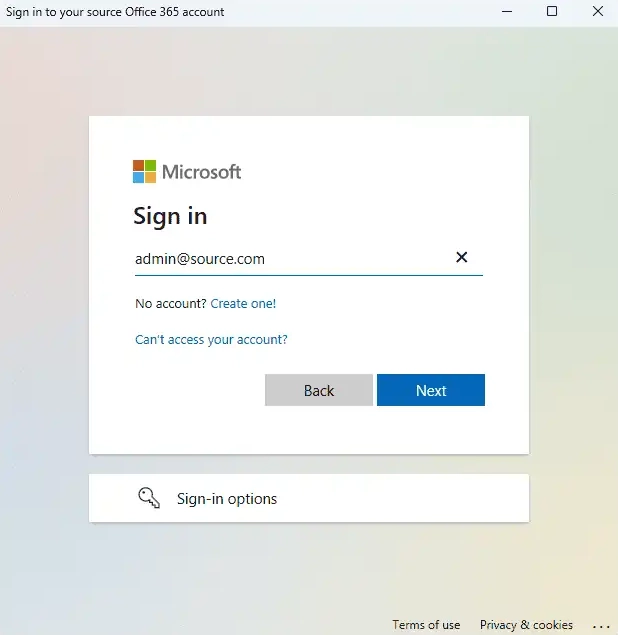
- Authenticate on Microsoft sign-in page.
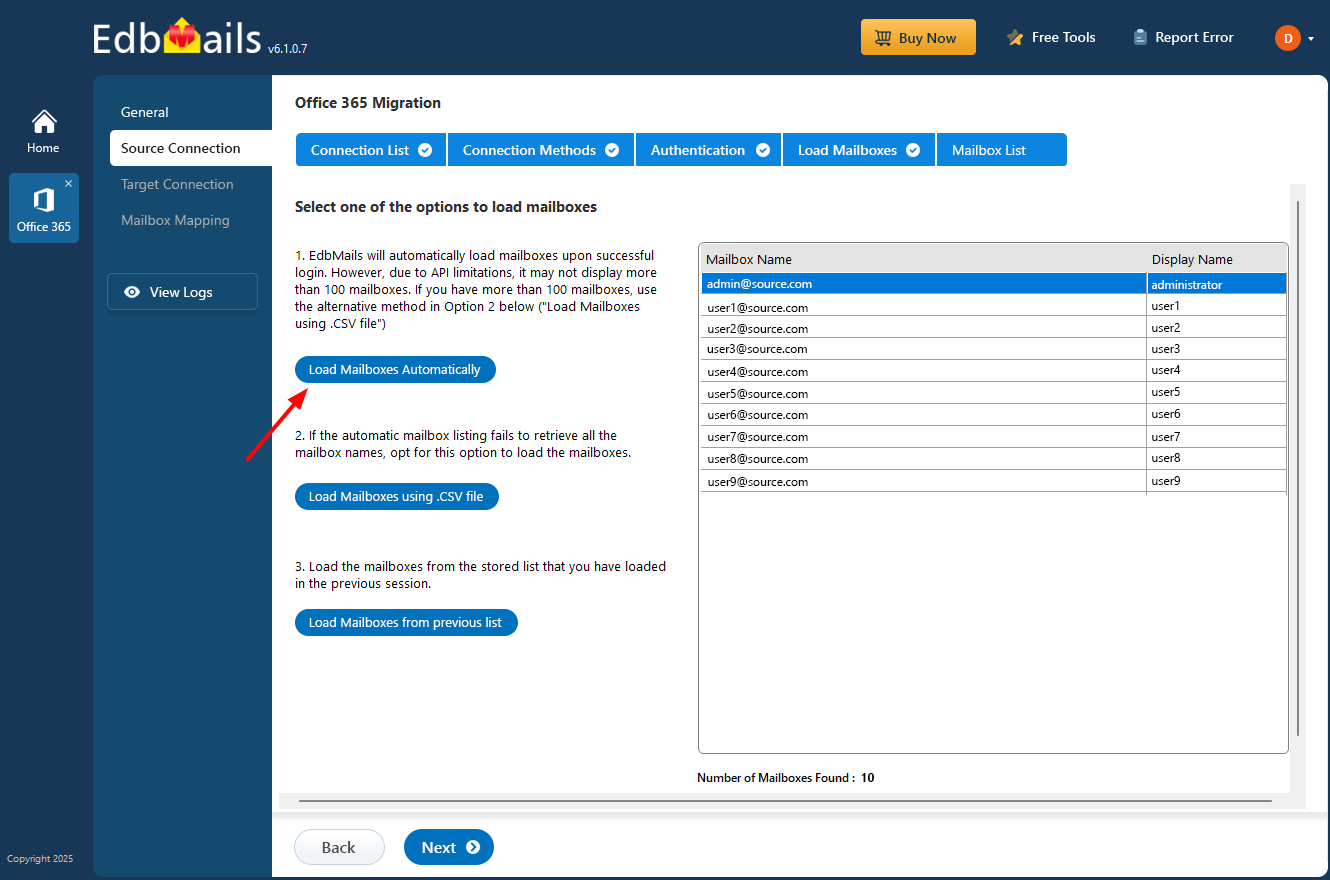
After the successful authentication, choose one of the methods to load the mailboxes. You can also load and migrate the mailboxes using a CSV file.
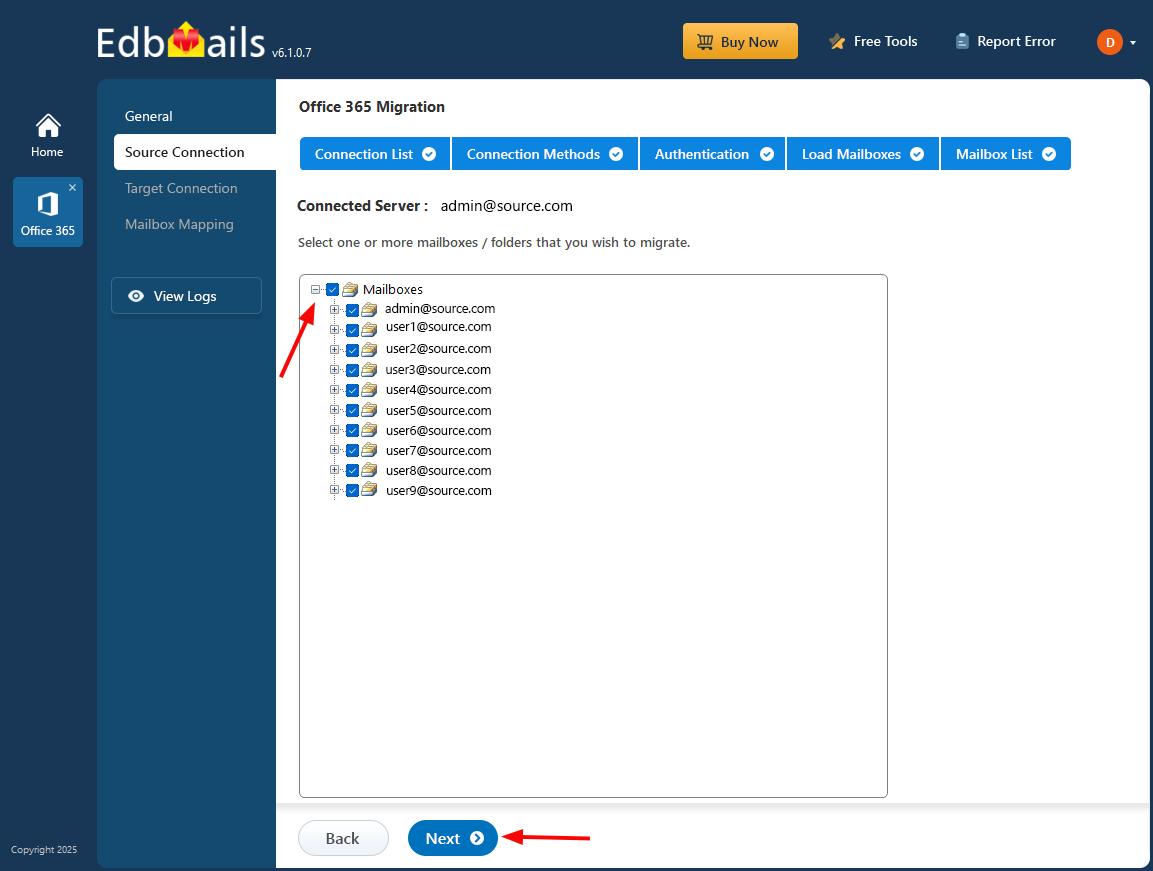
- Select the mailboxes you want to migrate from the source Office 365 server.
- Click ‘Next’ to proceed.
Step 4 : Connect to target Exchange server
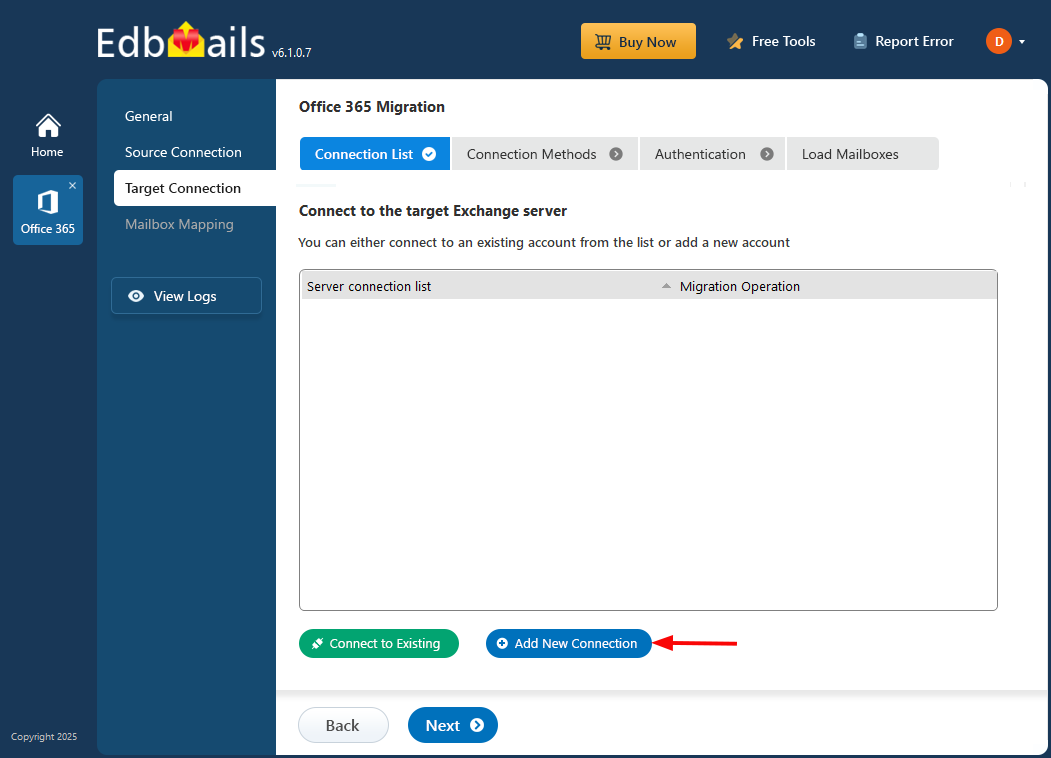
- Click the ‘Add New Connection’ button to establish a new connection to the target Exchange server. To use a previous connection, select it from the connection list and click the ‘Connect to Existing’ button to proceed.
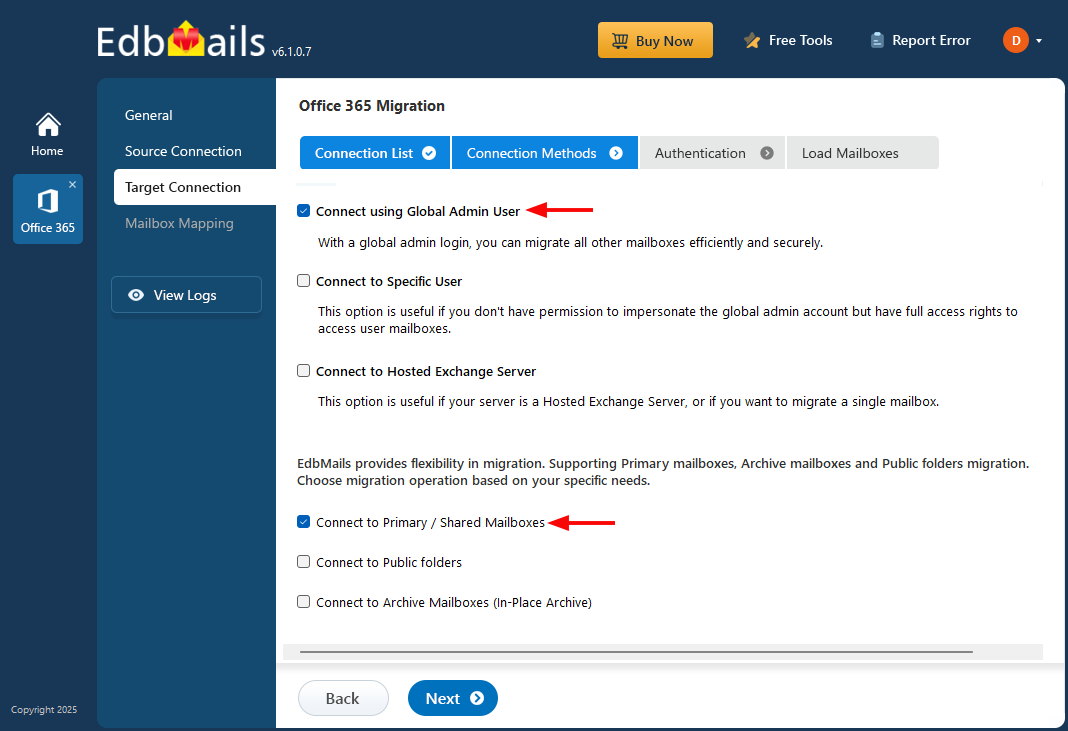
- Select the required connection options and click the ‘Next’ button.
Different options to connect to Exchange server in EdbMails
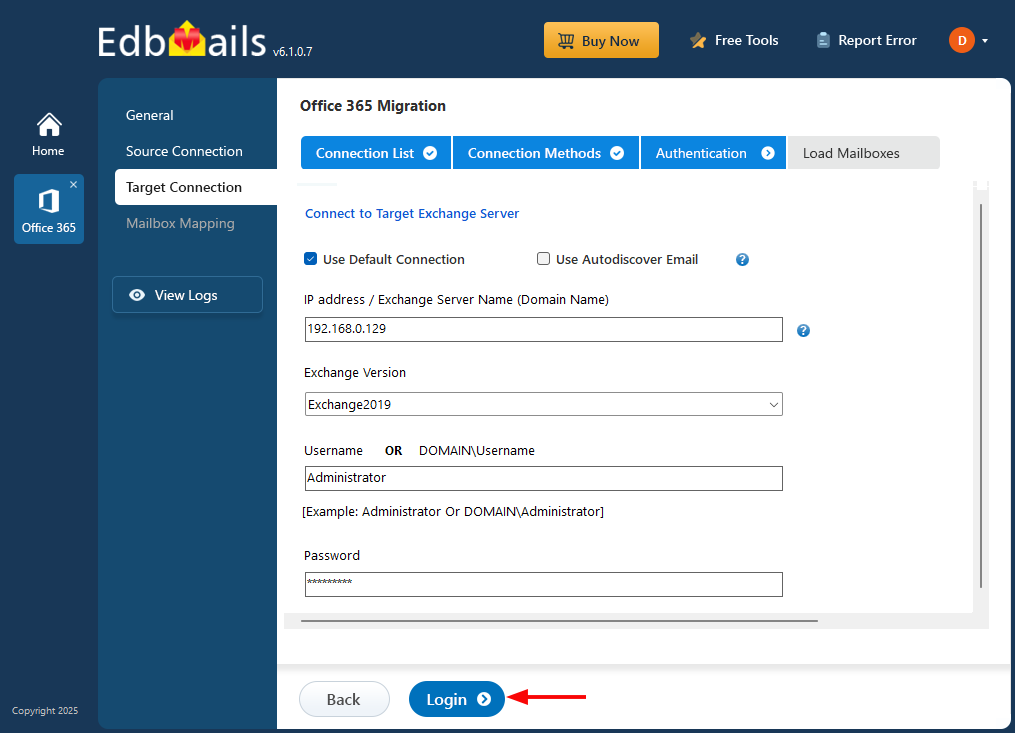
- Enter the target Exchange server details and click the ‘Login’ button
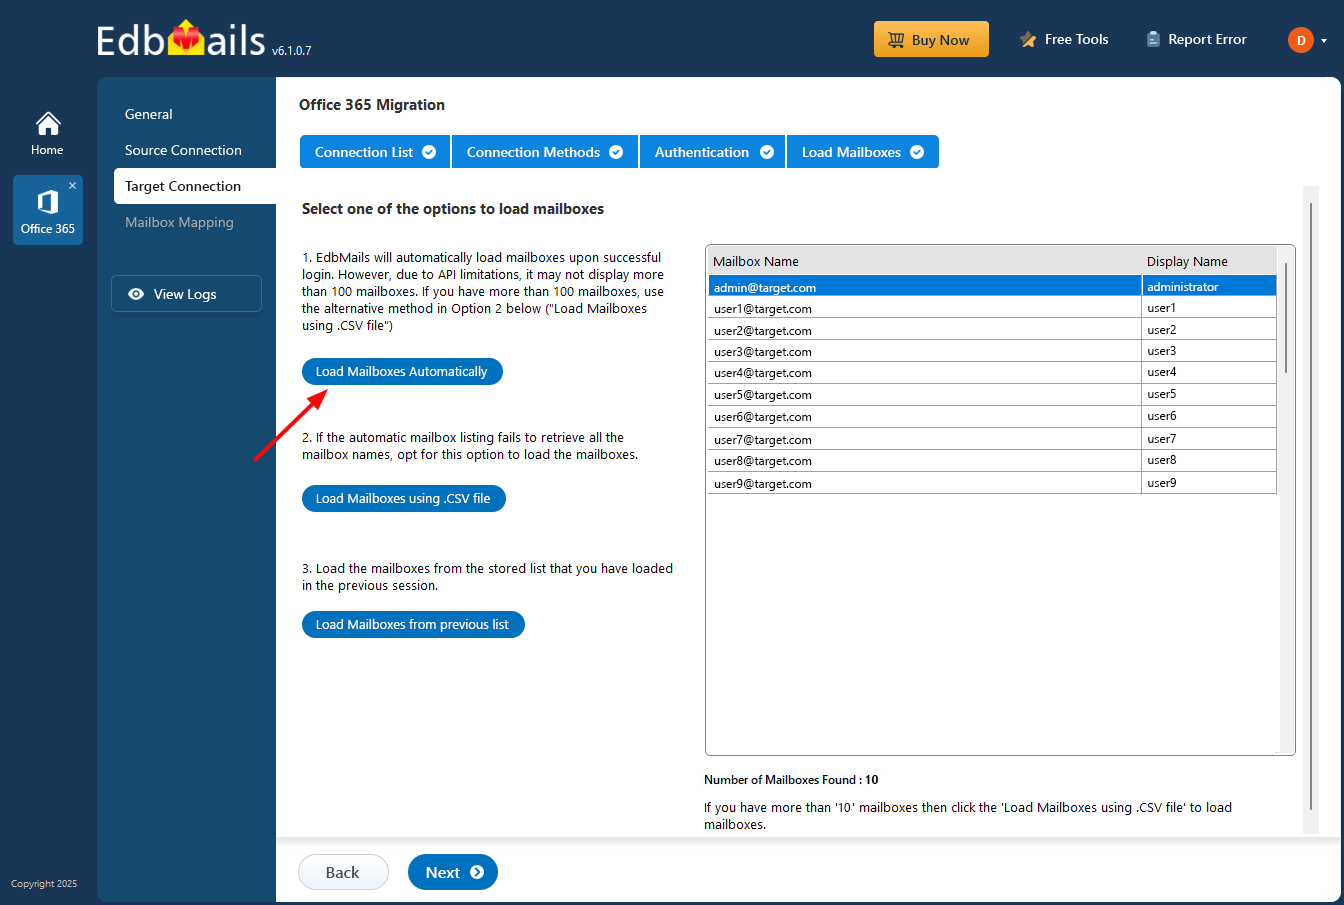
- Select one of the methods to load the mailboxes.
Step 5: Map source and target mailboxes
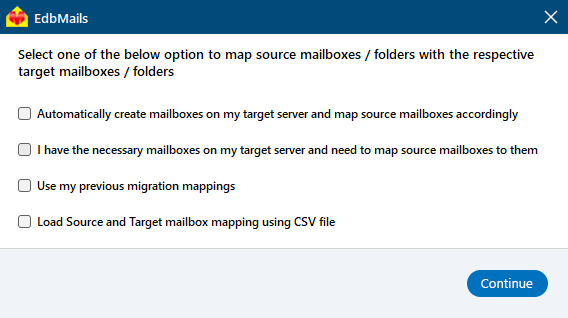
- Select the required mapping option
- If EdbMails is installed on your Exchange server, you can opt to automatically create mailboxes on the target Exchange server
Click here to know more about automatic mailbox creation.
Step 6: Start Office 365 to Live Exchange migration operation
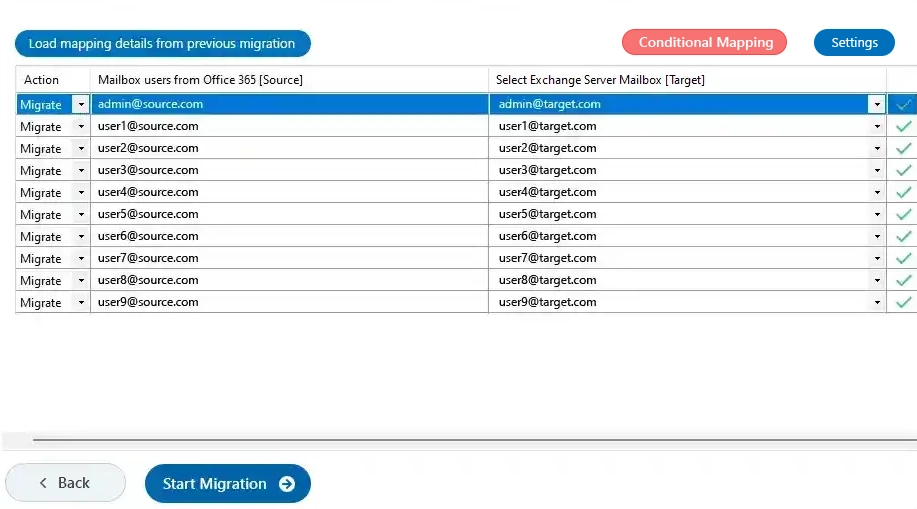
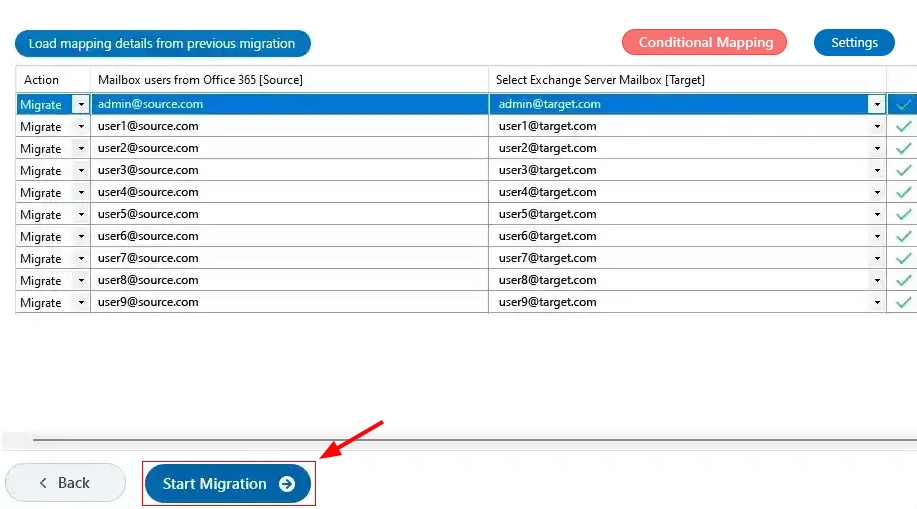
- After completing the mailbox mapping, click the ‘Start Migration’ button to initiate the process.
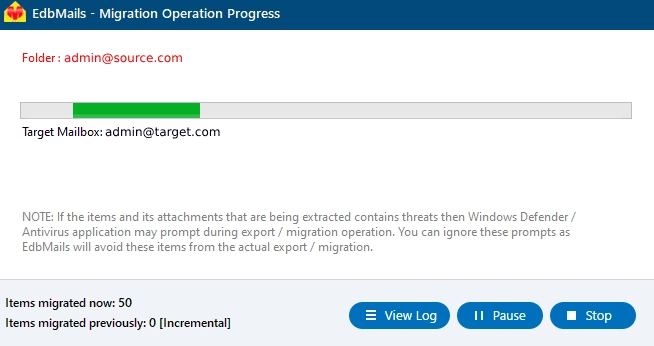
- During migration, you can track progress in real-time. Once completed, a confirmation message will appear.
- Click the 'View Log' button to access the migration report. Also, log in to your target Exchange server to verify the migrated items.
Post-migration activities
- Step 1: Update the MX records to point to the Exchange server
Update the MX records in your DNS settings to route messages to the new server after migration. Additionally, configure the Autodiscover record to ensure Outlook can connect to the migrated mailboxes properly.
- Step 2: Create a new Outlook profile for users in the new domain
- Ensure you have the latest Outlook version installed to avoid compatibility issues.
- Configure the Outlook profile for each user in your domain if Outlook has problems connecting to Office 365 mailboxes.
- Configure the new server settings, such as server address, username, and password in Outlook.
- Test email flow to confirm that users can send and receive emails.
- Step 3: Remove the old Office 365 subscription plan
After the migration is successful and you have verified the data, remove the Office 365 subscription plan from the source and any domains associated if you no longer plan to use it.
- Step 1: Update the MX records to point to the Exchange server
Office 365 migration troubleshooting
See the troubleshooting solutions for Office 365 and Exchange migration. For more information related to EdbMails Office 365 migration, see frequently asked questions.
Additional resources:


