Cutover Exchange migration
Cutover migration is a method for migrating an entire on-premises Exchange server environment in a single operation. This type of migration is used when all mailbox data needs to be migrated simultaneously, rather than in stages. It is typically necessary when an organization plans to transition its entire workforce to Office 365 in a single phase, making it suitable for small to medium-sized enterprises (SMEs) that have manageable data volumes and want to avoid prolonged migration timelines. A cutover migration is often chosen when there is a need to decommission the on-premises Exchange server entirely or when rapid migration is required to avoid long-term coexistence between environments. EdbMails Exchange migration software provides comprehensive support for cutover migration, making it easier to manage and execute.
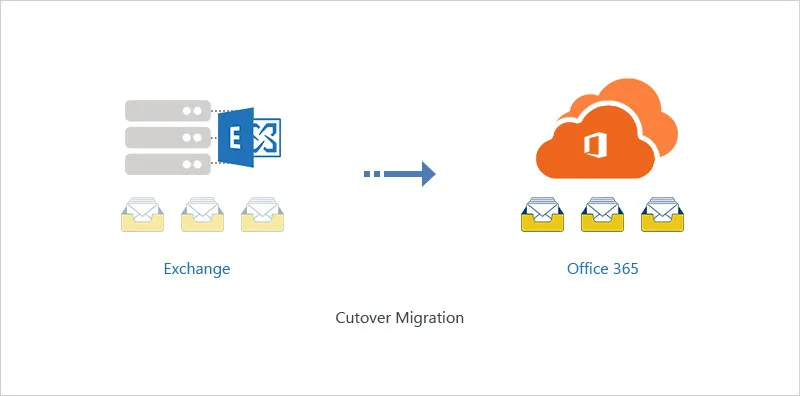
With EdbMails, users can migrate data from Exchange 2003, 2007, 2010, 2013, 2016, or 2019 to Office 365, handling the entire operation with minimal configuration. The software is designed to migrate complete mailboxes, public folders, archive mailboxes, shared mailboxes etc. ensuring a complete data transfer
Strategic scenarios for Exchange cutover migration
In cutover migration, EdbMails simplifies the process by allowing users to select the mailboxes for migration and leave other settings at default, unless certain data types need to be excluded. Key scenarios where cutover migration becomes necessary include:
- Decommissioning on-premises servers: When an organization plans to completely move away from on-premises Exchange infrastructure and needs to transition all data at once.
- Small to medium data volume: For SMEs that do not have a large amount of data or users, cutover migration ensures a fast and effective transition without the need for complex staging or co-existence.
- Minimizing complexity: Organizations looking for a migration process that requires minimal technical overhead, particularly those that don’t have dedicated IT teams to manage extensive, phased migrations.
Steps to perform Exchange cutover migration using EdbMails
- Step 1: Install EdbMails Exchange migration software setup
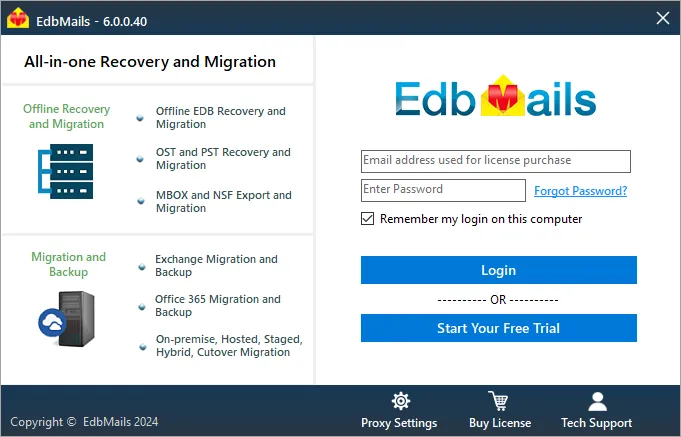
- Download EdbMails and install the application on a computer running the Windows operating system that can be connected to your target Exchange servers.
- Launch the application and click either ‘Login’ using the appropriate details or ‘Start Your Free Trial’.
See the detailed list of EdbMails system requirements for Exchange migration.
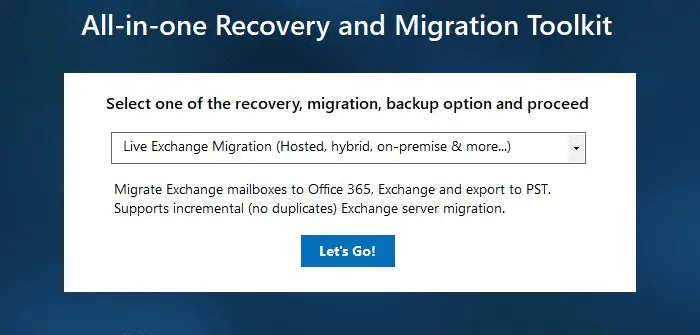
- Step 2: Select ‘Live Exchange migration’ as migration option
Choose the option 'Live Exchange Migration (Hosted, hybrid, on-premise and more..)' from the dropdown list and proceed
- Step 3: Connect to source Exchange server
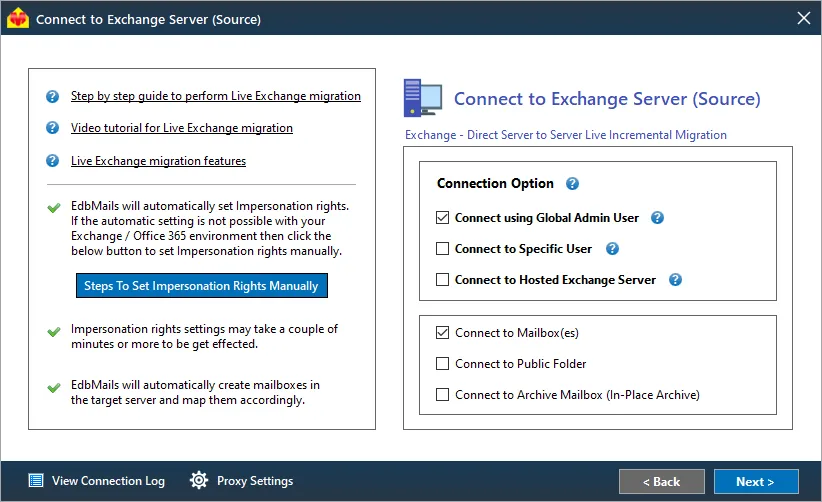
In the ‘Connect to Exchange server (Source)’ window, choose the required connection option and connection methods. If you are using a global admin account to connect to an Exchange server, ensure to set impersonation rights on both source and the target servers.
Click here for the details about different Exchange server connection methods supported by EdbMails.
With EdbMails, you can migrate mailboxes, public folders, and archive mailboxes from the source Exchange to the target server.
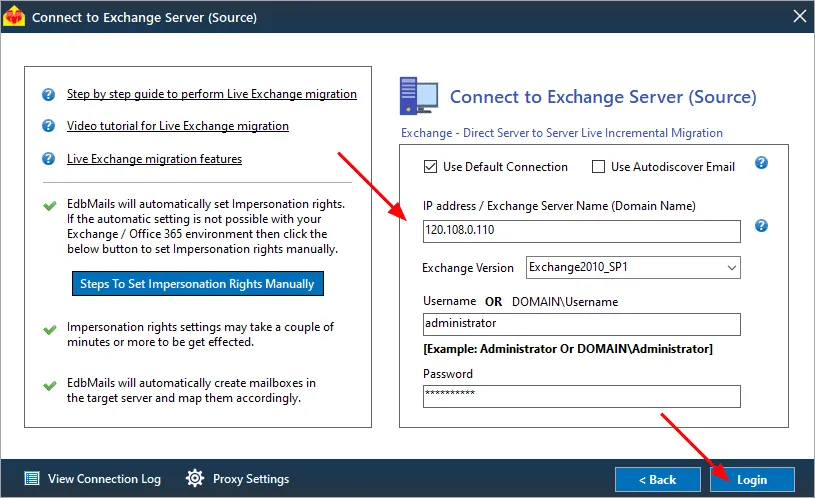
Enter the source Exchange server details and click the ‘Login’ button
Tip: EdbMails supports ‘Default Connection’ where you specify the Exchange server name and Exchange version, or the ‘Autodiscover Email' option where you directly login with the user credentials.
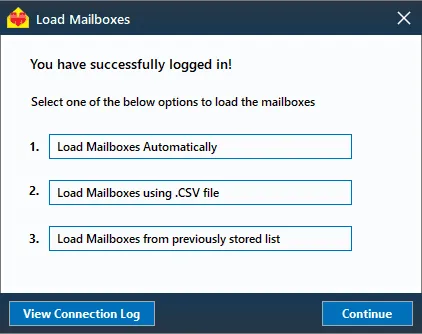
Once you successfully logged into your source server, choose the option to load the mailboxes. EdbMails can automatically load the mailboxes. Alternatively, you can manually load the mailboxes using a CSV file.
- Step 3: Select the mailboxes for migration
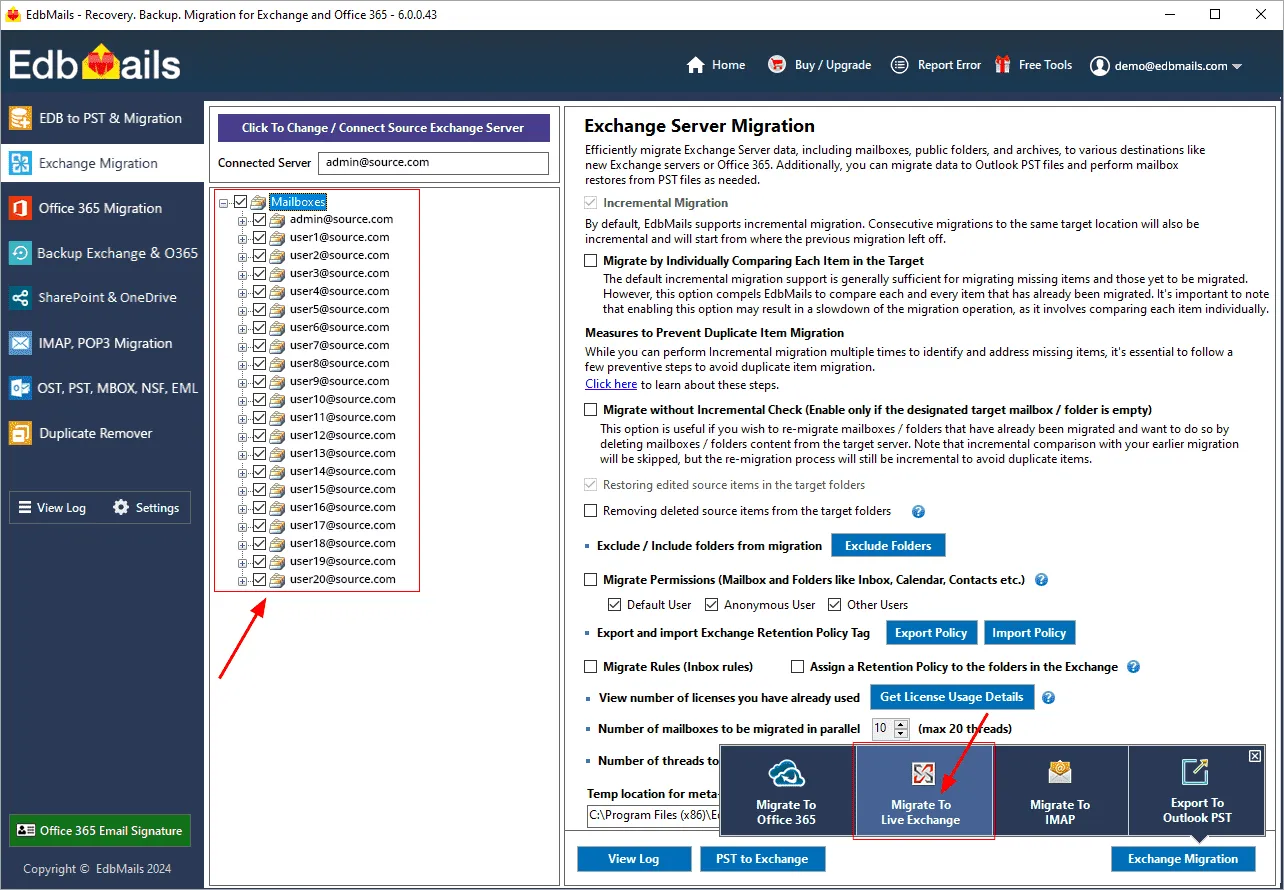
Select the mailboxes from the source Exchange server that you want to migrate
Tip: If this is the first time you’re migrating with EdbMails, the migration is a full migration. On subsequent migrations from the same source to the target, the migration is incremental. If you have duplicate emails in your source server, you can remove them with the Exchange Duplicate remover tool before the migration.
Click ‘Migrate to Live Exchange’ and proceed to set up the connection with the target server.
- Step 4: Connect to target Exchange server
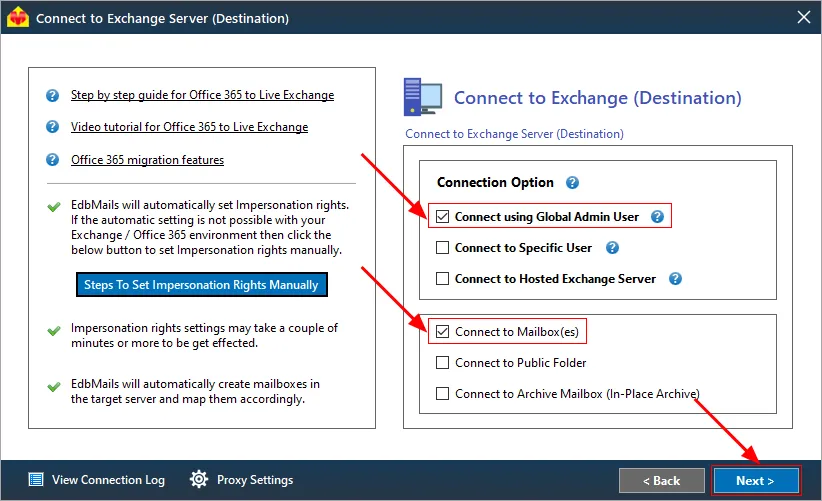
In the 'Connect to Exchange server (Destination)' window, choose the connection option and method.
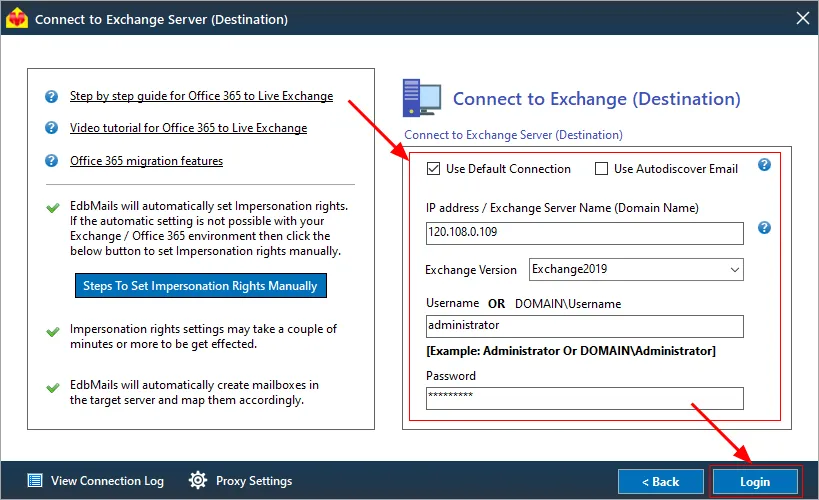
Enter the target Exchange server details and click the ‘Login’ button
Once you've successfully logged in, choose the required option for loading the target Exchange server mailboxes.
- Step 6: Map the source and target Exchange server mailboxes
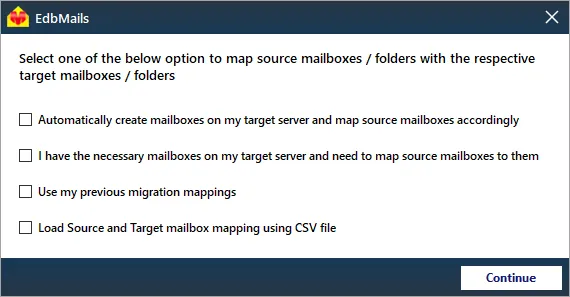
Select the required mapping option
If you have installed EdbMails on your Exchange server, you can choose to automatically create mailboxes on the target Exchange server.
Click here to know more about automatic mailbox creation.
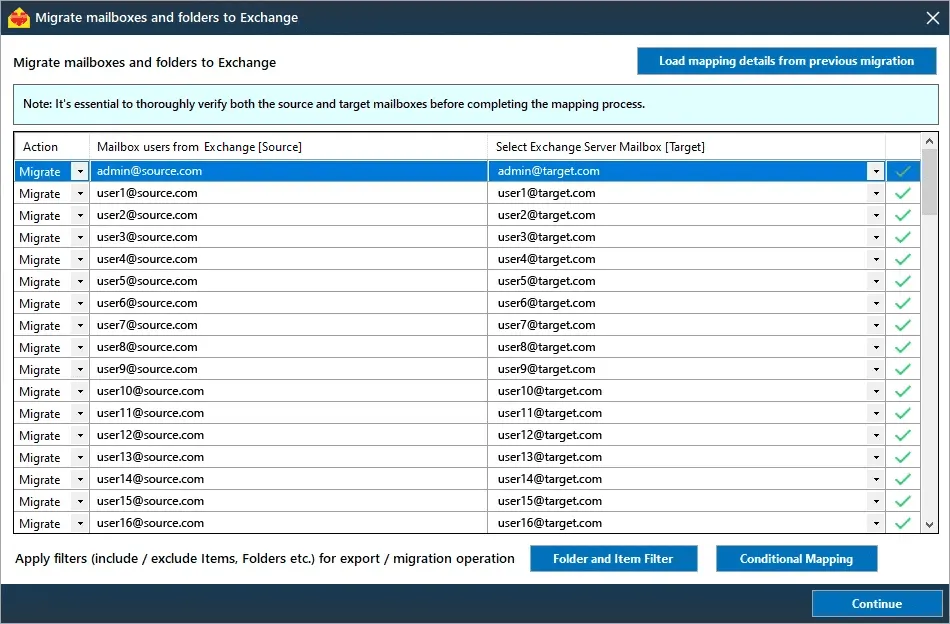
EdbMails automatically maps mailboxes between the source and the target Exchange servers. This functionality proves especially helpful when migrating a significant number of mailboxes, ultimately saving you time in the process.
Click the ‘Folder and Item Filter’ button to apply a filter to your migration. For example, you can migrate data only within a specific date range by applying a date filter. You can also exclude standard and custom folders from the migration.
- Step 7: Start Exchange cutover migration
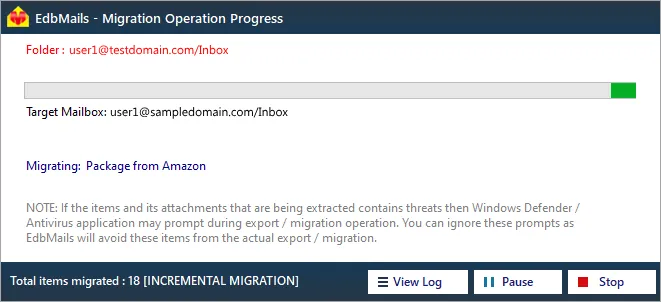
Once mailbox mapping is complete, click the ‘Continue’ button, enter a job name, and proceed. After the migration is successfully completed, EdbMails displays a completion message. Click the 'View Log' button to review the migration report. Additionally, log in to your target server to verify that items such as emails, calendars, and contacts have been migrated.
- Step 1: Install EdbMails Exchange migration software setup
Post migration tasks
- Step 1: Update the MX records to point to Exchange server
To receive messages on the target Exchange server, change the DNS records known as MX records to enable email to work with the new server you have migrated to. In addition, configure the Autodiscover record to allow Outlook to connect to the migrated mailboxes.
- Step 2: Create a new Outlook profile for users in the new domain
Configure the Outlook profile for each user in your domain if Outlook has problems connecting to the new Exchange server.
- Step 3: Decommission and uninstall Exchange server
Uninstall and decommission the source Exchange server after you finish the migration.
- Step 1: Update the MX records to point to Exchange server

