123 Reg to Office 365 Migration
Migrating from 123 Reg email to Microsoft 365 (formerly Office 365) is a smart step for businesses looking for a more powerful, scalable, and feature-rich communication solution. 123 Reg, a well-known UK domain registrar and email hosting provider, delivers reliable email services mainly designed for small businesses and custom domain use. However, as organizations expand, basic email hosting is often not enough to meet growing needs for collaboration, flexibility, and enhanced security.
In contrast, Microsoft 365 offers a complete range of productivity applications built to support organizations of every size. It combines Outlook, Teams, OneDrive, and SharePoint with advanced security, compliance, and collaboration capabilities, providing the control and dependability businesses need to manage remote work, meet regulatory standards, and achieve long-term digital transformation objectives. These capabilities make Microsoft 365 a strong choice for companies that need more than basic email services. Users get seamless access to emails and shared documents in one connected environment, while administrators benefit from centralized management of users and security settings. With stronger reliability, smooth integration, and enhanced email management features, moving from 123 Reg to Microsoft 365 delivers improved efficiency, greater flexibility, and lasting business value.
Migrating email from 123 Reg to Office 365 can involve several technical challenges that must be addressed to ensure a smooth transition. Mailbox size limitations may arise, particularly if the source accounts contain large attachments or extensive archived data, legacy data formats, and the need to maintain email integrity throughout the process. Updating DNS and custom domain records must be done with care to delivery issues or service interruptions. Transferring data from older IMAP or POP3 protocols also requires proper handling to ensure that every email, attachment, and folder structure is accurately preserved.
To address these issues, it’s essential to perform a thorough pre-migration assessment, ensure proper domain and mailbox preparation, and use a reliable migration tool that automates data transfer while minimizing disruption. A structured approach not only reduces manual effort but also guarantees a secure, accurate, and seamless transition to Office 365.

EdbMails IMAP migration is a Microsoft-partnered software that provides a direct and seamless migration from 123 Reg’s IMAP server to Office 365. The application ensures that all emails, folders, and metadata are accurately transferred while addressing key migration challenges. One of the key advantages of EdbMails is its Delta (Incremental) Migration feature, which ensures that after the initial synchronization, only new or modified items are migrated. This not only prevents duplicates but also significantly reduces migration time and bandwidth usage. With advanced filtering options , you can control the migration by filtering emails by date, subject, or folder, ensuring you migrate only the data you need. Its automated mailbox mapping eliminates manual errors, accurately aligning mailboxes from 123 Reg to Office 365, while its step-by-step wizard guides you through the entire process. This comprehensive solution ensures a smooth, reliable, and efficient migration to Office 365, even for non-technical users, minimizing disruption and maximizing productivity.
User Query
"We purchased a web host and email together from 123 Reg and now want to migrate only our email to Office 365 while retaining the web host. We also have the requirement that the email domain remain 123 Reg while receiving emails in our Office 365 account. In other words, how do we keep the same email domain name as 123 Reg email? Thank you for any input."
123 Reg to Office 365 Migration Planning
Before you start to migrate email from 123 Reg to Office 365, you must first create a detailed plan outlining how you intend to carry out the operation. Ensure that your data transfer is secure, complete, and causes no disruption to business operations.
Follow the checklist below to prepare effectively for the migration process:
- Define migration scope : Identify and document all items you intend to migrate, including emails, attachments, and folder structures, to ensure a complete and organized transition.
- Verify administrative access : Ensure that you have Global Administrator privileges for your Office 365 (target server). This access is required to automatically register the EdbMails application in Azure Active Directory.
If Global Admin access is not available, you can still proceed by using the manual registration method within the EdbMails application.
- Communicate with users : Inform all users about the upcoming migration and its possible effects. Encourage them to back up their mailbox data or export copies for personal reference.
- Gather connection details : Make sure to have the 123 Reg IMAP server connection details, including the IMAP server host name, port number, and login details. This information is essential for connecting the migration tool to the source environment.
- Prepare a CSV file : If you are migrating multiple mailboxes from 123 Reg, download the sample CSV from EdbMails application and fill in the details.
- Perform a pilot migration : Run a test or pilot migration with one or two mailboxes first. This helps confirm that the connection, data transfer, and mailbox mapping work correctly before executing the full migration.
To retain your 123 Reg domain name while hosting your emails on Office 365, you simply need to update your DNS (MX and Autodiscover) records at 123 Reg. This change redirects email flow to Office 365 while keeping your website hosted at 123 Reg.
Your web hosting remains unaffected, and your users can continue sending and receiving emails using their existing domain.
123 Reg to Office 365 Migration Prerequisites
Before starting the migration from 123 Reg to Office 365, ensure that you’ve completed the following pre-migration requirements. Proper preparation will help prevent issues such as connection errors, authentication failures, or incomplete data transfers during migration.
- Identify your 123 Reg IMAP server details : Find the IMAP server name of your 123 Reg server. You can find this information from your server’s dashboard settings or by connecting your email system to Outlook.
- Collect user credentials and connection information : Have the users email address, passwords, IMAP hostname and port number.
- Prepare target mailboxes in Office 365 : Create mailboxes on your target Office 365 server. To create target mailboxes, select the below option in EdbMails.
- If you’re using EdbMails IMAP Migration, you can use the automatic mailbox creation feature, which sets up target mailboxes for you.
- If you prefer to create them manually, refer to the links below.
- Add and verify your custom domain in Office 365 : If you have a custom email domain from your hosting provider to which you want to migrate and receive emails, you must add and verify the domain on Office 365.
Steps to add a custom domain to Office 365 and Steps to add DNS records to connect your domain.
- Configure Office 365 to handle large messages : By default, Microsoft 365 restricts message sizes, which can affect mailboxes with large attachments. To avoid migration errors,
Follow the steps to increase the message size on Office 365 to 150MB and see tips to optimize IMAP migration to Exchange online.
Steps to Migrate email from 123 Reg to Office 365
Step 1: Download and Install EdbMails software
- Download and install EdbMails on your computer.
- Launch the EdbMails application on your computer.
- Enter your registered email ID and password, then click ‘Login’. If you are using EdbMails for the first time, select ‘Start Your Free Trial’ to begin with the trial version.Note: The trial edition provides access to all major features and lets you migrate up to 30 items per folder. To enable unlimited migration, purchase IMAP Migration license from the official EdbMails website.After completing the purchase, close the application and reopen it. Log in again with the same email ID and password used for the purchase to activate your license successfully.

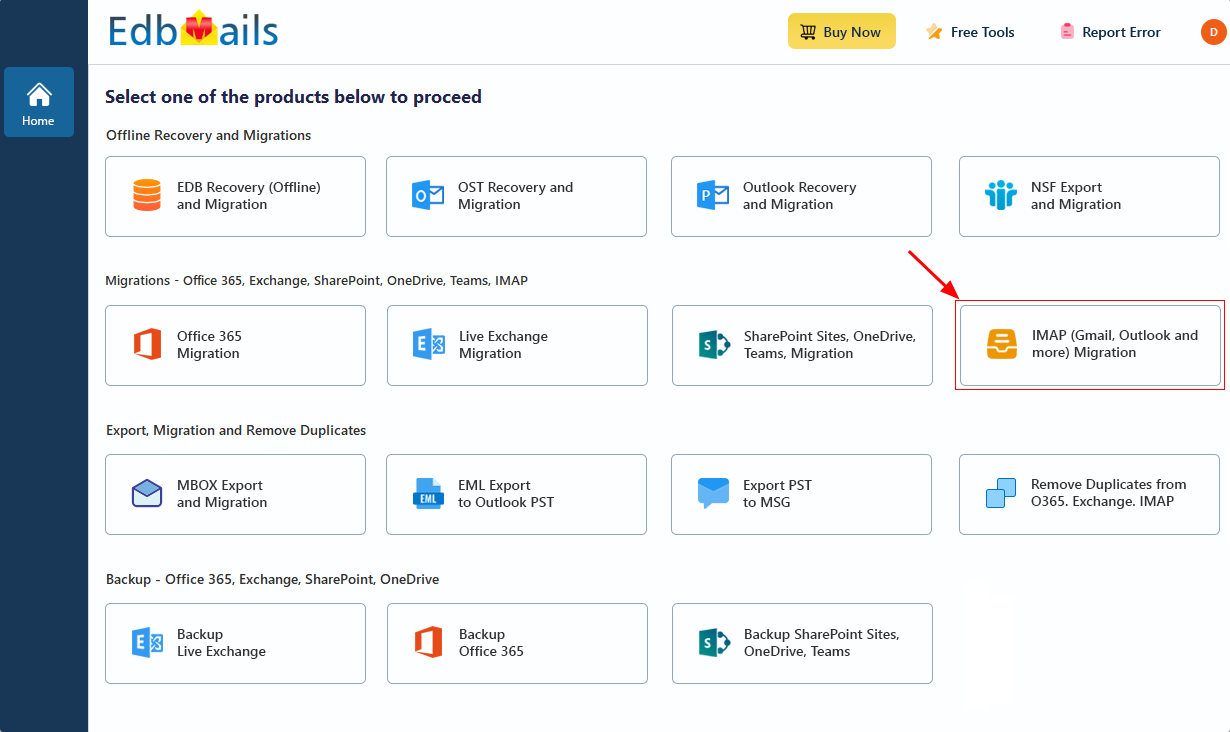
- Select the option ‘IMAP (Gmail, Outlook & more) Migration’.
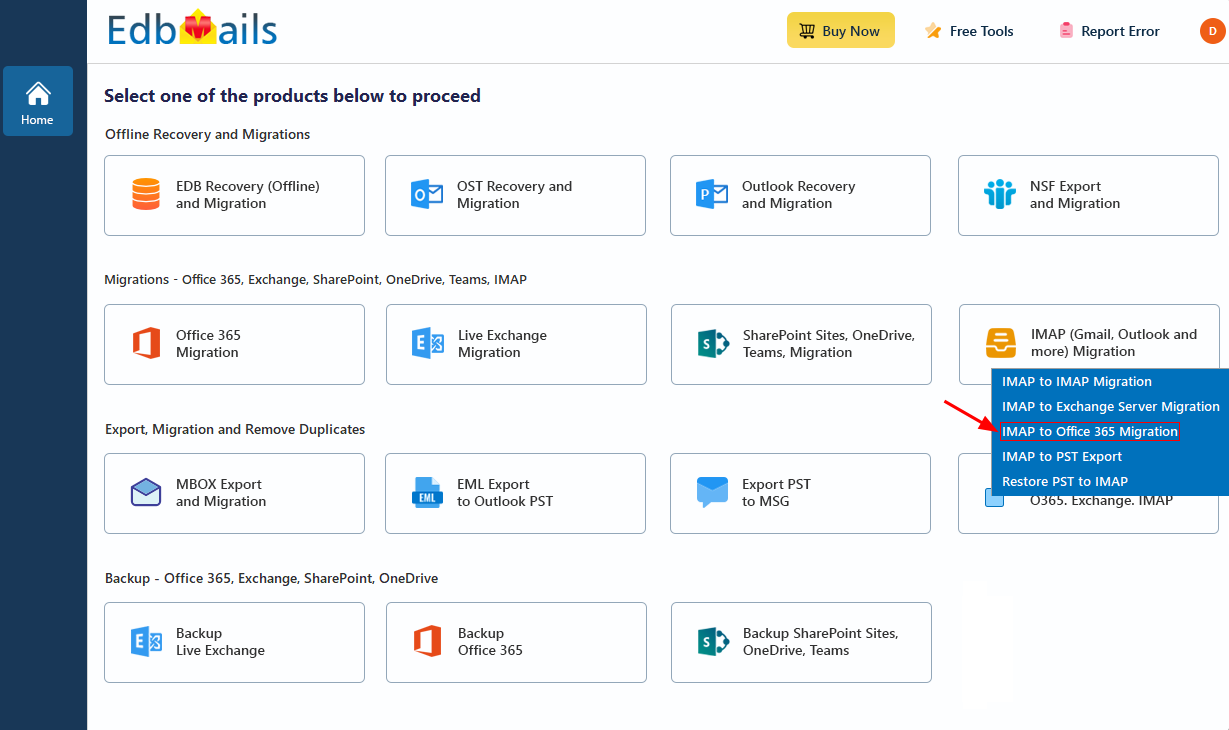
- Select ‘IMAP to Office 365 Migration’.
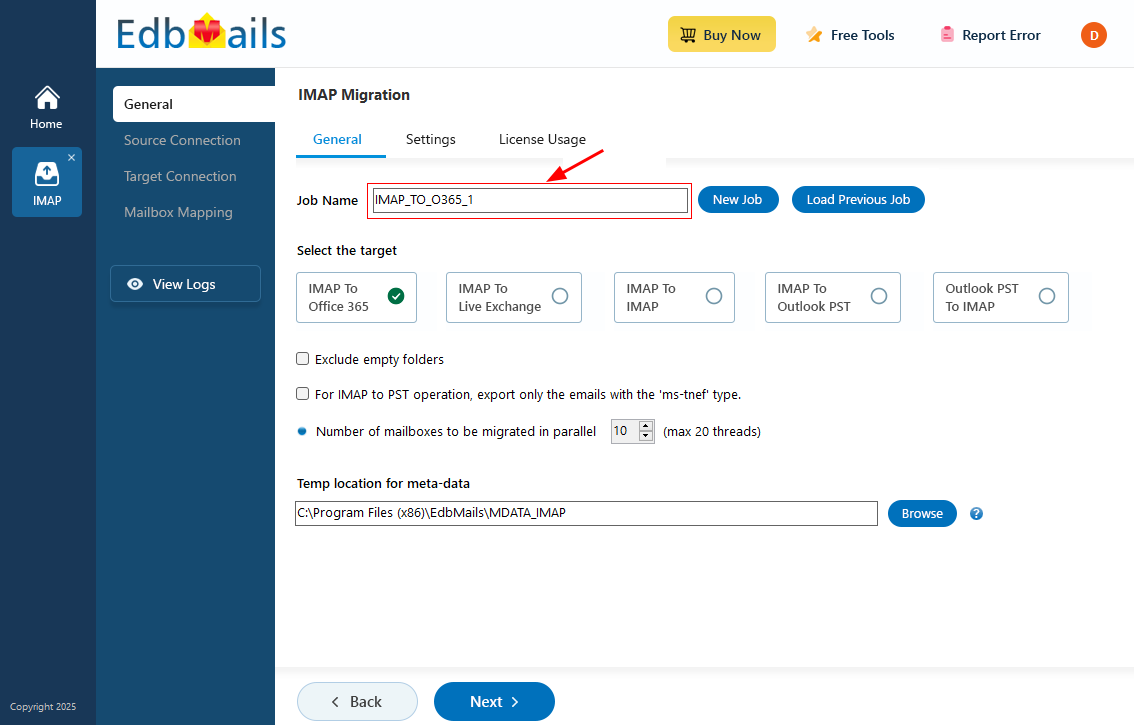
- You can proceed with the default job name, or click on ‘New Job’ to assign a custom name based on your migration preferences.
- Download and install EdbMails on your computer.
Step 2: Connect to source 123 Reg server
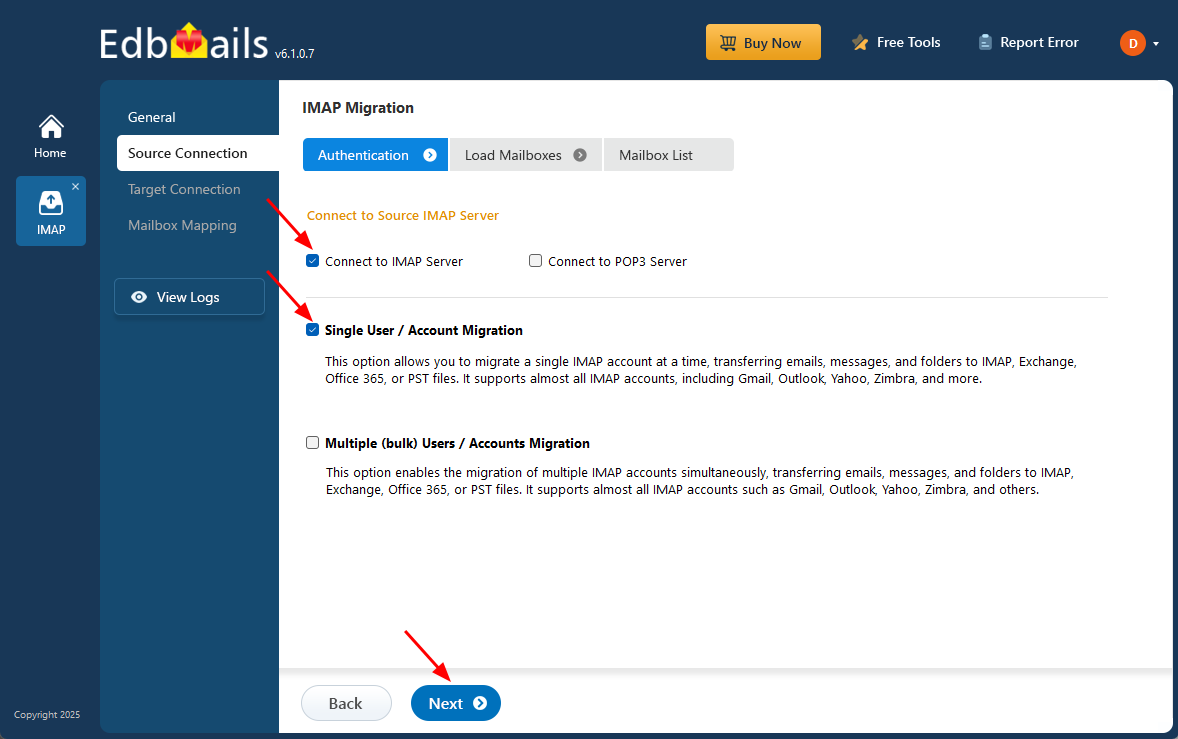
- To connect a single 123 Reg account for migration, click ‘Single User / Account Migration’, choose the suitable connection option such as ‘Connect to IMAP Server’ or ‘Connect to POP3 Server’. Click ‘Next’ to proceed.
- Provide 123 Reg Mail Server Details
On the EdbMails IMAP configuration screen, enter the necessary connection information for your 123 Reg mail server. Make sure the hostname, port number, and authentication credentials are correct to ensure a secure and successful connection.
IMAP Hostname: imap.123-reg.co.uk
Port: 993 (SSL/TLS enabled for a secure connection)
- Then click the ‘Login’ button to proceed.

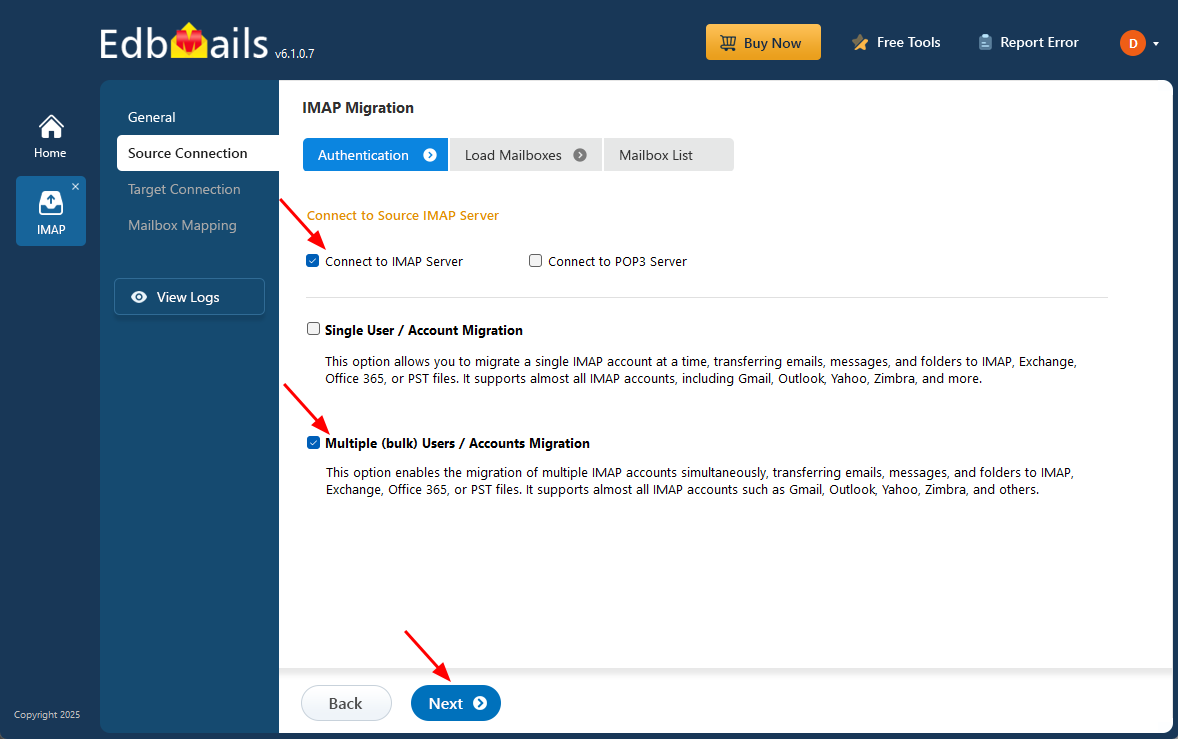
- To migrate multiple 123 Reg mailboxes at once, select ‘Multiple (bulk) Users/Accounts Migration’, choose the suitable connection method such as ‘Connect to IMAP Server’ or ‘Connect to POP3 Server’.
- Then proceed by clicking ‘Next’.
Steps to connect to single and multiple users in EdbMails IMAP migration
- Click ‘IMAP Migration CSV File’. It will load the sample CSV file to your local drive.
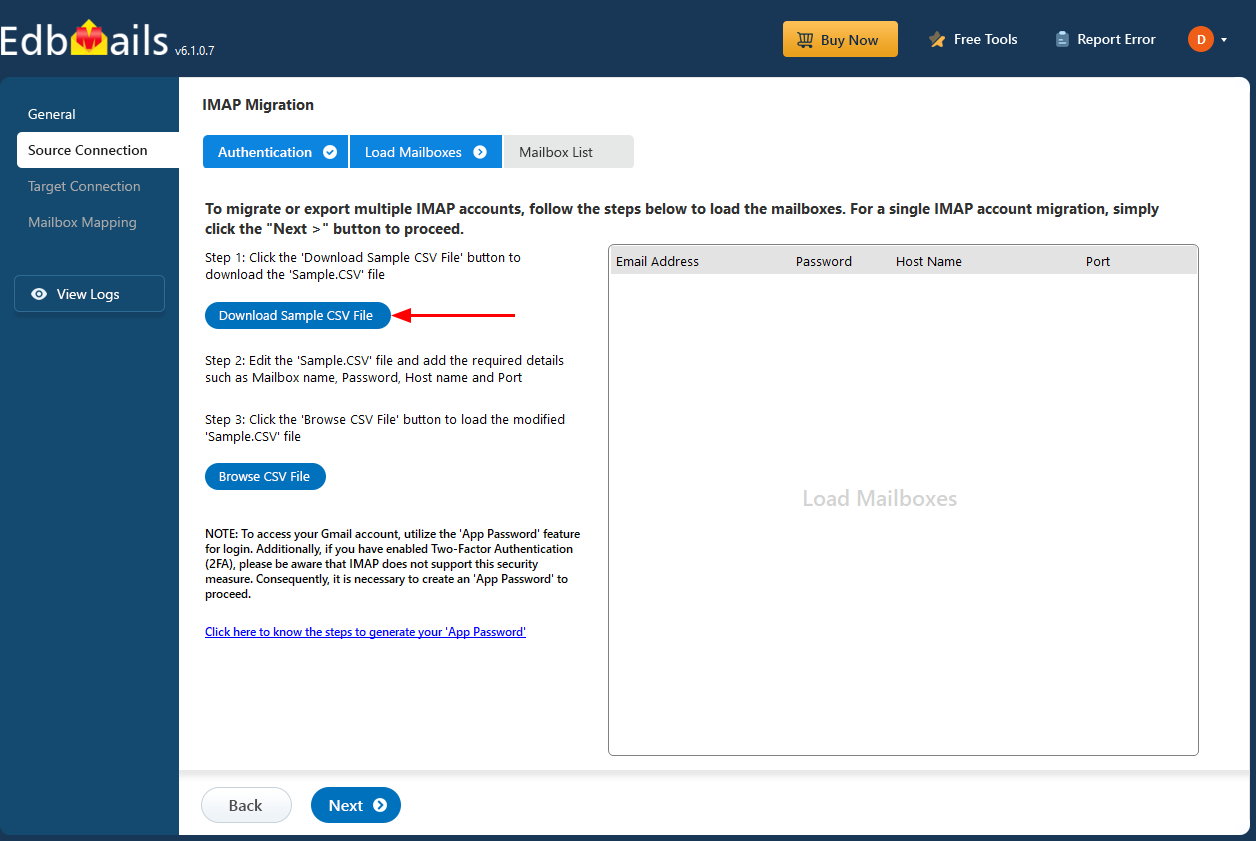
- Open the CSV file and fill in the necessary details, including the email address, password, IMAP server hostname, and port number for each mailbox. After completing the entries, save the file to proceed with the migration.

- Once you've finished updating the CSV file with the required information, save and close it.
- Then, click the 'Load Modified CSV File' button, open the CSV file and click ‘Next’ to proceed.

- To connect a single 123 Reg account for migration, click ‘Single User / Account Migration’, choose the suitable connection option such as ‘Connect to IMAP Server’ or ‘Connect to POP3 Server’. Click ‘Next’ to proceed.
Step 3: Select source 123 Reg mailboxes to migrate
- Select the mailboxes or individual folders you want to migrate from 123 Reg, then click ‘Next’ to proceed with the migration process.
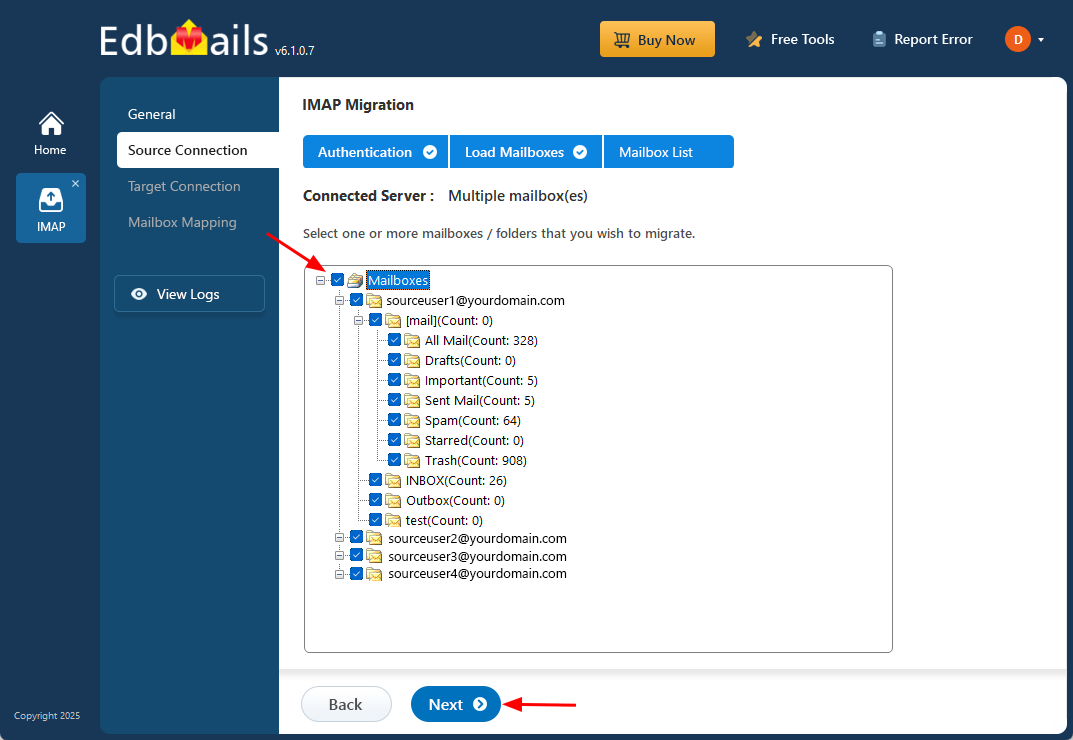
- Select the mailboxes or individual folders you want to migrate from 123 Reg, then click ‘Next’ to proceed with the migration process.
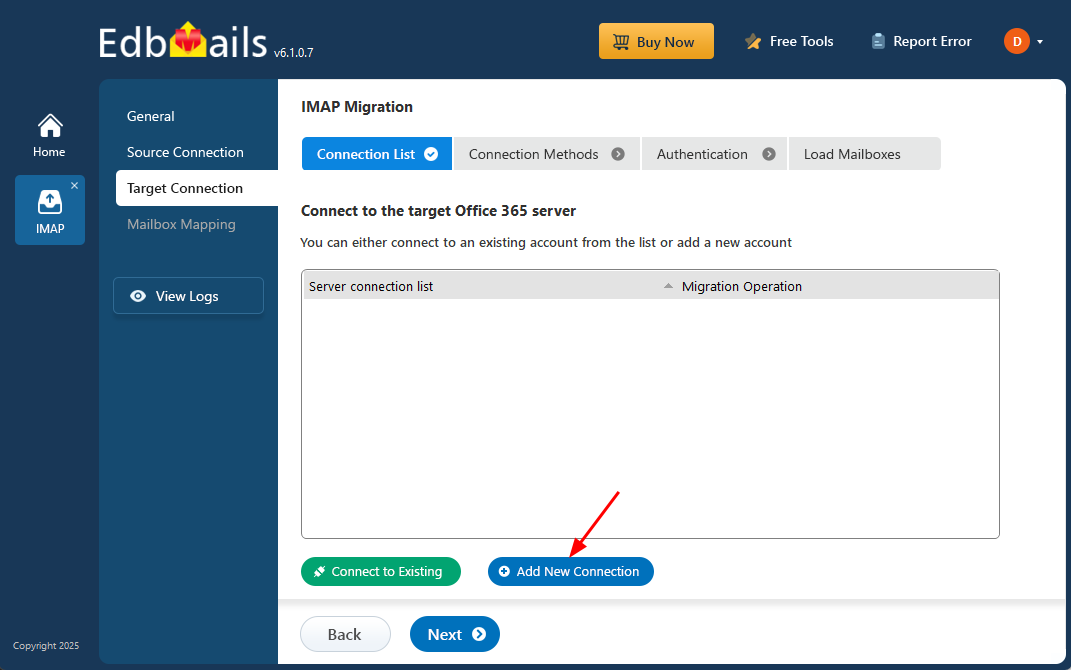
Step 4: Connect to target Office 365 server
- Click on ‘Add New Connection’ to set up a connection with your target Office 365 account.
- If a connection has already been configured, simply select it from the list and choose ‘Connect to Existing’ to continue.
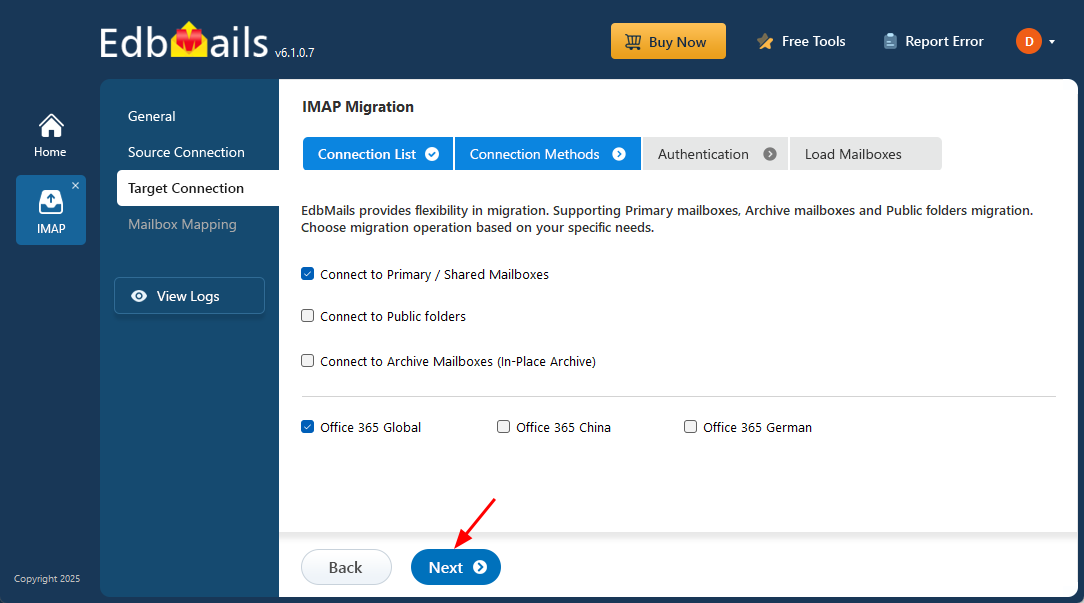
- EdbMails provides versatile migration options that let you migrate primary mailboxes, archive mailboxes, and public folders using one centralized platform
- Select your preferred connection option based on your migration requirements, and click ‘Next’ to continue with the authentication steps.
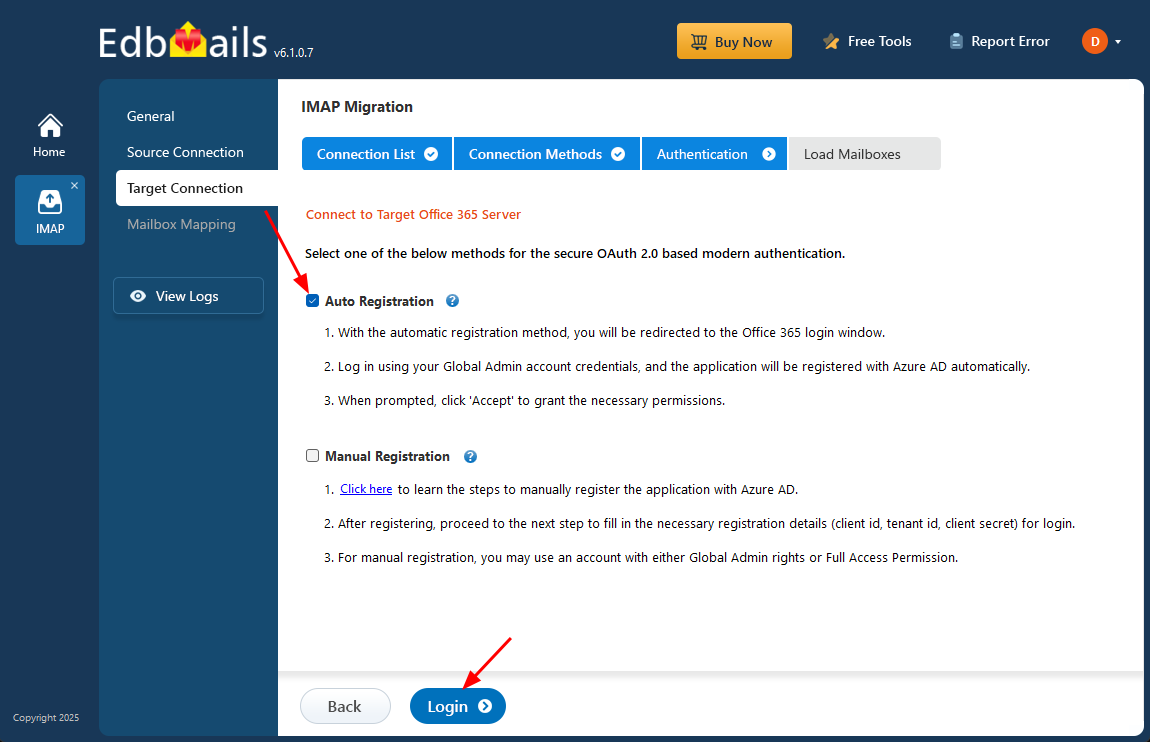
- Choose any of the available options to create a secure connection using OAuth 2.0 modern authentication:
- Select Auto Registration if you prefer a quick and smooth setup. Sign in with a Global Admin account and provide the required permissions to automatically register the application in Azure AD.
- Or choose Manual Registration if you prefer to enter the Azure AD application details yourself. This method supports both Global Admin accounts and accounts with Full Access permissions.
- Click ‘Login’ to proceed.
- Authenticate on Microsoft sign-in page.

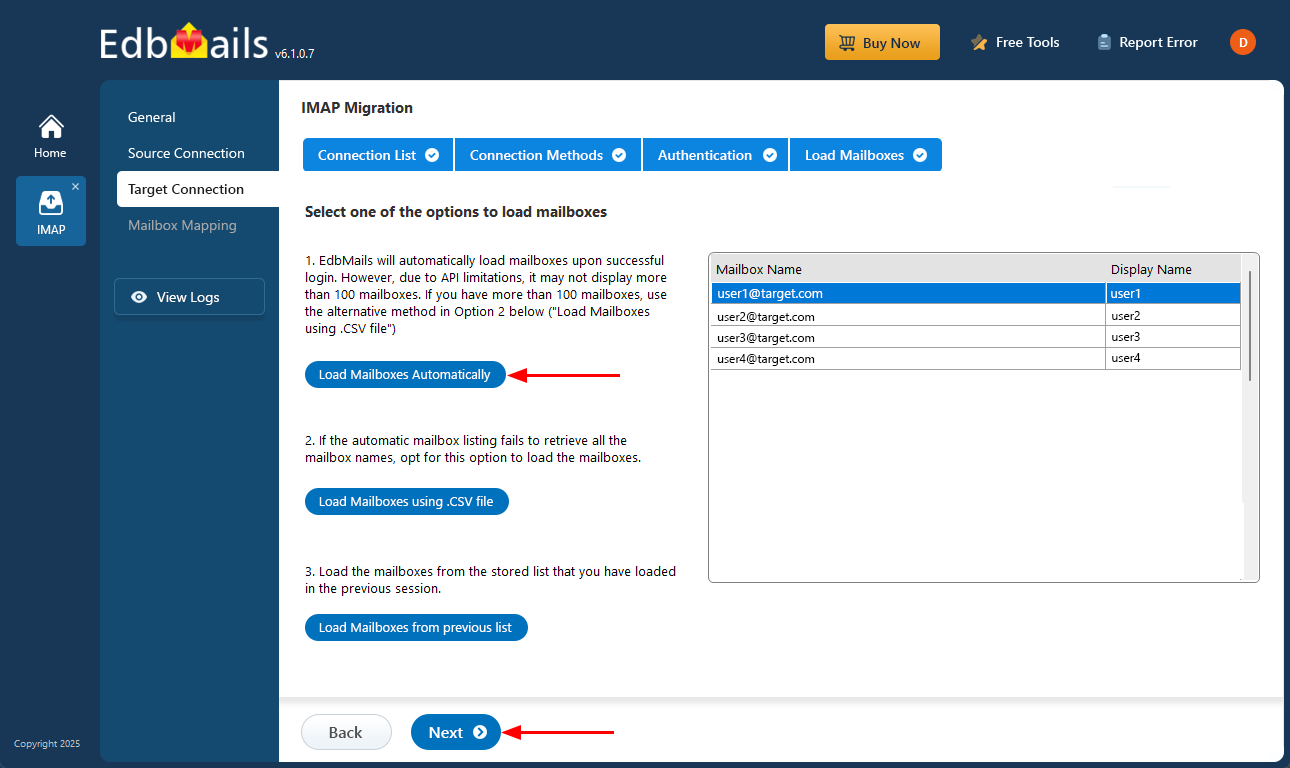
- Once authentication is completed successfully, select any one of the following options to load the mailboxes:
- i) Load Mailboxes Automatically: After logging in, EdbMails automatically detects and lists the mailboxes, making the process quick. Due to Microsoft API restrictions, only a maximum of 100 mailboxes can be displayed. If your organization contains more than 100 mailboxes, use the alternative option given below.
- ii) Load Mailboxes using CSV file: If the automatic method does not retrieve all mailbox names, choose ‘Load Mailboxes using .CSV file’ to manually upload and load the required mailboxes.
- iii) Load Mailboxes from previous list: This option allows you to load mailboxes from a previously saved list imported in an earlier session.
- Choose ‘Load Mailboxes Automatically’ and click ‘Next’ to move forward.
Step 5: 123 Reg to Office 365 Mailboxes Mapping
- Choose your preferred method to map the source mailboxes and folders to their corresponding mailboxes and folders in the target Office 365 account. This ensures that the migration is accurate and all data is transferred to the correct locations.
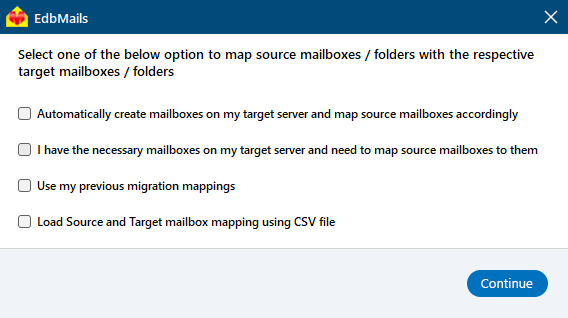
- EdbMails simplifies the migration process with automated mailbox creation for Office 365, ensuring precise mapping of mailboxes and folders from the source IMAP server automatically. This feature is crucial for large-scale migrations, optimizing the workflow and ensuring a seamless transfer to Office 365 without manual intervention.
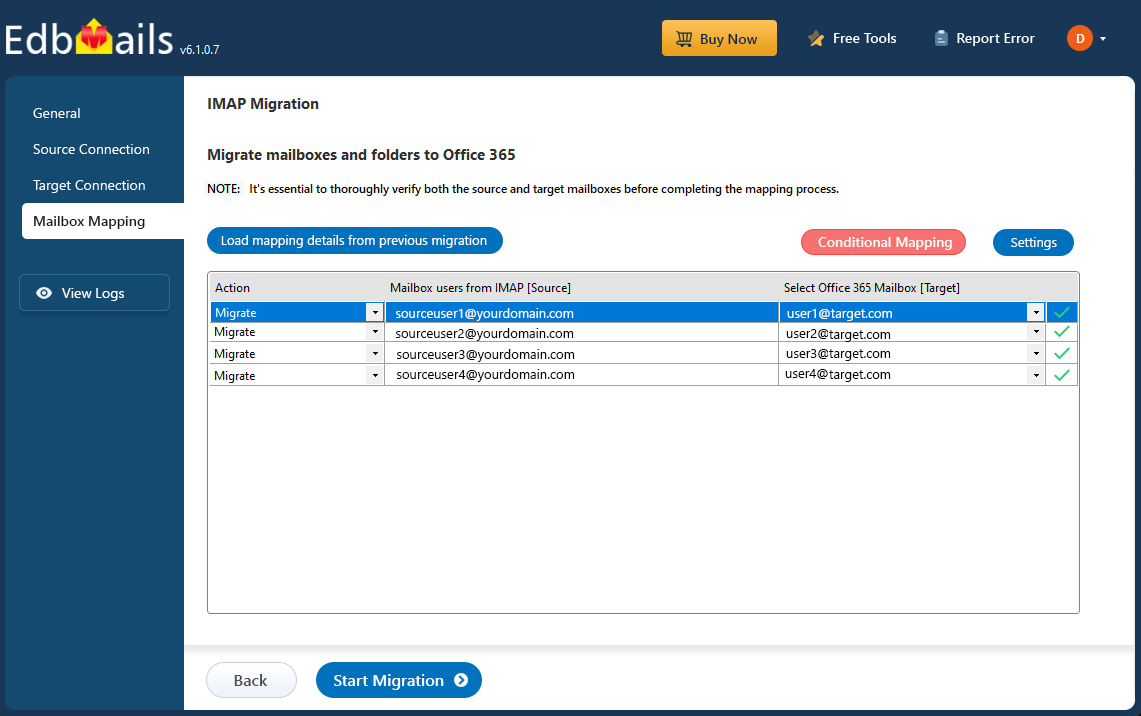
- Choose your preferred method to map the source mailboxes and folders to their corresponding mailboxes and folders in the target Office 365 account. This ensures that the migration is accurate and all data is transferred to the correct locations.
Step 6: Start 123 Reg to Office 365 migration
- Review and confirm the mailbox mapping to ensure accuracy, then click the ‘Start Migration’ button to initiate the migration process to Office 365.
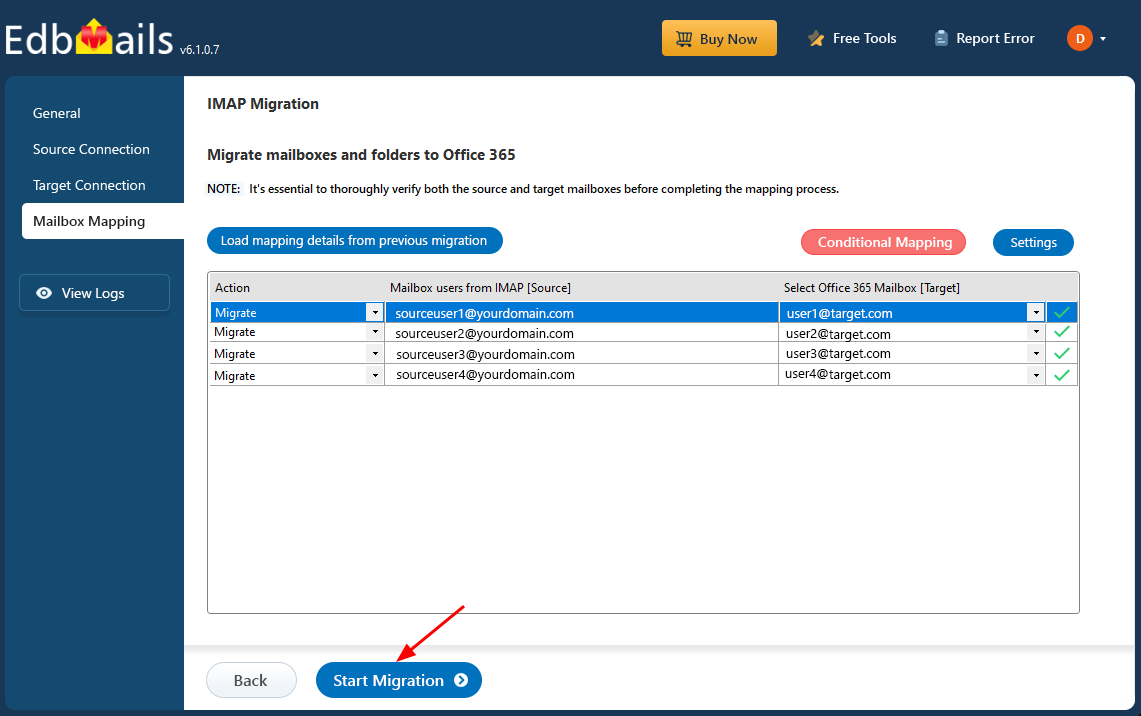
- Click the ‘View Logs’ button to access the comprehensive migration report. This report includes detailed insights such as mailbox mapping, migration summary, and the total number of items migrated for each mailbox and folder.

- Review and confirm the mailbox mapping to ensure accuracy, then click the ‘Start Migration’ button to initiate the migration process to Office 365.
123 Reg to Office 365 Post Migration Tasks
Step 1: Update MX Records to Point to Office 365
Update the MX records in your DNS settings to route incoming emails to the Office 365 mail server. This ensures that all new emails are delivered directly to your migrated mailboxes in Office 365.
Additionally, configure the Autodiscover record to enable Outlook and other mail clients to automatically locate and connect to users’ mailboxes after migration.
Step 2: Create a new Outlook profile for users in the new domain
Configure the Outlook profile for each user in your domain if Outlook has problems connecting to Office 365 mailboxes.
Troubleshooting guide for 123 Reg to Office 365 migration
Refer to the knowledge base articles for solutions to common issues. For additional details on EdbMails IMAP migration, check the frequently asked questions or reach out to our customer support team.
Benefits of EdbMails for 123 Reg to Office 365 Migration
- Easy to use Software Interface
Security is a top priority during email migration, and EdbMails addresses this with enterprise-grade protection. The software is developed using the latest security standards and protocols, ensuring end-to-end encryption and secure authentication throughout the migration process. Its intuitive and professionally designed interface further enhances user confidence, offering a reliable and secure environment with no risk of data exposure or unauthorized access.
- Bulk Mailbox Transfer
With the help of EdbMails 123 Reg mail migrator, you can migrate multiple 123 Reg server mailboxes. By loading multiple mailboxes, you may save spending unnecessary time and effort loading individual files.
- Migrate Selected Items with Additional Filter Options
EdbMails provides a number of advantages that other programmes that make similar claims to being the best never provide. The app offers the most effective method for strategically moving mailbox items. These filter options make it simple to migrate emails according to many criteria, like subject, email address, date and time range, etc.
- Maintain Folder Hierarchy & email Properties
EdbMails ensures complete preservation of all email properties during the migration process. It accurately retains attachments, subject lines, sender and recipient details, internet header information, inline images, hyperlinks, and other essential elements. Additionally, the software maintains the original folder hierarchy of your 123 Reg mailboxes, ensuring a seamless and organized transition to Office 365 without any data loss or structural changes.
- Unwavering Customer Support
EdbMails 123 Reg to office 365 migration tool is trustworthy and safe, offers free assistance throughout migration, is completely scalable, and is flexible enough to handle all of your migration needs. For any migration assistance, our migration specialists can offer free 24/7 services to guarantee your migration proceeds as planned.