Restore Exchange 2016 mailbox from Recovery database
In Exchange 2016, a Recovery Database (RDB) is designed to restore data from a backup without impacting the primary database. It allows administrators to mount a restored database and recover specific mailboxes or individual items, making it an essential tool for data restoration. Created through the Exchange Management Shell (EMS), the RDB is intended solely for recovery purposes and is not suitable for backup operations. This feature is available only in Exchange server 2016 and later versions
To efficiently restore mailboxes from an RDB, a seamless solution is required for data extraction and migration. EdbMails EDB to Live Exchange Migrator offers an ideal solution by enabling the direct migration of recovered mailboxes from the RDB to a live Exchange server. EdbMails eliminates the need for complex manual procedures, streamlining the process and ensuring reliability.
This guide provides a detailed, step-by-step approach to restore Exchange server 2016 mailboxes from a Recovery Database. Whether you're recovering a single mailbox or multiple items, EdbMails ensures smooth recovery with minimal downtime and no data loss.
Learn more about Recovery database in Exchange server
Prerequisites for recovering mailbox with RDB
Before you create the RDB, ensure that you meet the following prerequisites
- Ensure that you have the Organization Management permissions on the mailboxes. See the recipient permissions in Exchange server for creating the RDB.
- You must copy the recovered database and log files manually to the RDB folder
- You may have to perform a soft repair on the recovered database and bring it to the clean shutdown with eseutil/r.
How to restore Exchange server 2016 mailbox from recovery database?
- Step 1: Create a recovery database for Exchange server 2016
The first step in restoring Exchange server 2016 mailboxes from a Recovery Database (RDB) is to create the RDB using the Exchange Management Shell. Before creating the database, ensure you have sufficient space on your server to store the backup database and its associated log files in separate folders. To create the recovery database, use the New-MailboxDatabase cmdlet.
For example, the following command creates a recovery database named RDB1 on the mailbox server MBX1:
New-MailboxDatabase -Recovery -Name RDB1 -Server MBX1
This example demonstrates how to create a recovery database named RDB1 on the Mailbox server MBX1, specifying custom locations for the database and log files. Ensure the recovery database name matches the one from your backup, as this will be used in the restore process.
New-MailboxDatabase -Recovery -Name RDB1 -Server MBX1 -EdbFilePath "C:\Recovery\RDB1.EDB" -LogFolderPath "C:\Recovery\RDB1"
See how to create a recovery database in Exchange server 2016 and 2019
Do not mount the recovery database yet. You must restore a database and corresponding log files from a previous backup.
- Step 2: Recover and restore the backup Exchange server 2016 database
Once the Recovery Database (RDB) is created, the next step is to restore the Exchange server 2016 backup to it. Using Windows Server Backup, copy both the database file and its corresponding log files into the folder specified for the RDB. The following steps provide a quick overview of how to perform this restore using Windows Server Backup:
- Start the Windows Backup Recovery Wizard
- Specify and select the location type of the backup
- Select the backup location and name of the server
- Apply the date filter to restore the database and log files
- Select the files and folders option to restore to recovery databases
- Browse through the Available Items tree to find the files and folders you want to recover
- Select the Exchange database file and restore it to the location you specified when creating the Recovery Database in the earlier step.
- Repeat the same step to restore the log files to the same location.
- Step 3: Mount the restored database to the Exchange server
The database file which you recovered from Windows backup will be in the Dirty Shutdown state. To mount it to the RDB, you must first bring it to the Clean Shutdown state.
- Start Eseutil from the Exchange server directory and run the following cmdlet
Eseutil /r E01 /l E:\Databases\RDB1 /d E:\Databases\RDB1
Eseutil /r performs soft recovery on the database
- E01 is the log file number that is required along with the database.
- The first path (/l) indicates the path to place the log files.
- The second path (/d) indicates the path of the recovery database.
Run the cmdlet eseutil/mh to verify if the database is in the Clean Shutdown state
- Restart the Microsoft Exchange server Information Store
Restart the Microsoft Exchange server Information Store
Restart-Service MSExchangeIS
- Verify if the mounted database contains the mailboxes you want to restore
Get-MailboxStatistics -Database
| Format-Table DisplayName,MailboxGUID -AutoSize
- Start Eseutil from the Exchange server directory and run the following cmdlet
- Step 4: Perform Mailbox Restore Request in Exchange server 2016
Once the backup database is successfully mounted to the Recovery Database, the next step is to restore the mailboxes to their original location on the Exchange server. For example, you can use the following cmdlet to restore John Doe’s mailbox directly to his archive mailbox.
New-MailboxRestoreRequest -SourceDatabase DB1 -SourceStoreMailbox "John Doe" -TargetMailbox johndoe@mail.com -TargetIsArchive
The following cmdlet restores the mailbox of Dave Smith to the target mailbox
New-MailboxRestoreRequest -SourceDatabase DB1 -SourceStoreMailbox "Dave Smith" -TargetMailbox davesmith@mail.com
See how to restore data using recovery database with EMS
Run the following cmdlet on a regular basis to check the status of the mailbox restore completion.
Get-MailboxRestoreRequest -Name "John Doe" | Get-MailboxRestoreRequestStatistics
- Step 5: Remove the Recovery Database from Exchange server 2016
After the restore operation is complete perform the following steps
- Run the following cmdlet to remove the mailbox restore request
Get-MailboxRestoreRequest -Status Completed | Remove-MailboxRestoreRequest
- Dismount the recovery database with the following cmdlet
Dismount-Database RDB1
- Finally, remove the recovery database that you created
Remove-MailboxDatabase RDB1
- Run the following cmdlet to remove the mailbox restore request
- Step 1: Create a recovery database for Exchange server 2016
Limitations of the Recovery database:
- A Recovery database can be used only for the restore operation and cannot be used to take a backup of an Exchange database file (EDB).
- The RDB can be created only in Exchange server 2016 and later.
- Restoring your mailbox data with the RDB requires extensive knowledge of PowerShell cmdlets.
- This method may result in data loss if you use incorrect commands
- The Recovery Database method will not work if Eseutil fails to restore the database to a Clean Shutdown state.
Recover and restore mailboxes in Exchange server 2019, 2016, 2013 and 2010 using EdbMails
If you need to restore mailboxes from an offline or corrupted EDB file in Exchange server versions 2019, 2016, 2013, 2010 and 2007, then EdbMails Exchange Recovery is a reliable and efficient solution. As a Microsoft-partnered tool, it works independently of the original Exchange server or Active Directory, making the recovery process more flexible. Unlike traditional methods, EdbMails does not require a prior Windows backup. You can simply select any EDB file and begin the recovery process—whether you want to export mailboxes to PST format or migrate them directly to a Live Exchange server. Let us look at the steps to restore Exchange server mailboxes with the EdbMails application.
Step 1: Download and install EdbMails Exchange recovery tool- Download and install EdbMails on a computer that is connected to both the source and target environments. Alternatively, you can perform the recovery and migration process by installing EdbMails on any non-Exchange server computer as well.
- Launch the application and click on ‘Login’ to access your account. If you haven't registered yet, simply click on ‘Start Your Free Trial’ to activate your trial and explore the features.
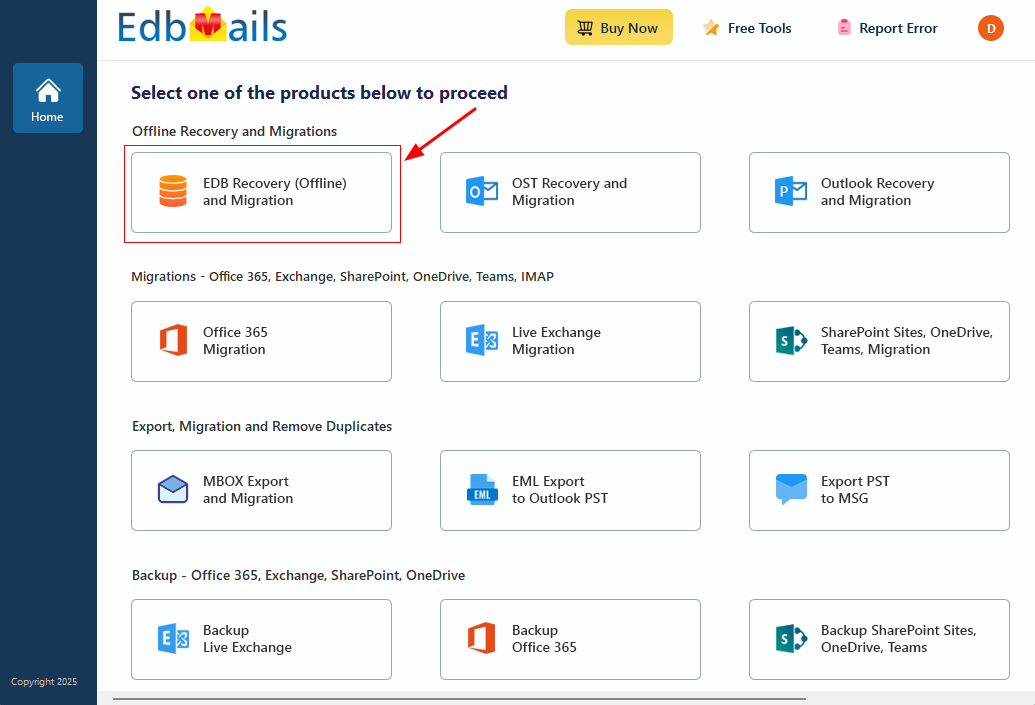
- Choose ‘EDB Recovery (Offline) and Migration’ from the list of available products to begin the recovery process.
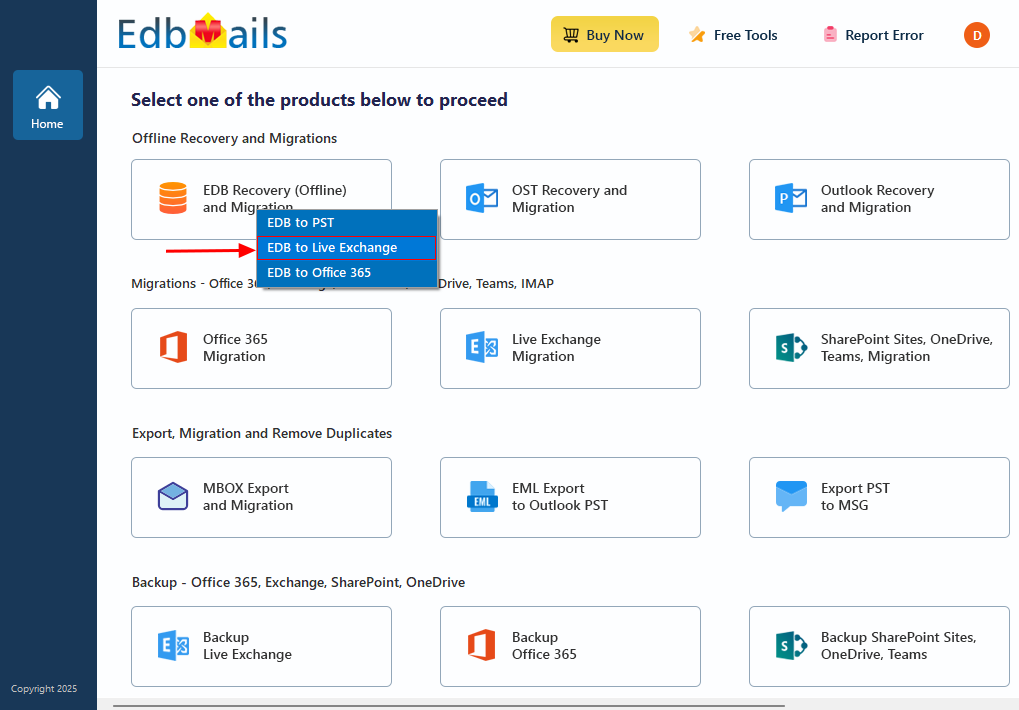
- Select 'EDB to Live Exchange' as recovery technique
- You can either stick with the default job name or click ‘New Job’ to give it a custom name, making it easier to identify and manage later.
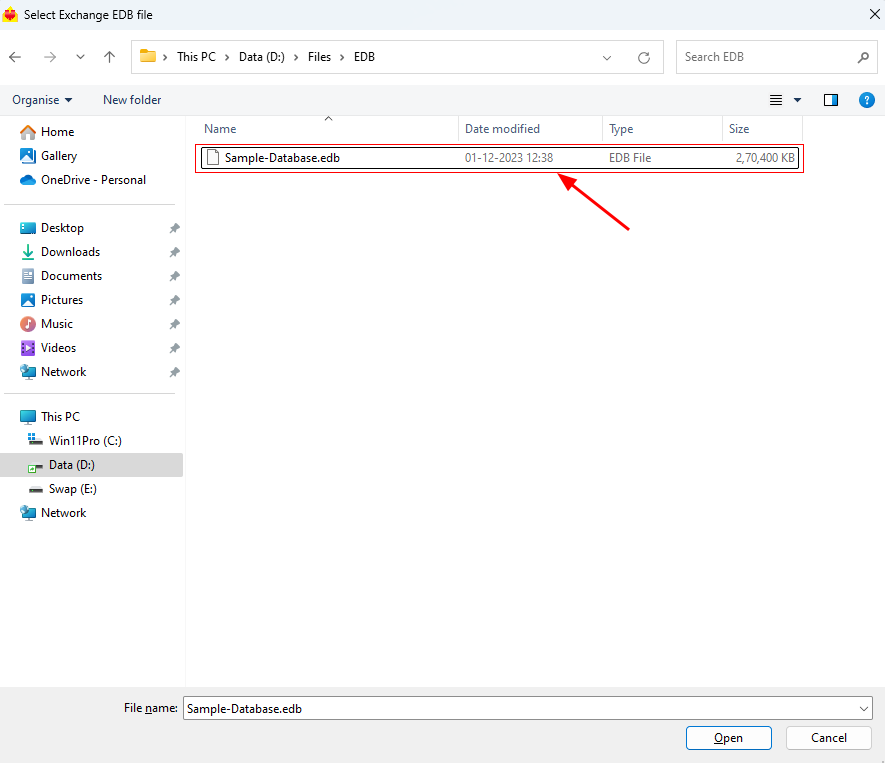
- Click the ‘Browse for EDB file’ button
- Select the EDB file which contains the mailboxes you want to restore.
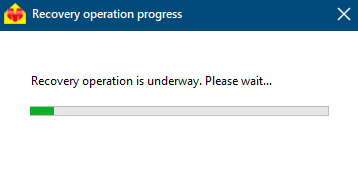
- EdbMails thoroughly scans the EDB file even if it's damaged or corrupted and retrieves all mailbox data with complete integrity, ensuring nothing is lost during the recovery process.
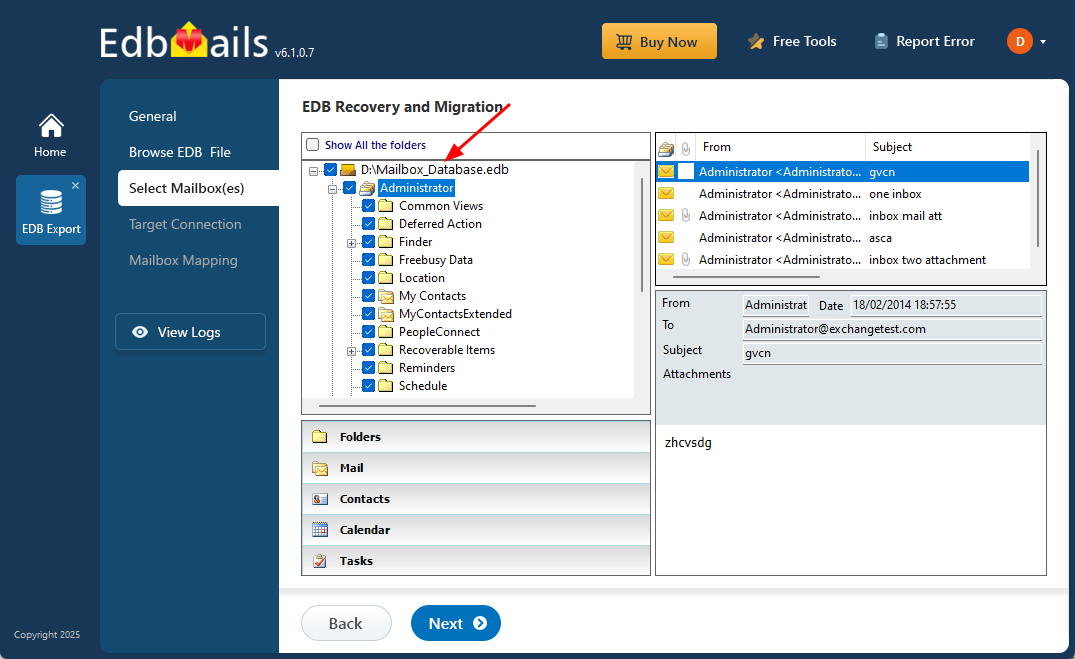
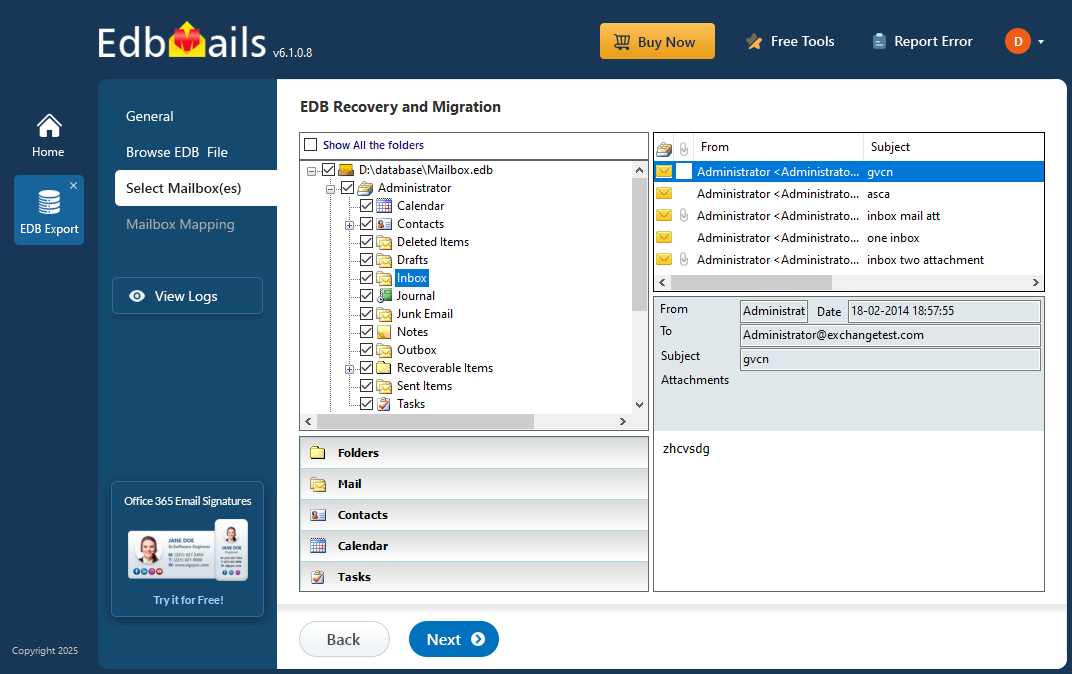
- Once the recovery is finished, simply expand the mailbox and select any folder to preview its contents—whether it's emails, contacts, calendars, tasks, journals, or notes—all neatly displayed in the right-hand preview pane.
- Select the mailboxes or folders you'd like to export, then click ‘Next’ to move forward.
- You can apply the advanced filter settings to export or migrate Exchange emails based on Date, Subject, Attachments, and more.
- EdbMails comes with other additional settings for export, like splitting a PST file during export and excluding emails that exceed a specified size limit.
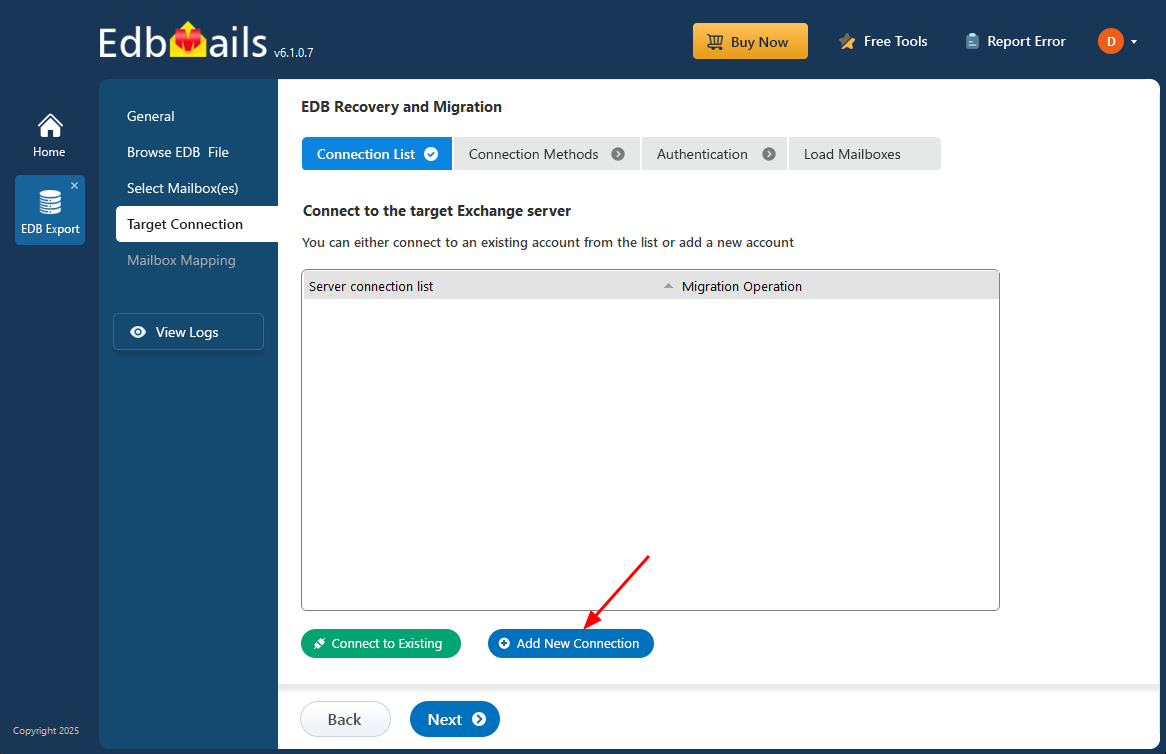
- To set up a connection with the target Exchange server, click on ‘Add New Connection’ and enter the required details. If you already have a saved configuration, just select it from the list and click ‘Connect to Existing’ to proceed without starting from scratch.
- Select the required connection options and click the ‘Next’ button.
Different options to connect to Exchange server in EdbMails
- Select the appropriate connection options based on your setup, click the ‘Next’ button to proceed.
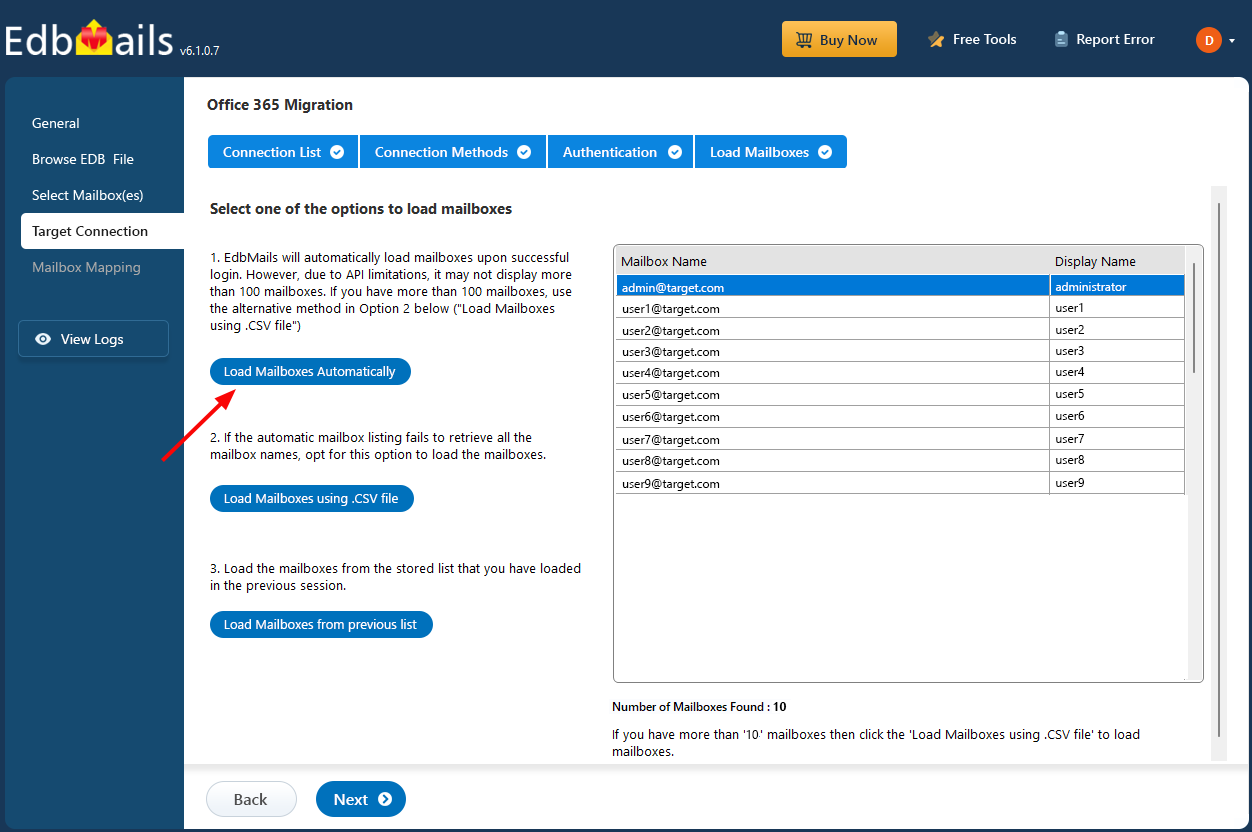
- As per Microsoft's API limit, EdbMails automatically loads up to 100 mailboxes from the target Exchange server. To load more, simply import a CSV list of additional mailboxes. Pick the option that fits your setup and move forward.
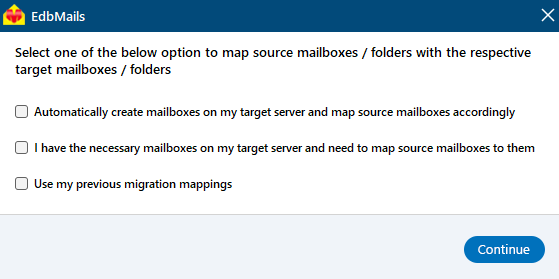
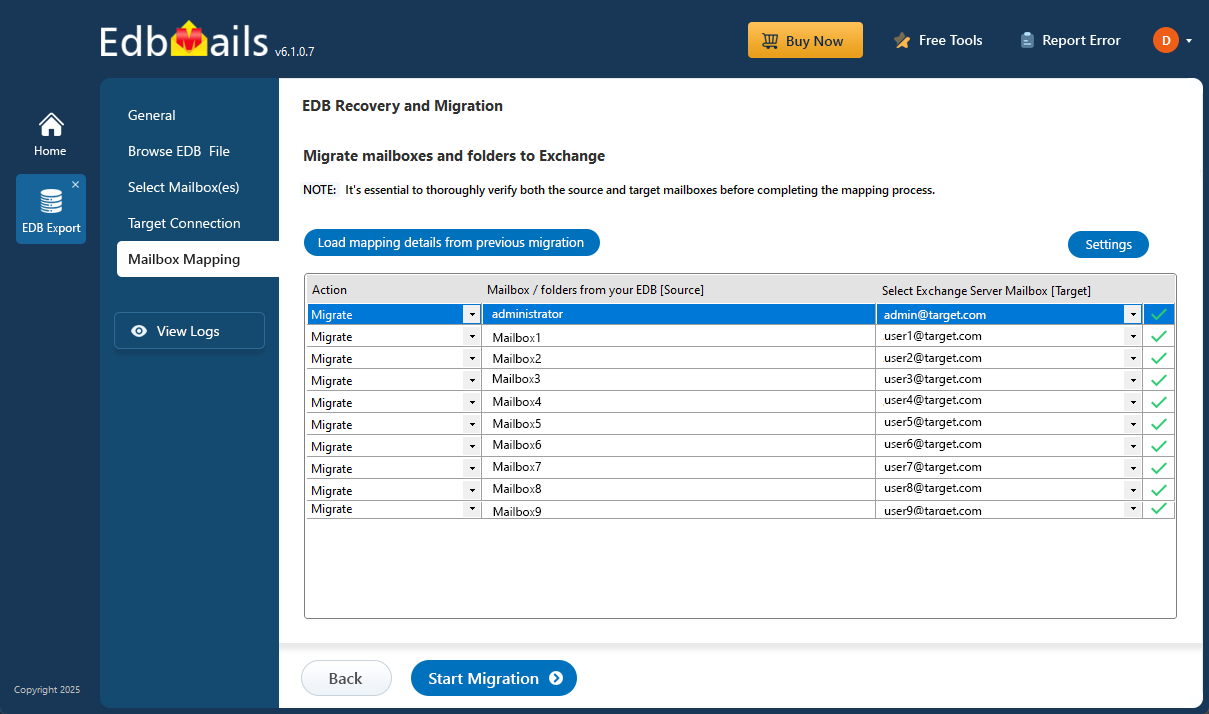
- Choose the required mailbox mapping option
- When EdbMails is installed directly on the target Exchange server, it can automatically create mailboxes. It also maps source and target mailboxes intelligently by matching display names. If needed, you can manually map mailboxes and folders to align with your migration strategy.
- Once the mailbox mapping is finished, simply click the ‘Start Migration’ button to begin transferring mailbox data from the EDB file to the Exchange server.
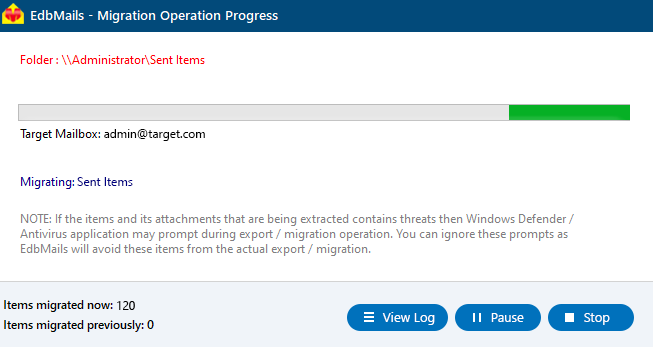
- You can track the migration progress in real-time using the progress bar. Once the process is complete, EdbMails will show a confirmation message to let you know that the migration was successfully finished.
- Click on the ‘View Logs’ button to access the migration report, where you can review details such as the number of emails, folders, and mailbox items that were successfully migrated.
Benefits of EdbMails Exchange recovery software
- Does not require transaction log files for Exchange database recovery
- All-in-one solution for Exchange migration, Exchange backup and recovery
- Does not require you to create the RDB to perform the mailbox restore
- Restores all Exchange server mailboxes without data loss
- Recover Exchange server mailboxes without requiring PowerShell scripts
- EdbMails is the ideal solution to directly migrate an EDB file to Office 365 and Live Exchange
- The tool can recover corrupted, badly damaged and virus infected EDB files
- Provides a complete preview of your mailbox data and mail items
- Include and exclude filter options make it easy to export selected data
- Enables you to recover deleted Exchange server mailboxes and perform migration to the target server.
- EdbMails is compatible with all Windows operating systems and Windows server versions.
Concluding Words
We explored two methods for restoring Exchange server 2016 mailboxes. The first method involves creating a recovery database (RDB) and restoring the database from a Windows backup to the RDB. The second method uses the EdbMails EDB converter tool to restore Exchange server mailboxes. While creating an RDB is effective, it is only applicable for Exchange server 2016 and newer versions, and it doesn't work if the database is corrupted. EdbMails, however, can recover corrupted EDB files and restore mailboxes from Exchange server 2019 to Exchange server 2003 without the need for complex PowerShell scripts.


