MBOX to Office 365 migration step by step guide
Migrating from MBOX-based email clients to Office 365 is a crucial step for users and organizations moving toward cloud-based communication platforms. MBOX is a commonly used email file format supported by clients like Mozilla Thunderbird, Apple Mail, Eudora, Opera Mail, and SeaMonkey. Since Office 365 does not directly support MBOX files, a dedicated migration tool is necessary to ensure a smooth and secure transfer of data.
EdbMails MBOX to Office 365 Migrator offers a reliable solution for directly importing MBOX files into Office 365 mailboxes. It supports loading multiple MBOX files at once, making it easier to manage data from various accounts or sources. With a straightforward interface and advanced features like preserving folder structure, email headers, and attachments, EdbMails ensures a seamless and user-friendly migration experience.

The following sections cover the migration prerequisites, step-by-step process, and the benefits of using EdbMails for MBOX to Office 365 migration.
Prerequisites to Migrate MBOX to Office 365
Before importing a MBOX file to Office 365, make sure to prepare the target Office 365 server as outlined in the following section.
- Verify that you meet the network and bandwidth requirements for the migration. Refer to network and migration planning, performance factors and best practices for Office 365 migration.
- Set up your target Office 365 tenant by following the tenant roadmap for Microsoft 365.
- Choose an Office 365 licensing plan based on your needs, or opt for a 30-day free trial to decide on the best plan later. Compare Office 365 business and enterprise plans.
- Set up mailboxes for users within your organization and assign appropriate licenses to them.
Add users and assign licenses to Office 365 accounts
- If you want to import Public folders from a MBOX file to Office 365, make sure to set up Public folder mailboxes on the target server.
Create Public folders in Office 365 and assign users to the mailboxes.
- For migrating In-Place archives to Office 365, enable the archive mailbox on the target server. Refer to the steps for enabling online archive in Office 365.
- If you have a custom email domain that you wish to receive emails from after the migration, you need to add and verify that domain in Office 365.
Follow the steps to add a custom domain to Office 365 and update the DNS records for domain connection.
- Configure Office 365 to handle large messages.
Follow the steps to increase the message size limit to 150MB on Office 365.
Steps to Migrate MBOX to Office 365 using EdbMails
Step 1: Download and Install the EdbMails application
- Download and install EdbMails MBOX to Office 365 migration tool on your computer running on Windows OS.

- Launch the Application
- Log in using your registered email address and password, or choose the 'Start Your Free Trial' option to explore the software's features.

- Download and install EdbMails MBOX to Office 365 migration tool on your computer running on Windows OS.
Step 2: Select MBOX Export and Migration option
- Choose ‘MBOX Export and Migration’ from the list of products.

- Select ‘MBOX to Office 365’

- You can either keep the default job name or click the 'New Job' button to change.

- Choose ‘MBOX Export and Migration’ from the list of products.
Step 3: Add MBOX file(s)
- Click the ‘Add file(s)’ button.
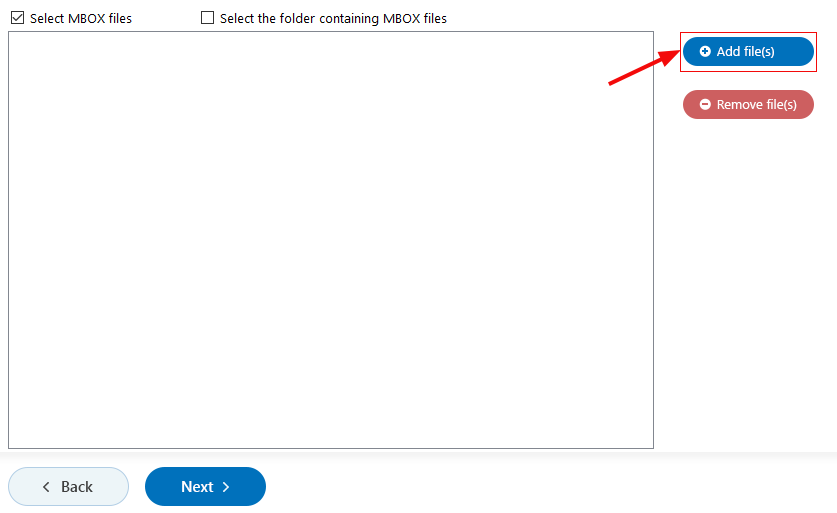
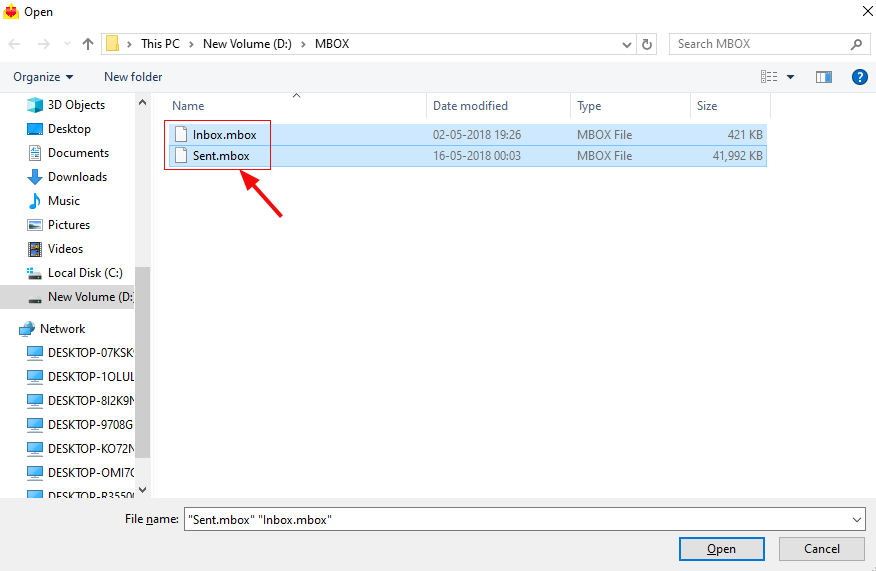
- Select the MBOX file(s). You can also choose MBOX files from a shared network location, provided that read and write permissions are assigned to the files.
- Click ‘Next’ to continue
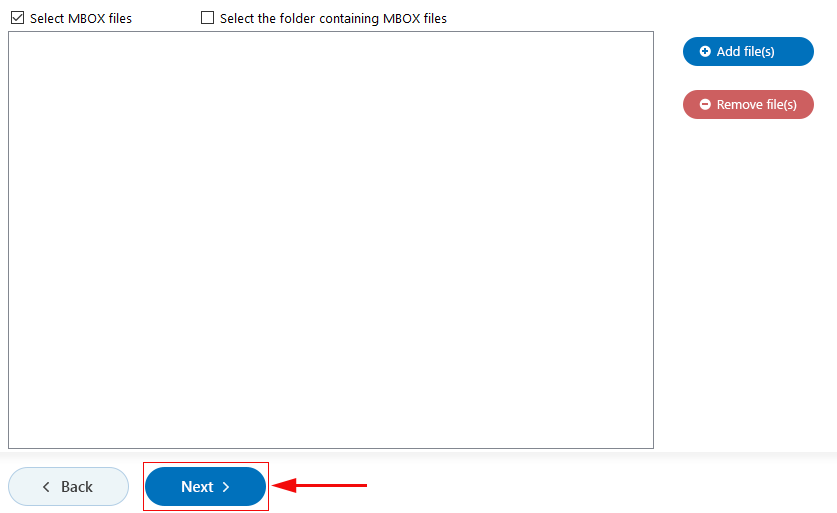
- Select the mbox files to migrate and click ‘Next’ to proceed
- Click the ‘Add file(s)’ button.
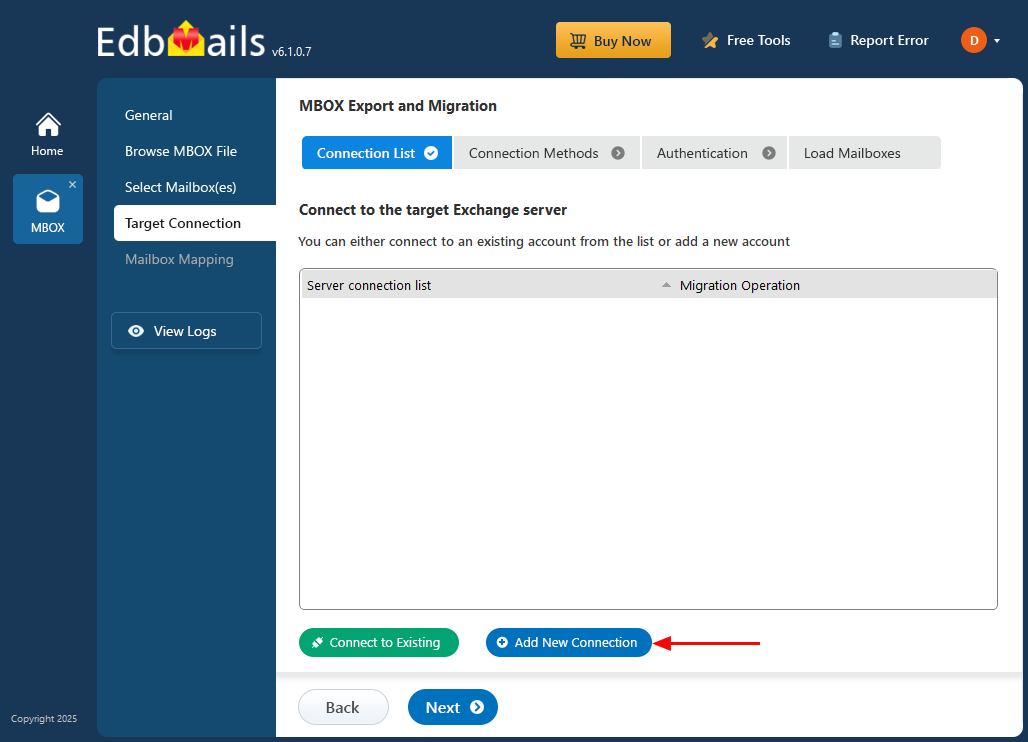
Step 4: Connect to target Office 365 server
- Click the 'Add New Connection' button to establish a connection to the target Office 365 server. To use an existing connection, simply select it from the list and click 'Connect to Existing' to proceed.
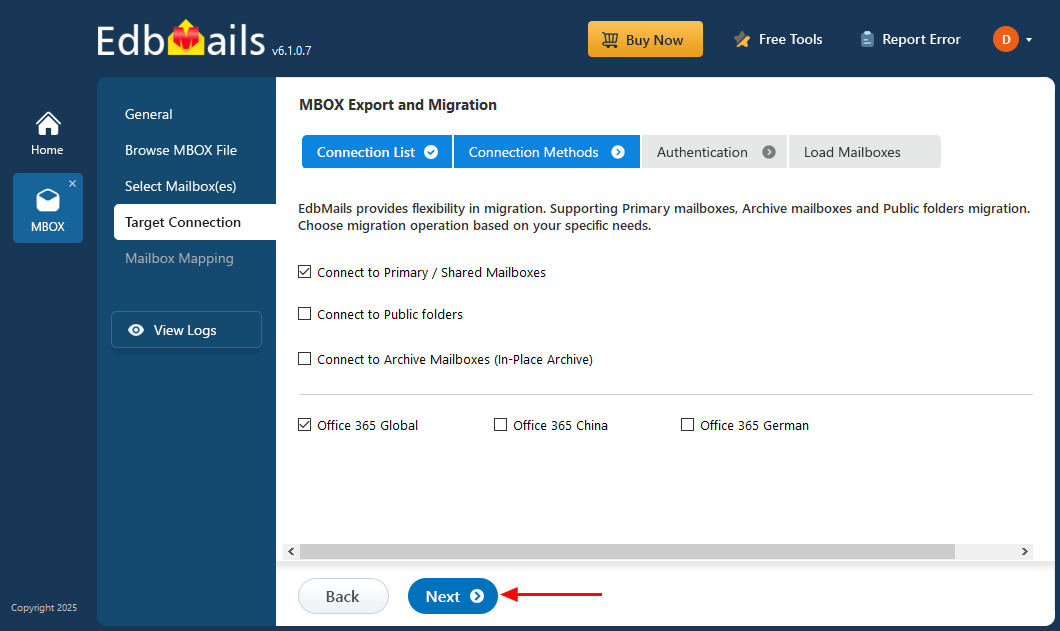
- Choose the required connection options and click 'Next'.
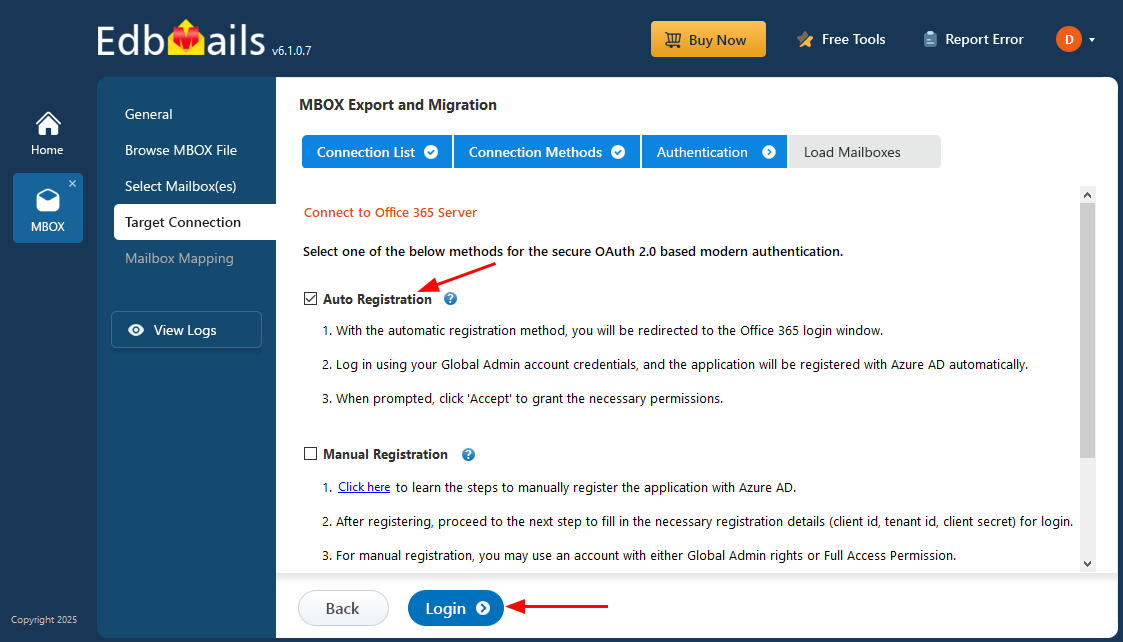
- Select one of the authentication methods and click the ‘Login’ button to continue.
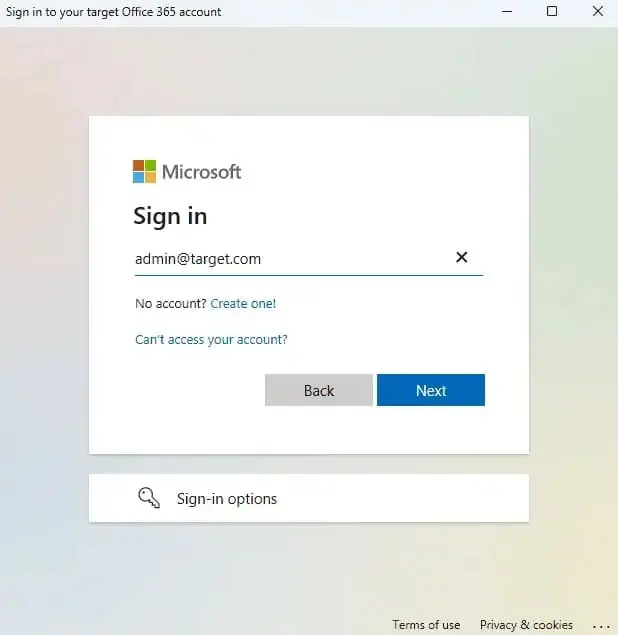
- Authenticate on Microsoft sign-in page.
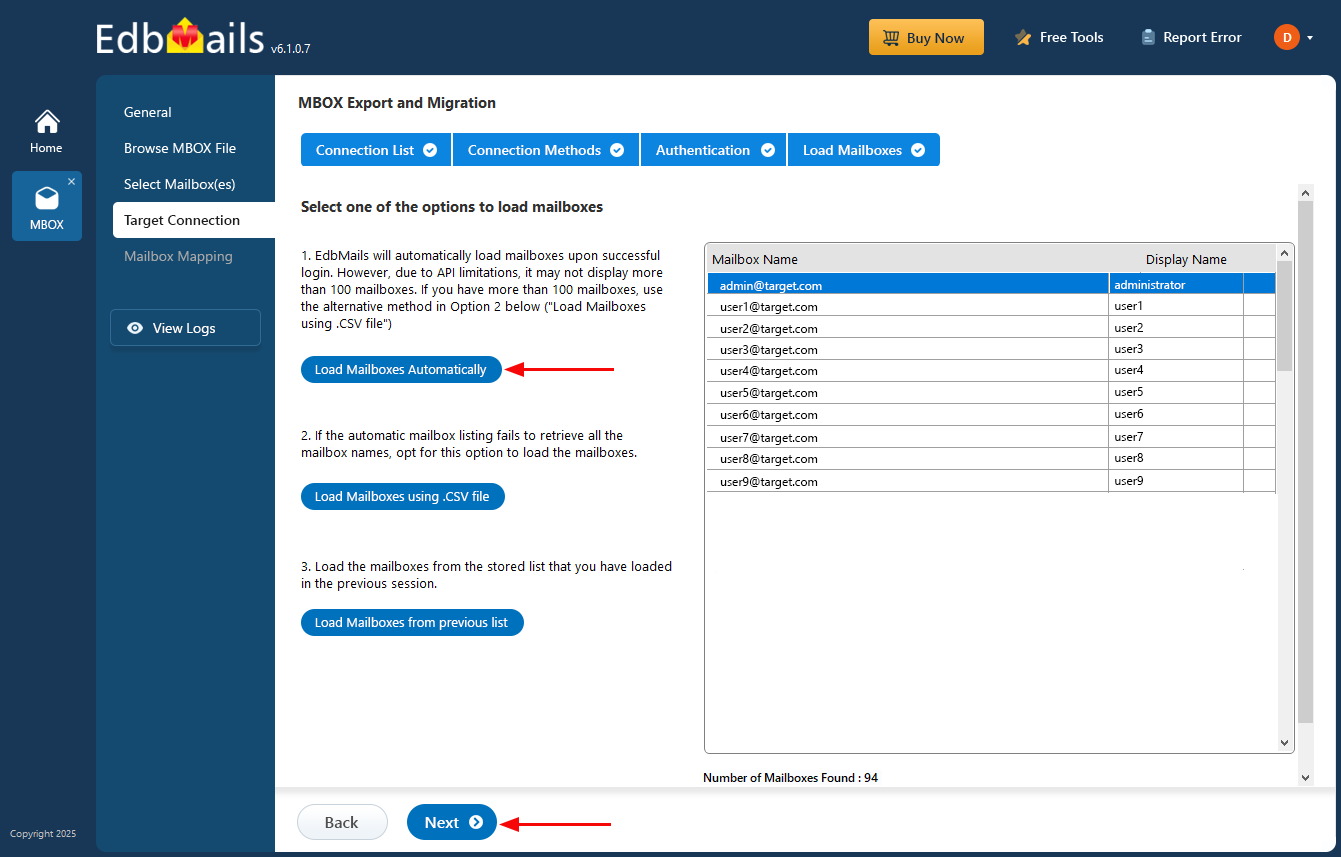
- Choose one of the methods to load the mailboxes
- Click the 'Add New Connection' button to establish a connection to the target Office 365 server. To use an existing connection, simply select it from the list and click 'Connect to Existing' to proceed.
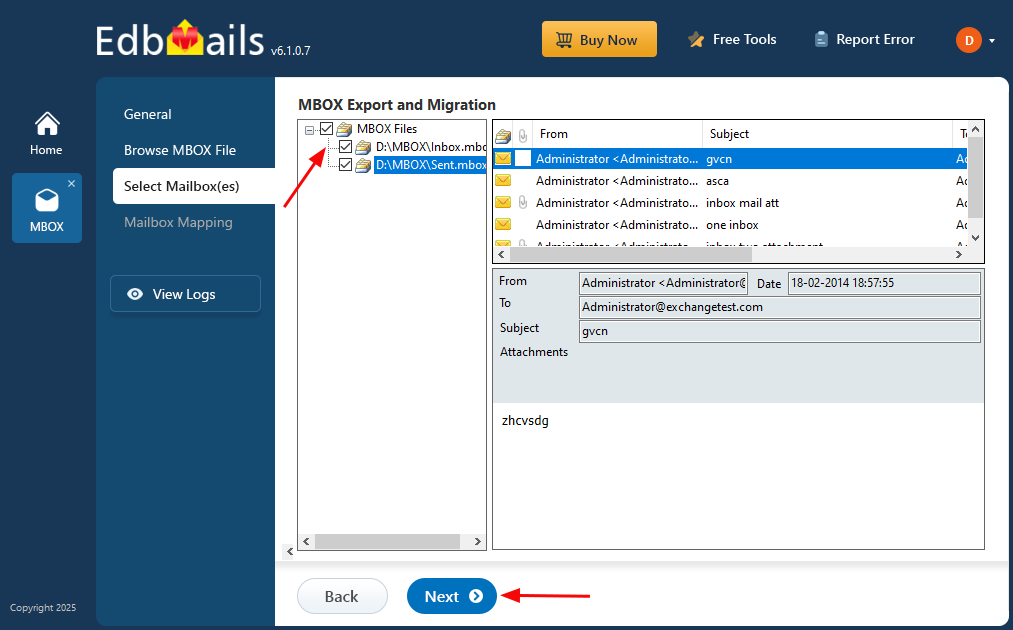
Step 5: MBOX to Office 365 mailbox mapping
- Choose the required mailbox mapping option.
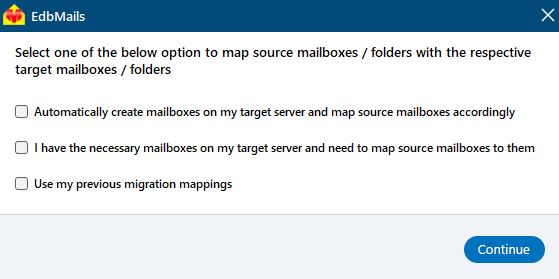
- EdbMails automatically creates mailboxes on your target Office 365 server and assigns the necessary licenses.
Learn more about the automated mailbox creation process.
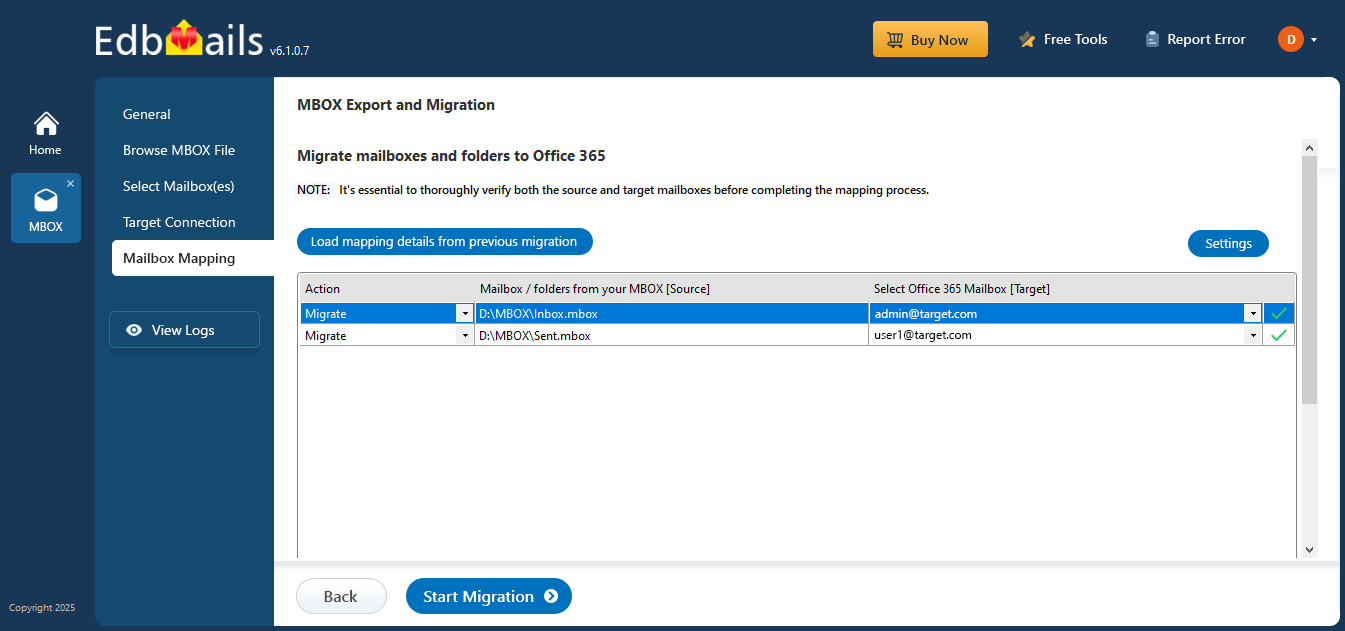
- EdbMails automatically maps mailboxes and folders between the source and target server. Also, you can manually map source and target mailboxes.
- Choose the required mailbox mapping option.
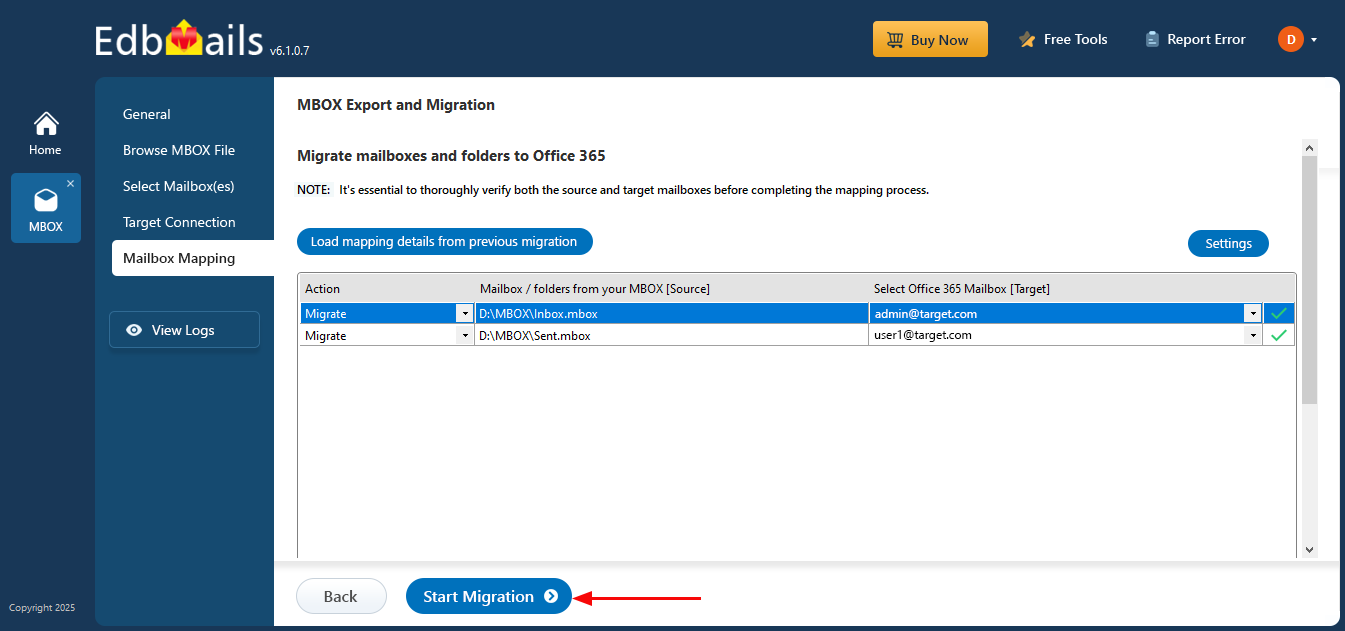
Step 6: Start MBOX to Office 365 migration
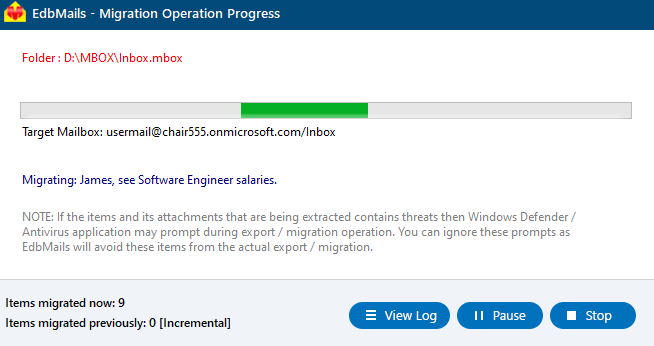
- Click the 'Start Migration’ button to initiate the migration process.
- The migration operation has been initiated. Once it is completed, a message will prompt to review the migration status. Click the ‘View Logs’ button to view the migration.
- Login to your target Office 365 server and verify the items.
- Click the 'Start Migration’ button to initiate the migration process.
Benefits of using EdbMails to Migrate MBOX to Office 365:
- Simple and intuitive interface for effortless MBOX to Office 365 migration.
- Fast and secure migration with no risk of data loss.
- Preserves the original folder hierarchy and email metadata.
- Selectively migrates specific MBOX files or folders to Office 365.
- Supports migration of large MBOX files without any issues.
- Load multiple MBOX files at once, saving time and effort.
- Offers a seamless experience with zero downtime during migration.
- Supports MBOX files from Thunderbird, Entourage, Pocomail, Mulberry, Spicebird, Sylpheed, Apple Mail, and Mozilla Mail and many more
- Supports unlimited MBOX files for migration without any file size limitations
- Free trial to verify the software features before purchasing

