EDB Archive Mailbox to Office 365
Migrating archived emails from older Exchange servers to Microsoft 365 is an essential step in keeping your IT infrastructure up to date. In many organizations, these archived messages are stored in In-Place Archives—mailboxes designed to manage mailbox size by moving older emails to a separate, searchable location governed by retention policies.
EdbMails EDB to Office 365 migrator provides a straightforward and reliable solution to migrate these In-Place Archive mailboxes directly from EDB files to Office 365. Whether you're upgrading to a newer platform, consolidating tenants, or decommissioning legacy servers, EdbMails ensures data integrity, preserves folder structures, and simplifies the entire process—even when the source Exchange server is no longer accessible.
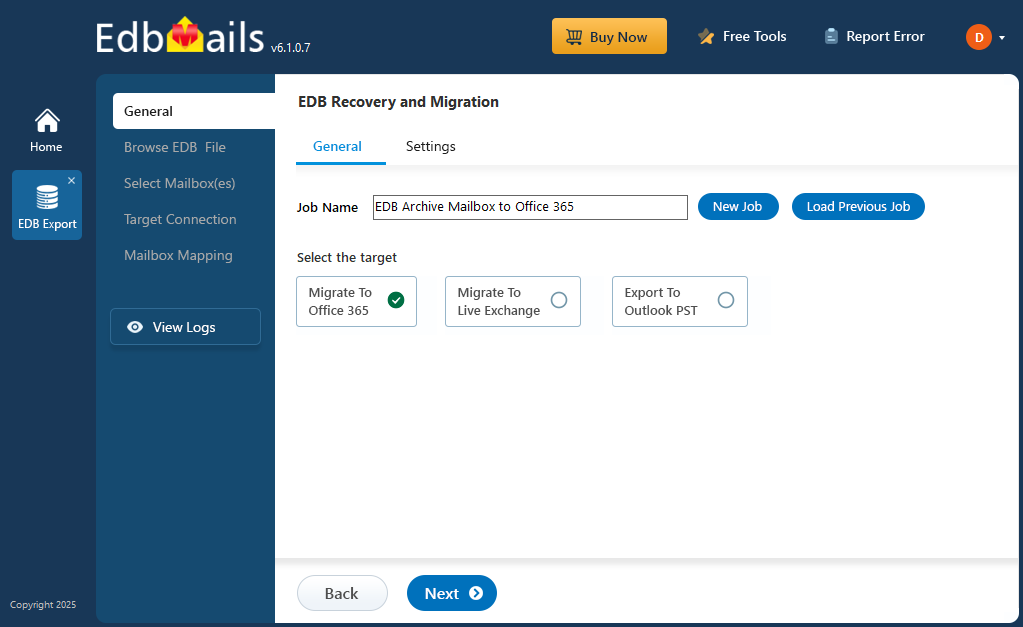
To help you get started with ease, this guide walks you through each step of the migration process using EdbMails. From selecting your source offline EDB file to configuring the target Office 365 account, you'll learn how to securely move archive data without downtime or data loss.
Prerequisites to migrate EDB Archive Mailbox to Office 365
Before migrating your In-Place Archive from EDB to Office 365, it’s essential to properly prepare the target Office 365 environment as described in the following section.
- Make sure you meet the necessary network and bandwidth requirements for the migration. Refer to the network and migration planning, performance factors, and best practices for Office 365 migration.
- Set up your target Office 365 tenant. See tenant roadmap for Microsoft 365.
- Choose an Office 365 licensing plan that best suits your needs. Alternatively, you can start with a 30-day free trial and select the most appropriate plan after evaluating your requirements.
Compare Office 365 business plans and Compare Office 365 enterprise plans
- Create user mailboxes for your organization and assign the appropriate licenses to each.
- To migrate In-Place Archive mailboxes to Office 365 archive mailboxes, make sure the archive mailbox is enabled on the target server.
- Ensure that you have a global admin account with a mailbox for Auto Registration of EdbMails application on your Entra ID (Azure Active Directory). However, you can use either a global admin account or any user account with full access rights in the Manual Registration method.
- Configure Office 365 to send and receive large messages
Follow the steps to increase the message size on Office 365 to 150MB.
- If you plan to continue receiving emails at a custom email domain after migration, you must add and verify the domain in Office 365.
See steps to add a custom domain to Office 365 and steps to add DNS records to connect your domain.
Steps to migrate from EDB Archive Mailbox to Office 365 using EdbMails
- Step 1: Download and Install the EdbMails application
- Download and install the EdbMails application on your computer running on Windows OS.
- Log in with your email and password, or select 'Start Your Free Trial' to get started.
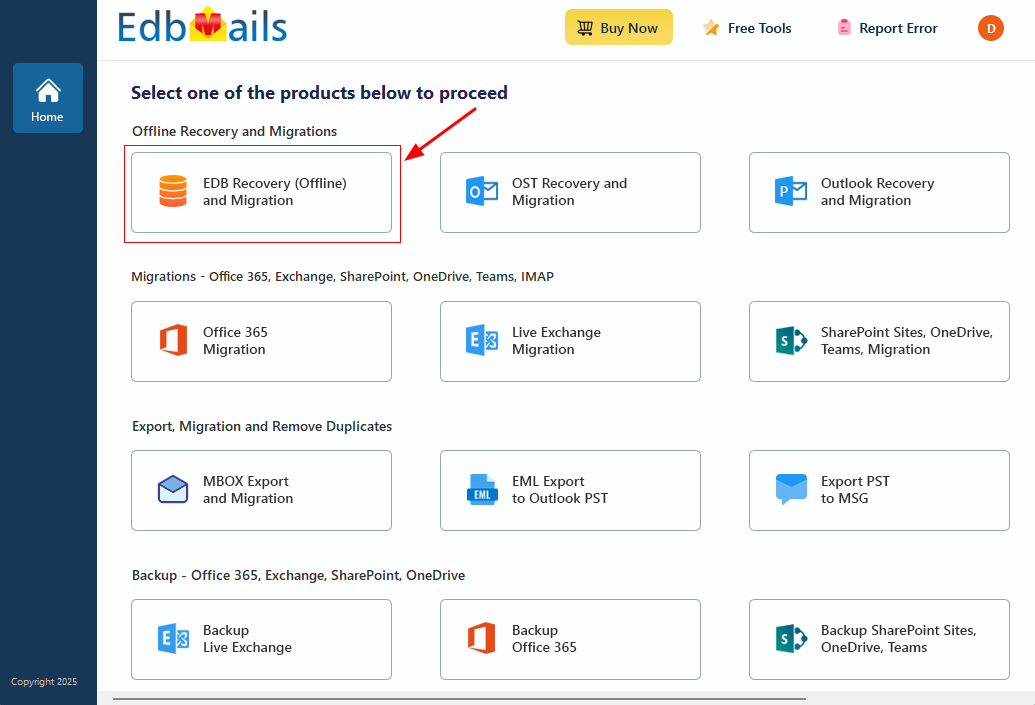
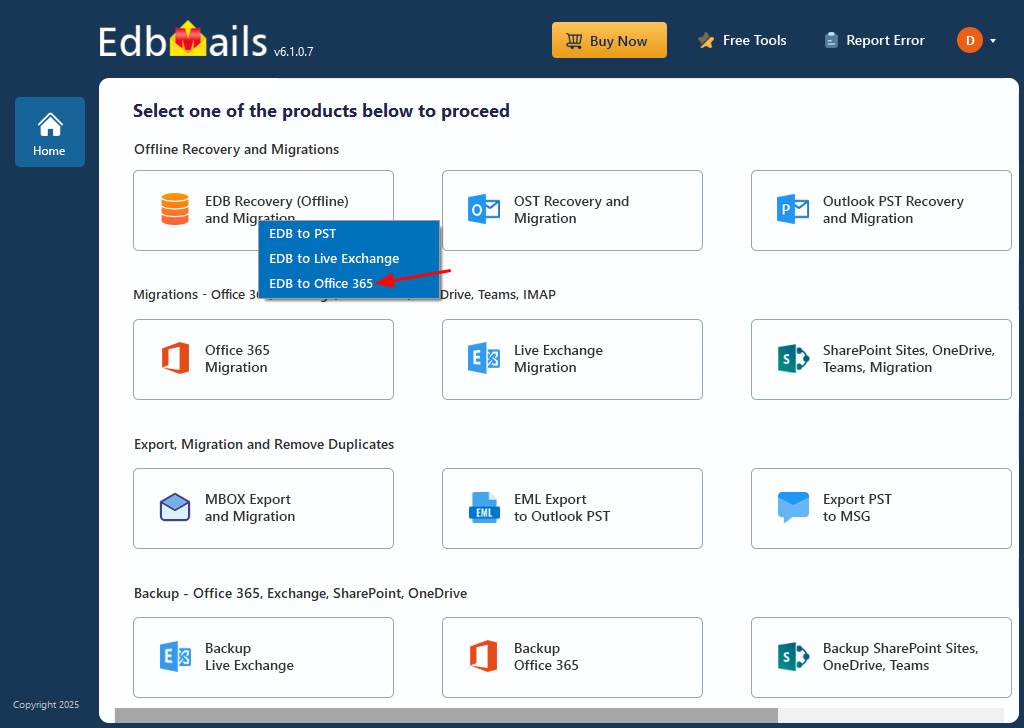
- Step 2: Select EDB Recovery (Offline) and Migration
- Select the ‘EDB Recovery (Offline) and Migration’ option
- Select ‘EDB to Office 365’ option
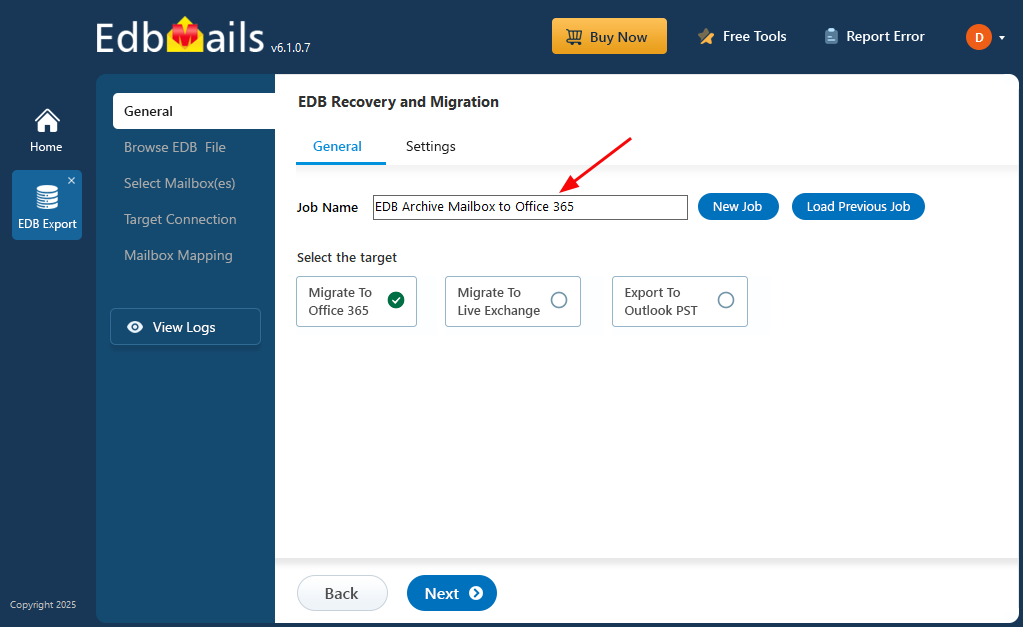
- You can keep the default job name or click on the 'New Job' button to give a new job name.
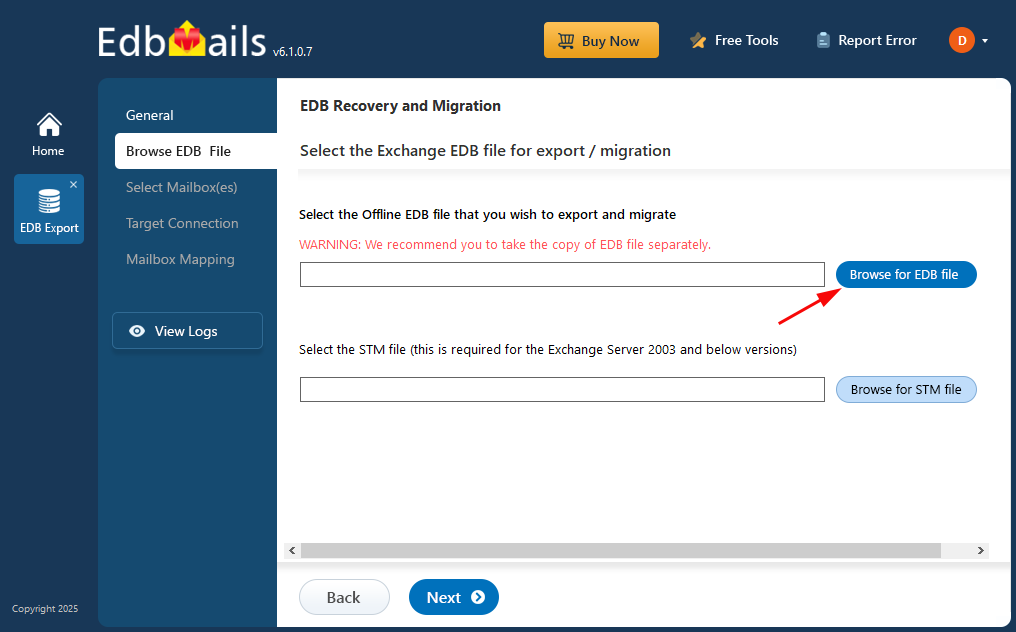
- Step 3: Browse EDB files
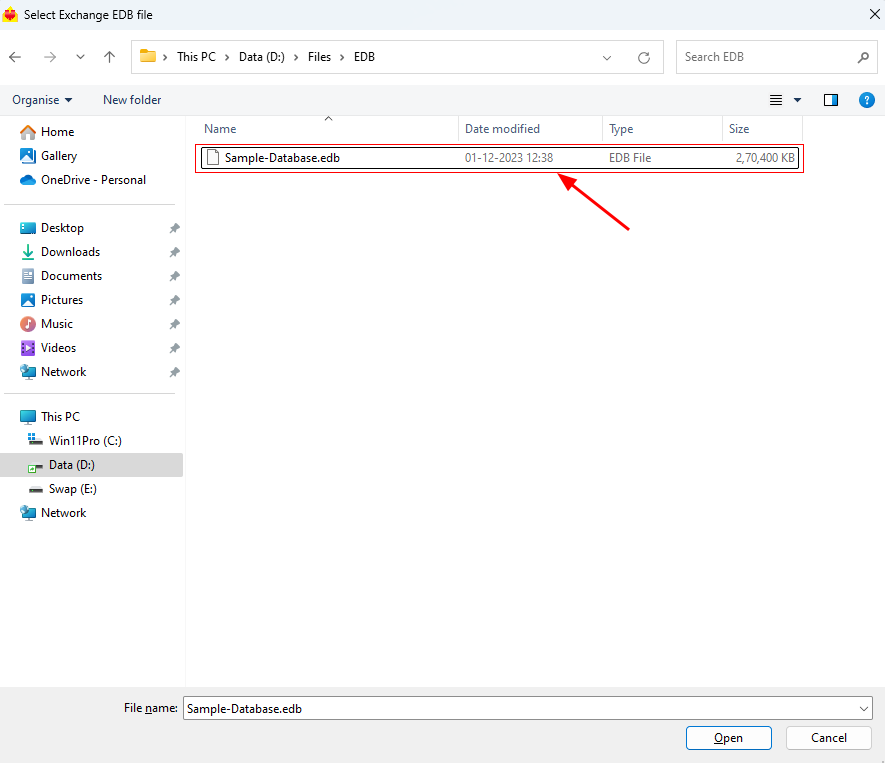
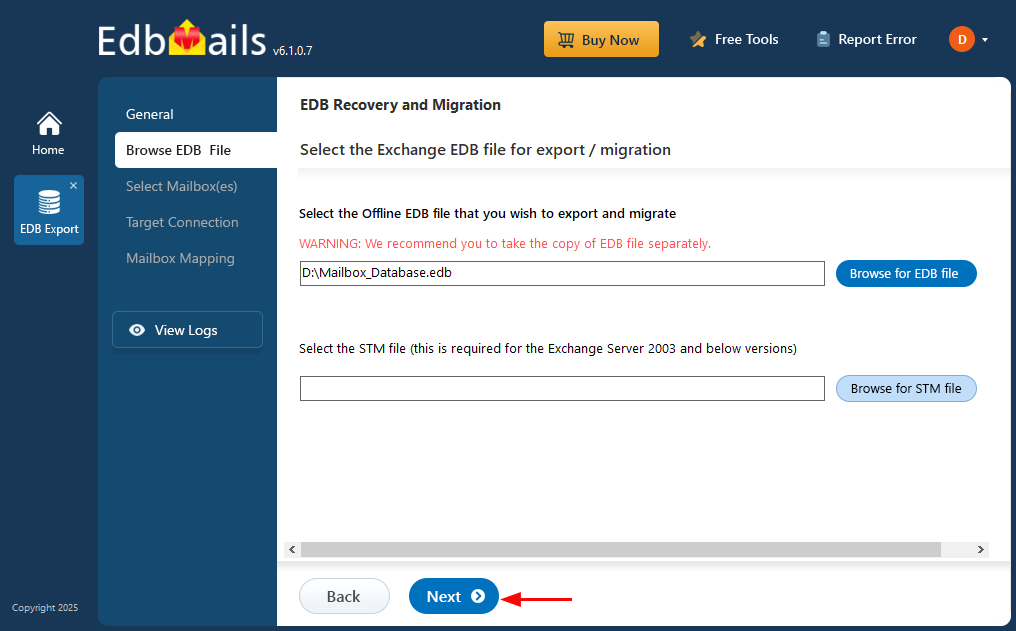
- Click the ‘Browse for EDB file’ button
- Choose the offline EDB file from your computer drive then click the ‘Next’ button to proceed.
- Click ‘Next’ to continue
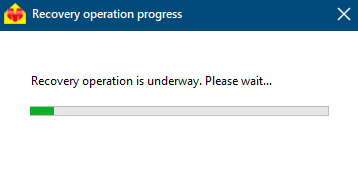
- EdbMails scans the EDB file and restores the data in case of any corruption.
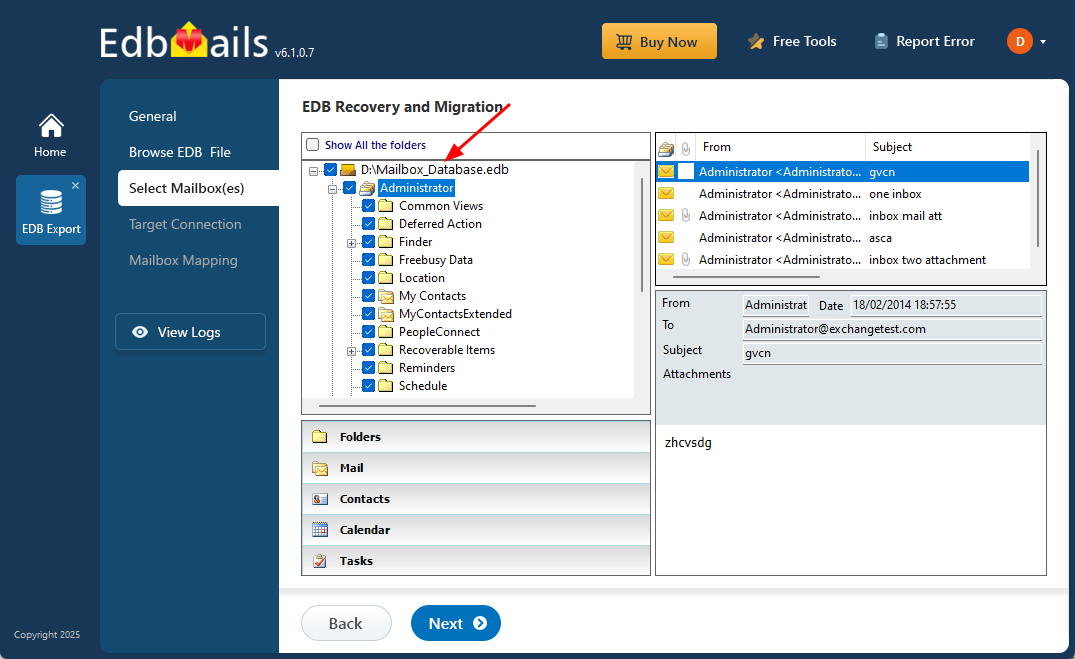
- Once the recovery is finished, you can preview all mail items, such as emails, contacts, folders, notes, tasks, and calendars, directly in the application's preview pane.
- Choose the required EDB archive mailboxes and click the 'Next' button to proceed.
- Step 4: Connect to target Office 365 server
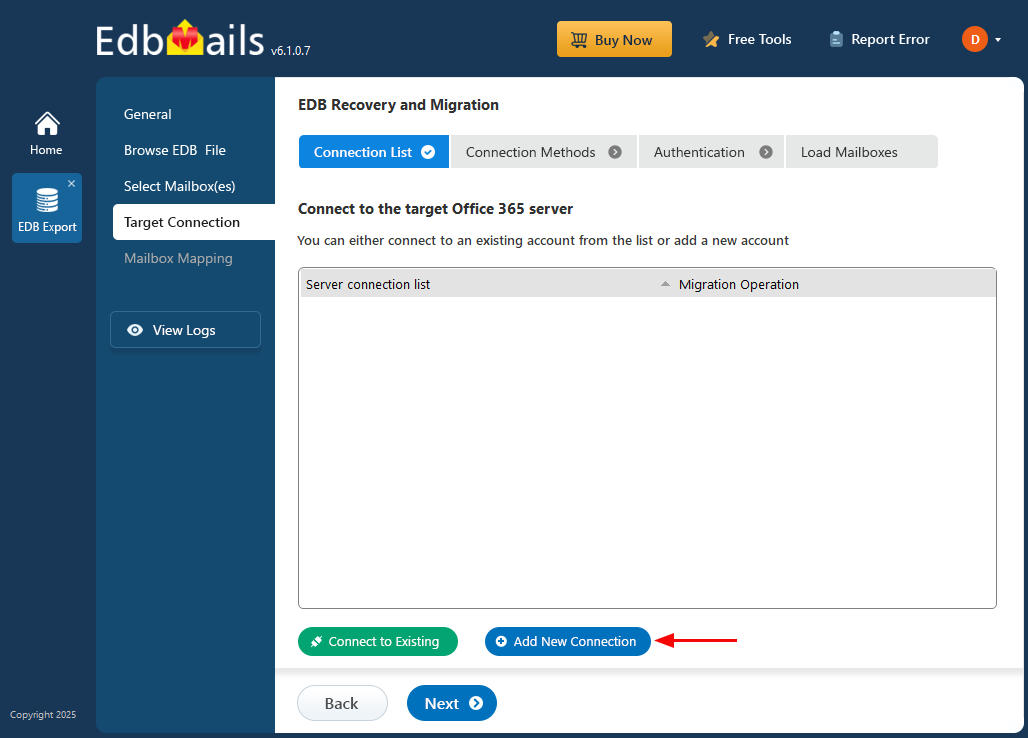
- To set up a new connection to your Office 365, click 'Add New Connection'. If you want to use an existing connection, simply select it from the list and click 'Connect to Existing' to continue.
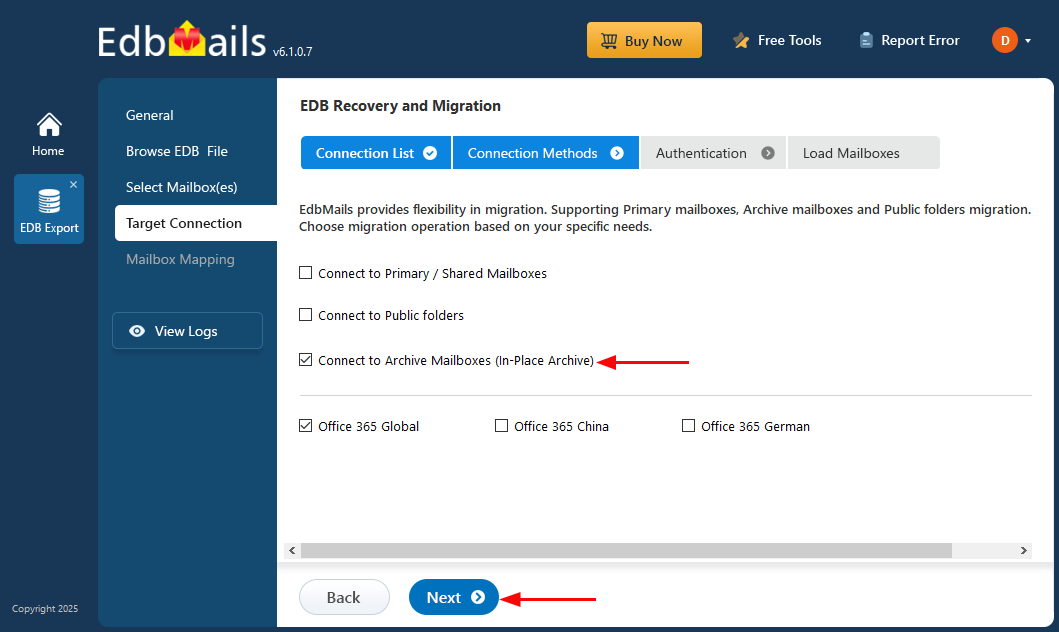
- Choose the preferred connection options and click the ‘Next’ button to continue.
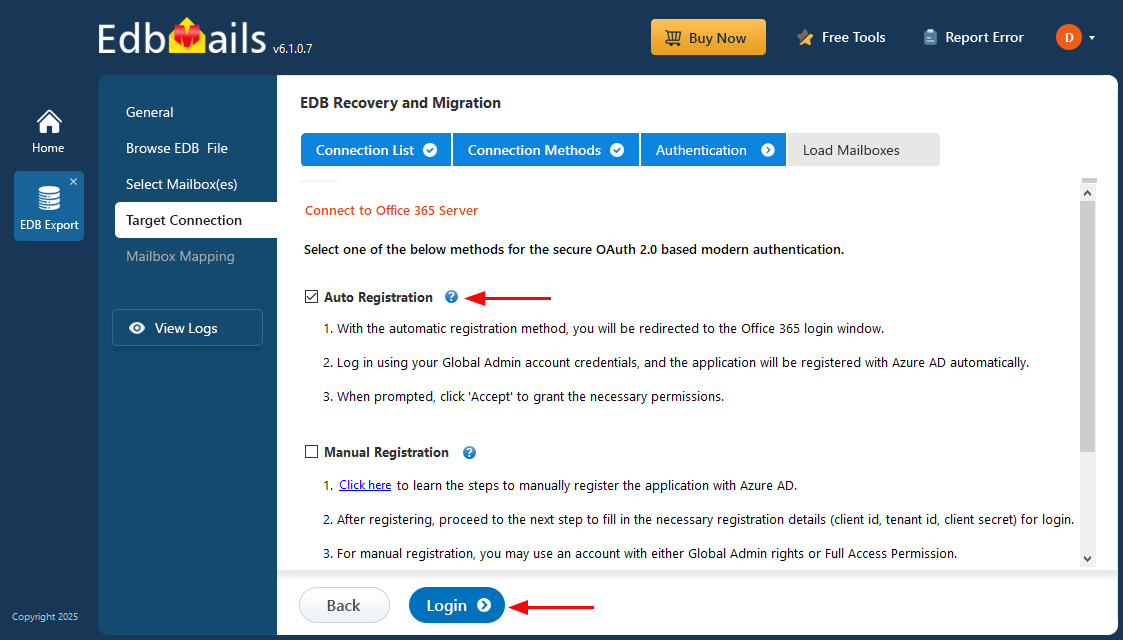
- Select one of the authentication methods and click 'Login' to continue.
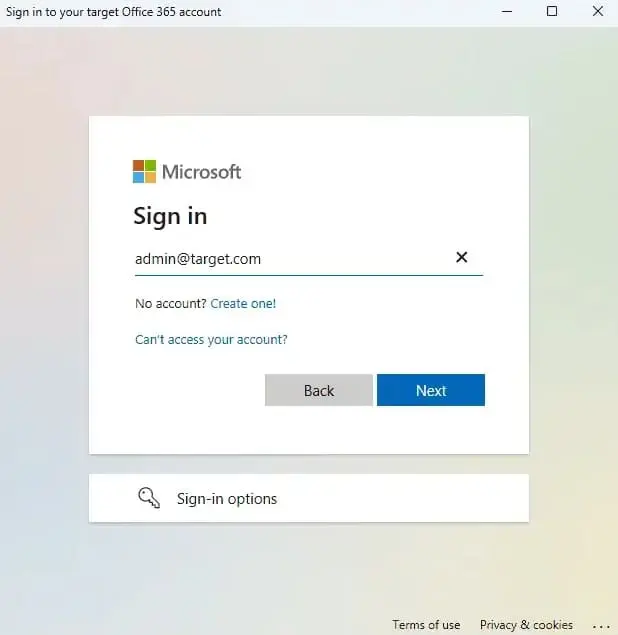
- Authenticate on Microsoft sign-in page.
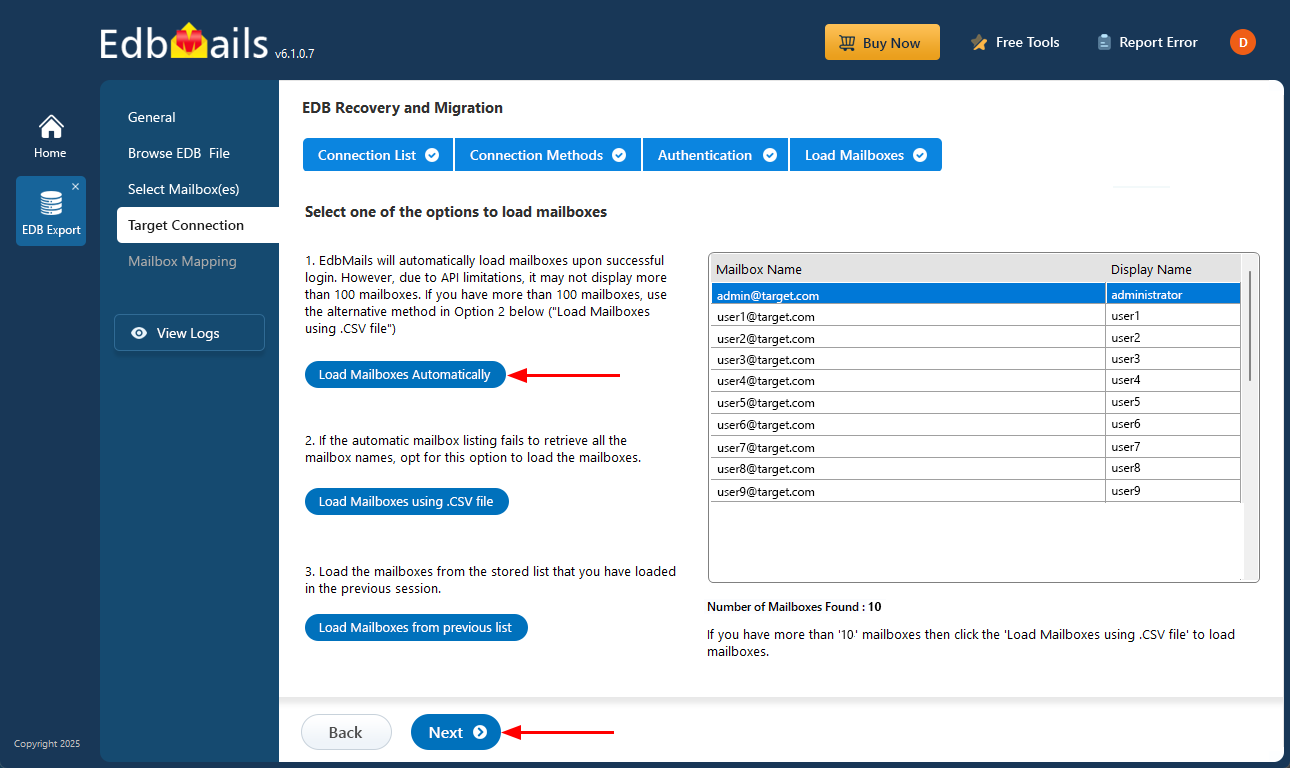
- Select a method to load the mailboxes and click on ‘Next’.
- Step 5: Map source and target archive mailboxes
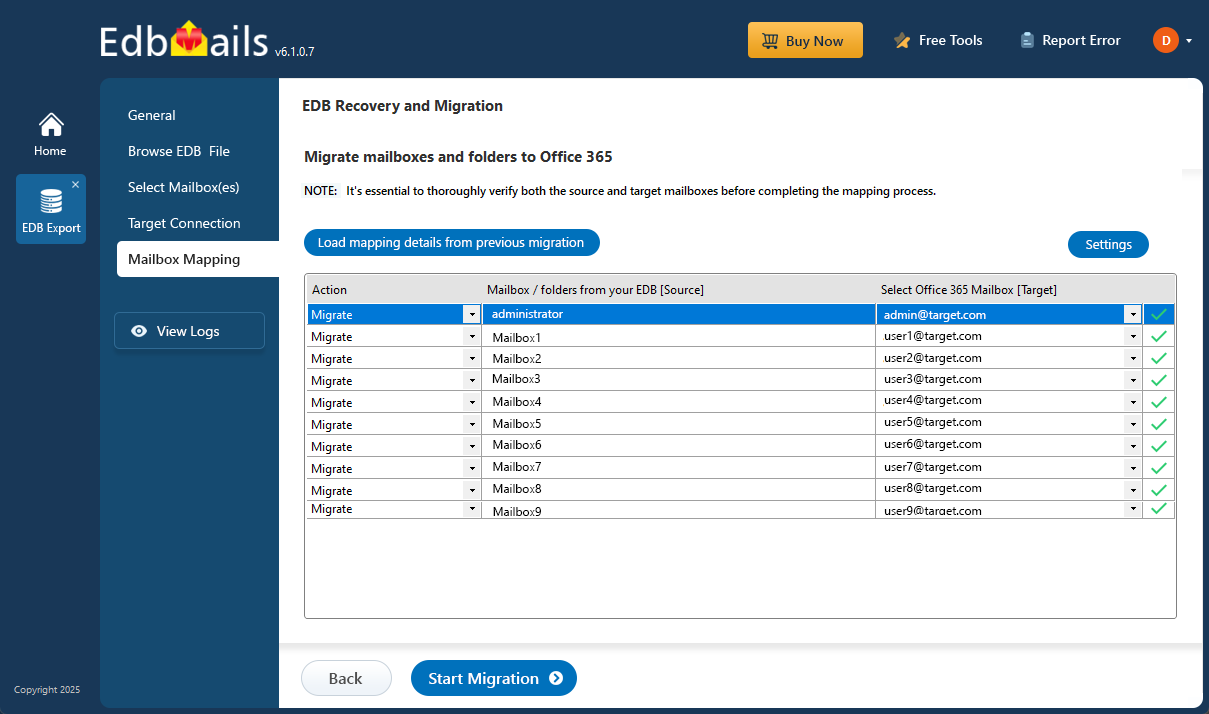
- EdbMails automatically matches the archive mailboxes between the source and target servers. Alternatively, you also have the option to manually map source archive mailboxes to their corresponding targets.
- Step 6: Start EDB Archive Mailbox to Office 365 migration
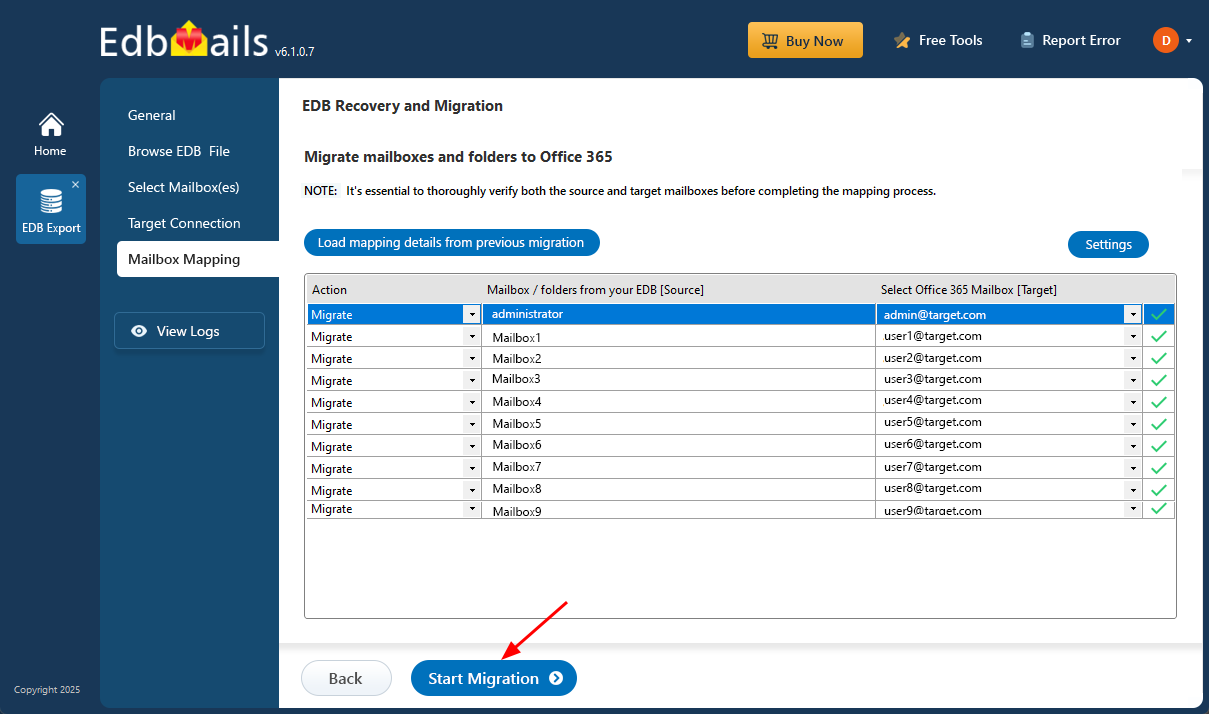
- Click the ‘Start Migration’ button to begin the migration process.
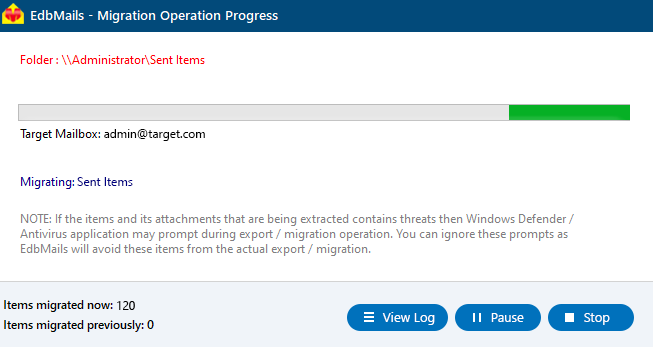
- That's it! During the migration, you can track the progress, with options to pause and resume the operation. A confirmation message will appear once the migration is complete.
- Click the ‘View Logs’ button to verify the migrated archive mailboxes and items with EdbMails text-based migration log report.
- Step 1: Download and Install the EdbMails application
Benefits of using EDB Archive Mailbox to Office 365
- Simplifies the migration process, reducing complexity.
- Preserves folder structure, emails, and other mailbox data without any data loss.
- Reduces the burden on servers by offloading archived data to the cloud.
- Increases productivity with quick and easy access to archived data from any location.
- Enhances security by storing archived data in Office 365’s secure cloud environment.
- Helps businesses stay compliant by offering backup and disaster recovery options.
- Improves scalability and flexibility with Office 365’s cloud-based infrastructure.


