Export Office 365 Mailbox to PST
Exporting an Office 365 mailbox to a PST (Personal Storage Table) file is useful for several reasons. It helps create local backups, archive cloud data, and migrate data to other email platforms.
Even though Microsoft's native solution offers the eDiscovery tool for PST export, it frequently encounters errors such as ‘Request failed with status code 500’. Users often face issues like missing items, corrupted PST files, lengthy export times, and problematic searches. There is also a common misunderstanding that PowerShell commands can be used to download Office 365 emails, contacts, and calendars to Outlook PST files. Unfortunately, these problems do not have a quick fix. EdbMails Office 365 Migration software provides a reliable alternative. It facilitates the seamless export of Office 365 mailboxes to PST files without encountering such issues, ensuring a smooth and efficient export process.

Export Office 365 Mailbox to PST using EdbMails:
EdbMails simplifies the Office 365 to PST export operation with its user-friendly interface and advanced features. It supports incremental backups, which only include new or modified data during subsequent export runs, reducing data transfer and storage requirements. You can customize exports with various filtering options, allowing precise control over the data based on criteria such as email date ranges and inclusion or exclusion of specific folders.
Microsoft Outlook has a 50GB limit for PST files, which can be restrictive for large mailboxes. EdbMails helps overcome this limitation with its split PST feature, which divides large mailboxes into smaller, more manageable files. This ensures efficient management and use of PST files. EdbMails effectively supports compliance, data archiving, and operational needs with its comprehensive export capabilities.
Prerequisites to Export Office 365 Mailbox to PST
- Install Microsoft Outlook with a profile on the computer where the export operation will be performed.
- Ensure sufficient space on the computer drive to save the output PST file.
Steps to Export Office 365 Mailbox to PST using EdbMails
- Step 1: Download and Install the EdbMails application
- Download and install EdbMails on your computer.
- Double click the EdbMails setup (EdbMailsSetup.exe) to install the application.
- Follow the instructions that appear to complete the installation.
- Click 'Login' or 'Start Your Free Trial' to access the application
- Step 2: Select Office 365 to PST Export option
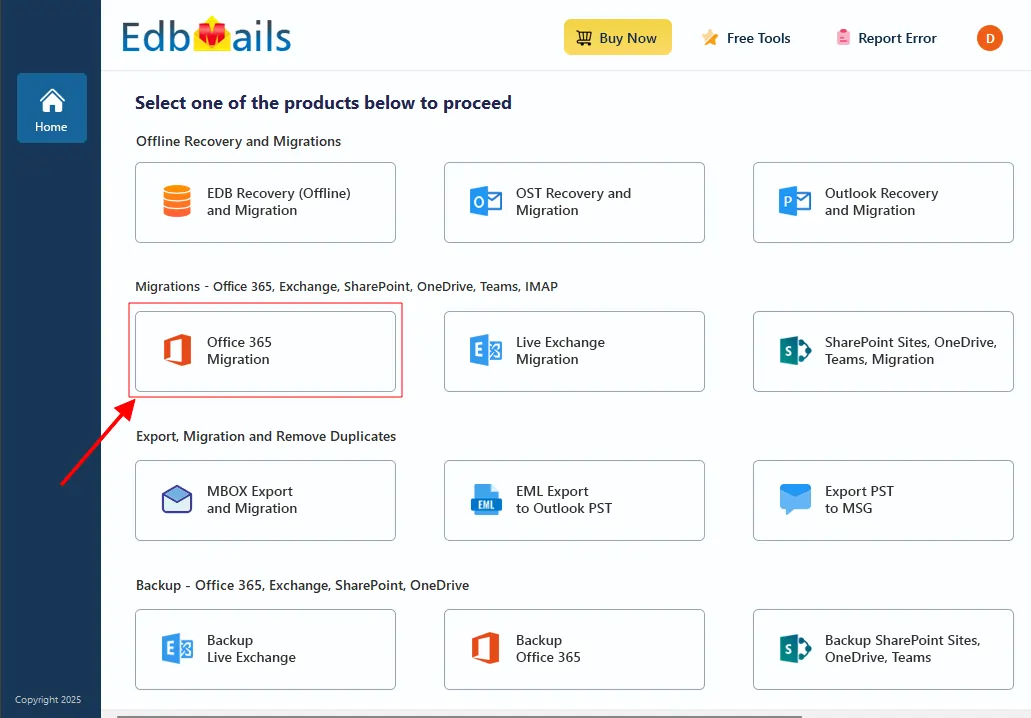
- Select the option 'Office 365 Migration'
- Select ‘Office 365 to PST Export’
- Use the default job name, or click 'New Job' button to input a custom name.
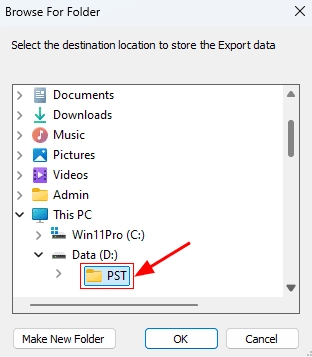
- Click ‘Browse’.
- Select the location to save the exported PST files. Ensure you have enough free disk space for storage.
- Step 3: Connect to source Office 365 server
- Click the ‘Add New Connection’ button to establish a new connection to the source Office 365. To use the previous connection, select it from the connection list and click the ‘Connect to Existing’ button to proceed.
- Choose the required connection options and click the ‘Next’ button.
- Select the appropriate connection method and click the ‘Login’ button to continue.
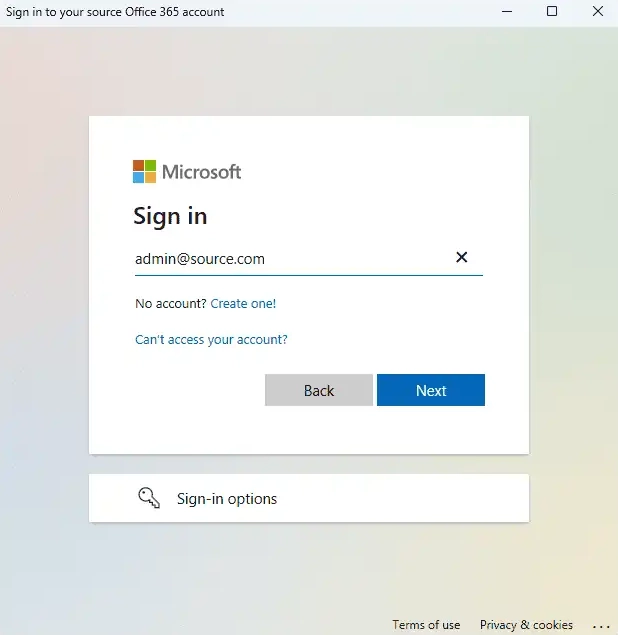
Connect to Office 365 server using secure modern authentication
- Authenticate on Microsoft sign-in page.
After the successful authentication, choose one of the methods to load the mailboxes. You can also load and migrate the mailboxes using a CSV file.
- Step 4: Select Office 365 Mailboxes
- Select the mailboxes or folder you want to Export from the source Office 365 server.
- Click ‘Next’ to proceed.
- EdbMails allows you to apply the filters to customize your export process. For instance, you can apply date filters to export the items within a certain date range.
- Step 5: Start Export operation
- Verify the selected mailboxes for the export operation and ensure the ‘Action’ is set to ‘Export’, then click the 'Start Export' button.
That's it! During the export operation, you can track the progress as shown below. Once the export is complete, you will receive a confirmation message. EdbMails also generates a detailed export report, accessible by clicking the ‘View Log’ button at the left-side bottom of the export window.
- After the export finishes, open the PST file in Outlook to verify items like emails, calendars, contacts, and more.
- Verify the selected mailboxes for the export operation and ensure the ‘Action’ is set to ‘Export’, then click the 'Start Export' button.
- Step 1: Download and Install the EdbMails application


