Public folder to Shared mailbox Migration
Migrating public folders to Office 365 shared mailboxes is a strategic move for organizations to modernize communication and simplify management. Public folders, though effective for structured data sharing, can be complex to manage and scale. In contrast, shared mailboxes offer an efficient way to centralize emails, calendars, and tasks without requiring separate licenses or extensive administrative effort.
EdbMails Exchange Migration software makes this transition easy and secure. It simplifies the migration of public folders to Office 365 shared mailboxes, preserving data integrity, folder structure, and permissions. With EdbMails, you can reduce maintenance overhead, enhance collaboration, and ensure a hassle-free migration experience for improved team productivity.
EdbMails offers a simple and reliable solution for organizations planning to migrate public folders to shared mailboxes in Office 365. It supports direct migration from on-premises Exchange servers including 2019, 2016, 2013 ad 2010 to Office 365. EdbMails ensures the complete transfer of public folder data, including emails, contacts, calendars, and folder structure, while preserving all permissions. You can also apply advanced filter settings to selectively migrate specific folders or items, making the process fast, flexible, and seamless.
The software supports incremental migration, transferring only newly added or modified items during subsequent runs. This minimizes bandwidth usage, shortens overall migration time, and eliminates the risk of duplicating previously migrated data.
Public folder to shared mailbox migration planning
Before initiating public folders to the shared mailbox migration process, it is crucial to evaluate the necessary requirements and prerequisites for a successful transition. Please refer to the following checklist to ensure that your environment is adequately prepared for the migration.
- Assess the total size and quantity of public folders designated for migration.
- Set up shared mailboxes on the destination server.
- Decide whether you prefer to migrate all data at once or in phases.
- Evaluate your internet connection speed and overall network setup.
- Keep in mind that shared mailboxes have a 50GB size limit. If you plan to migrate larger public folders, consider partitioning them or reducing their size beforehand.
- Determine the nature of your current migration environment, whether it is Hybrid or non-Hybrid.
Public folder to shared mailbox : Pre-migration activities
- Step 1: Set the impersonation role on the source to the admin user
Ensure that you set the ApplicationImpersonation permissions to the admin account on the source Exchange server. Ensure that the mailboxes and folders you migrate are not hidden from the address lists.
- Step 2: Configure shared mailboxes on the target Office 365 server
Ensure that you create and configure the Shared mailboxes on the target Office 365 server.
Create Shared Mailbox on Office 365 and assign the members
Ensure that you have a global admin account with a mailbox for Auto Registration of EdbMails application on your Entra ID (Azure Active Directory). However, you can use either a global admin account or any user account with full access rights in the Manual Registration method.
- Step 3: Add a custom domain to Office 365 (Optional)
If you have a custom email domain from your hosting provider to which you want to migrate and receive emails, you must add and verify the domain on Office 365.
- Step 4: Install cumulative updates (CU) on Exchange server
For migrating Public folders from Exchange to Office 365, ensure that you have the latest cumulative updates installed on the source server
- Step 1: Set the impersonation role on the source to the admin user
Steps to migrate public folders to shared mailbox using EdbMails
Step 1: Download and install EdbMails Exchange server migration software setup
- Download the EdbMails application and install it on a computer with access to both the source Exchange server.
List of system requirements for public folder to shared mailbox migration
- Launch the EdbMails application and ‘login’ with your email address and password or you can choose the 'Start Your Free Trial’ option.
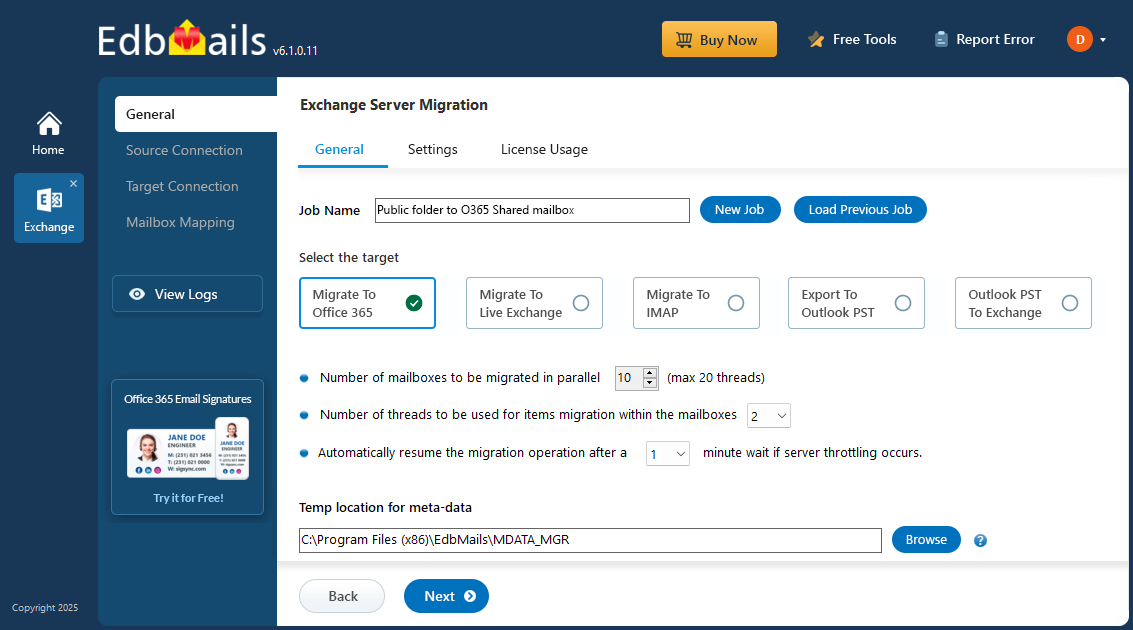
- Select the ‘Live Exchange Migration’ option.
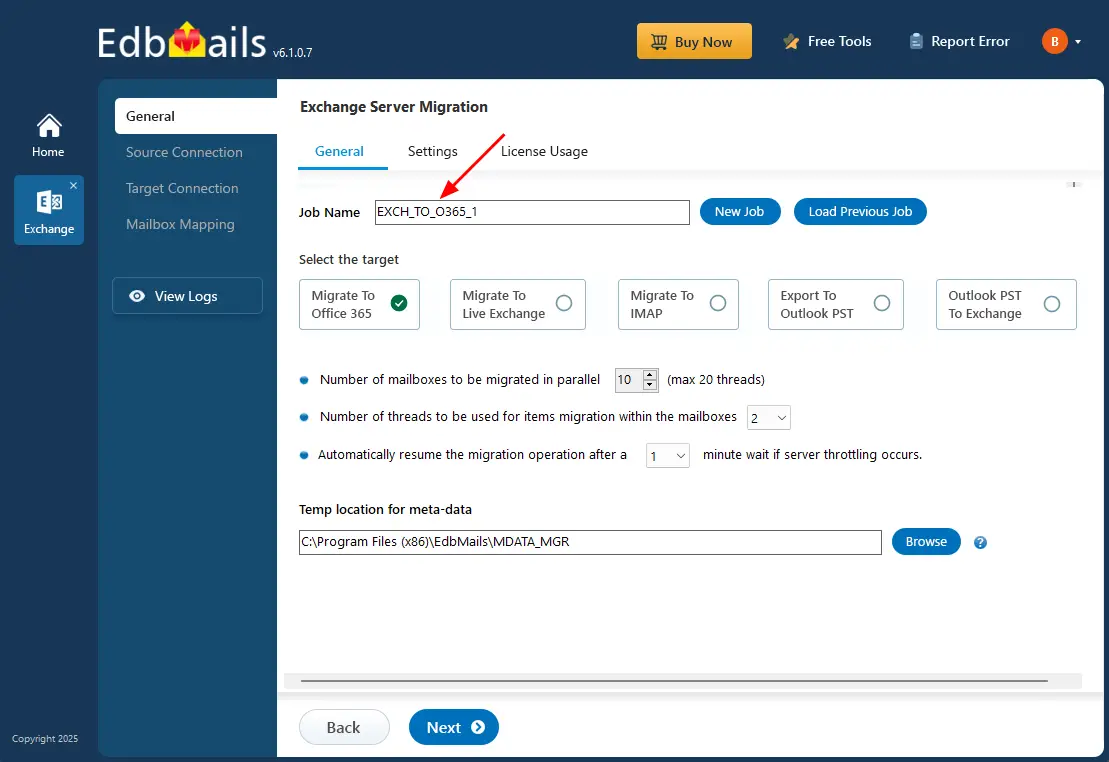
- You can assign any name you want by clicking ‘New Job’, or you can use the default job name.
- Download the EdbMails application and install it on a computer with access to both the source Exchange server.
Step 2: Connect to source Exchange server
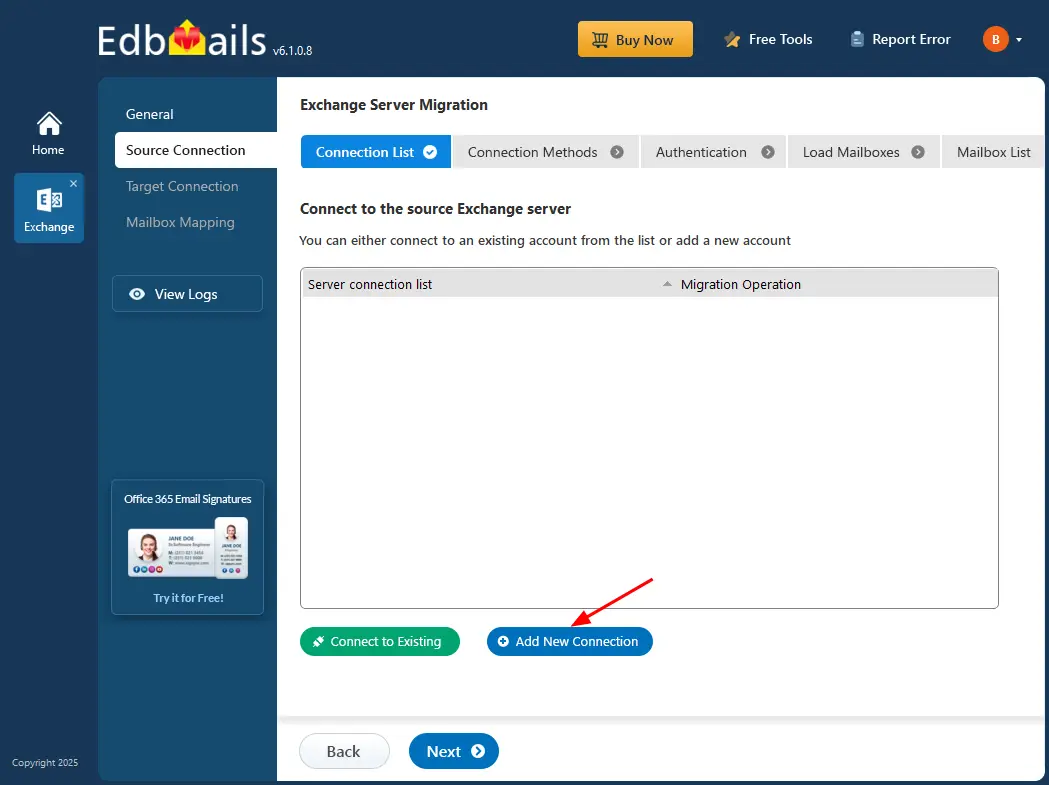
- To connect to the source Exchange server, click on ‘Add New Connection’. If you’ve already created a connection before, choose it from the list and click ‘Connect to Existing’ to proceed.
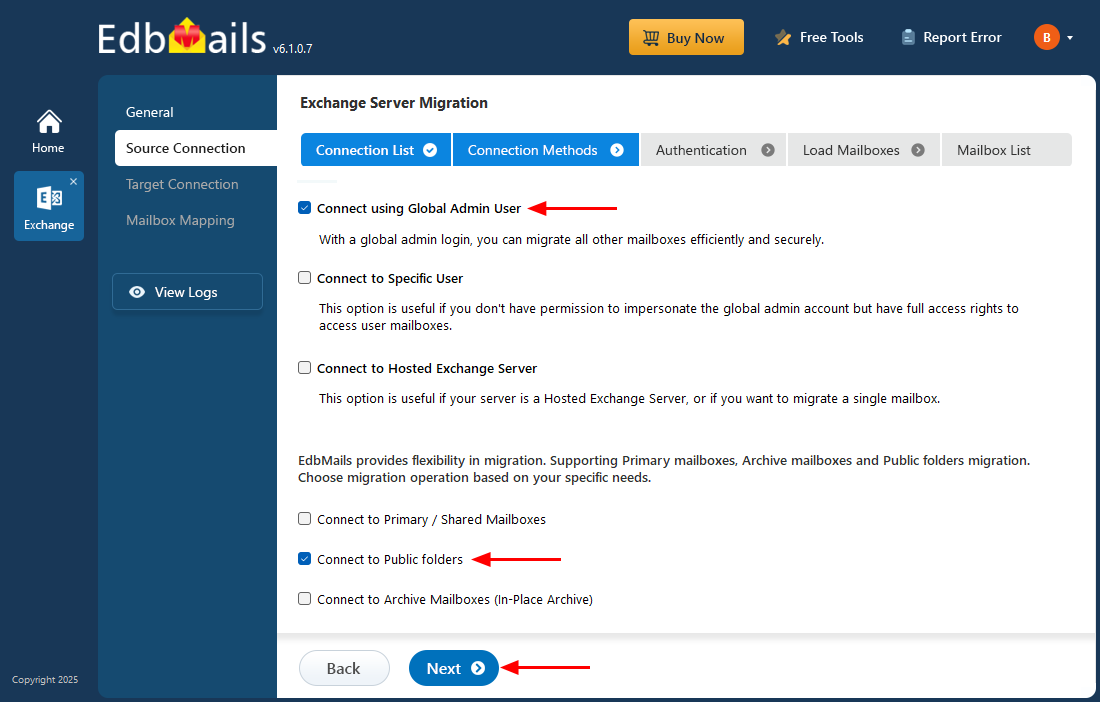
- Select the ‘Connect to Public folders’ option and click the ‘Next’ button
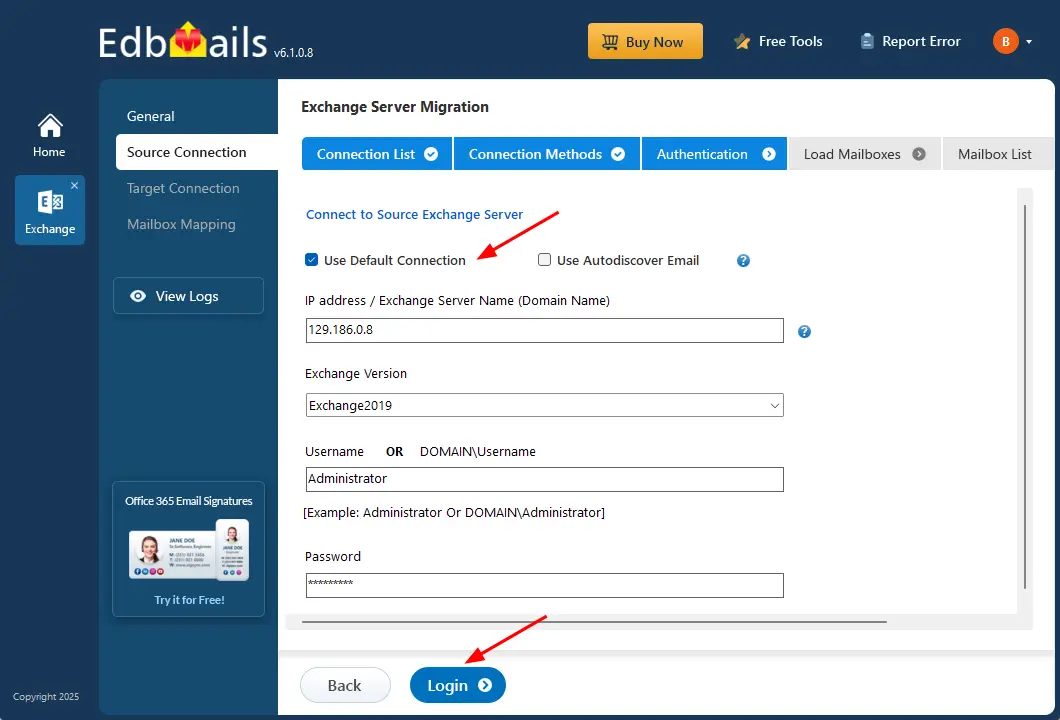
- Enter the source Exchange server details and click the ‘Login’ button
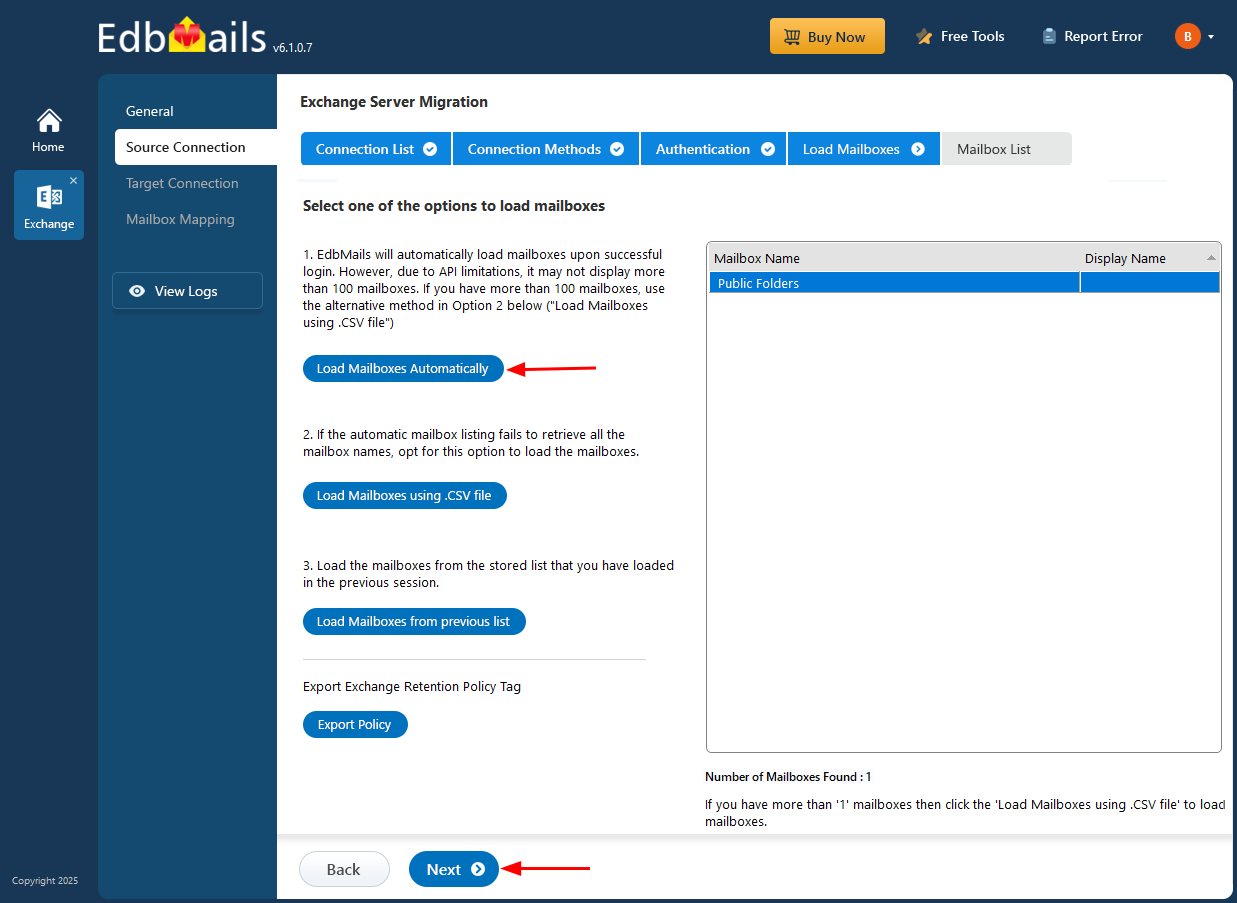
- Select any one of the methods to load the public folders.
Step 3: Select the Exchange Public folders
- Select the required public folders on the Exchange server that you wish to migrate or you can migrate all folders.
- Then, click 'Next' to establish a connection with the target server.
Step 4: Connect to target Office 365 server
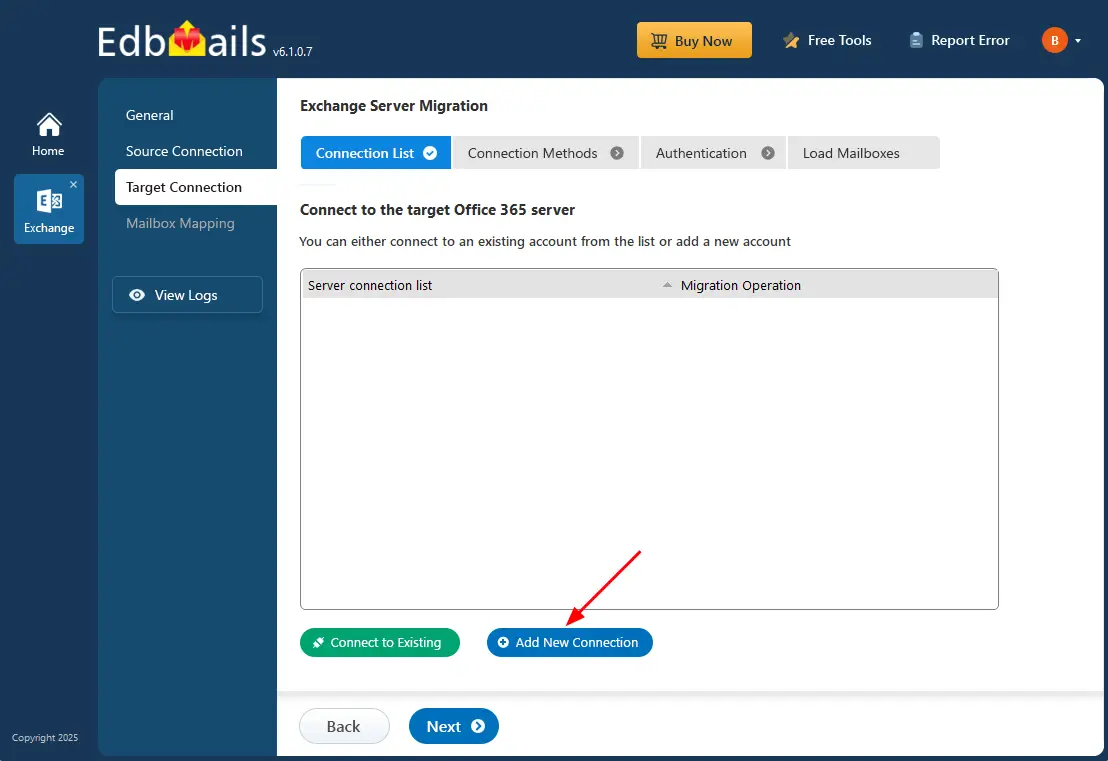
- Set up a new connection to your target Exchange server by clicking ‘Add New Connection’. If a connection already exists, you can reuse it by selecting it from the list and clicking ‘Connect to Existing’.
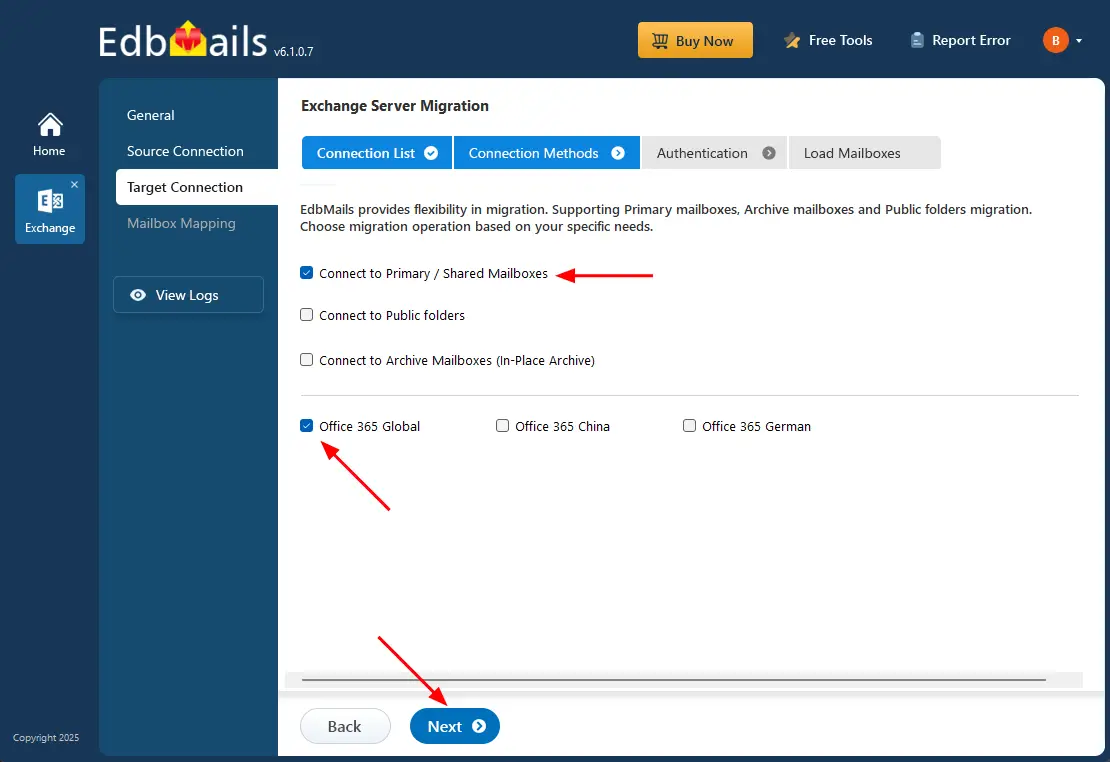
- Select ‘Connect to Primary / Shared Mailbox’ and click the ‘Next’ button.
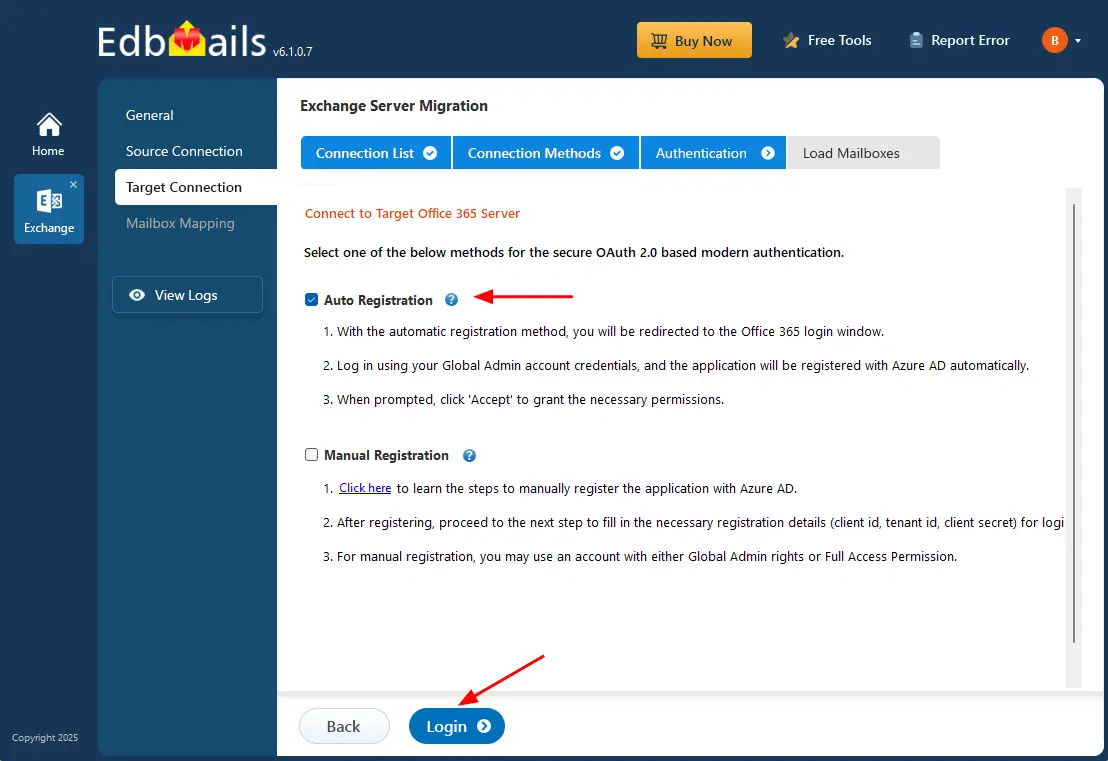
- Choose one of the authentication methods and click the ‘Login’ button.
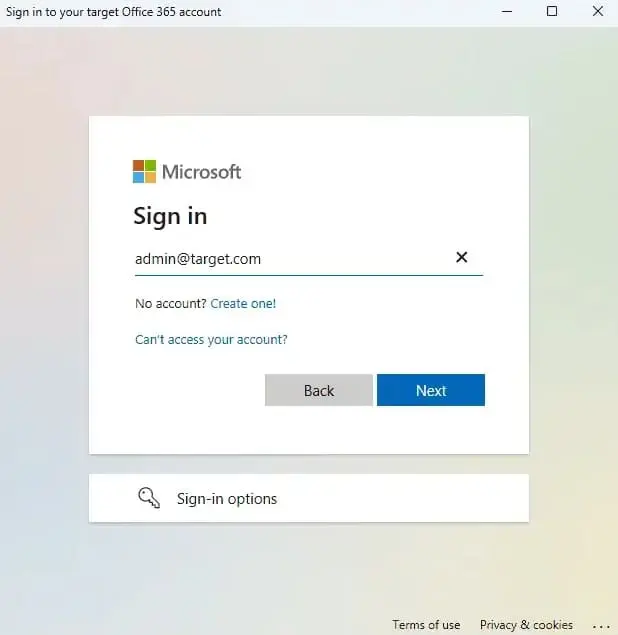
- Authenticate on the Microsoft Sign in page using your Global admin account.
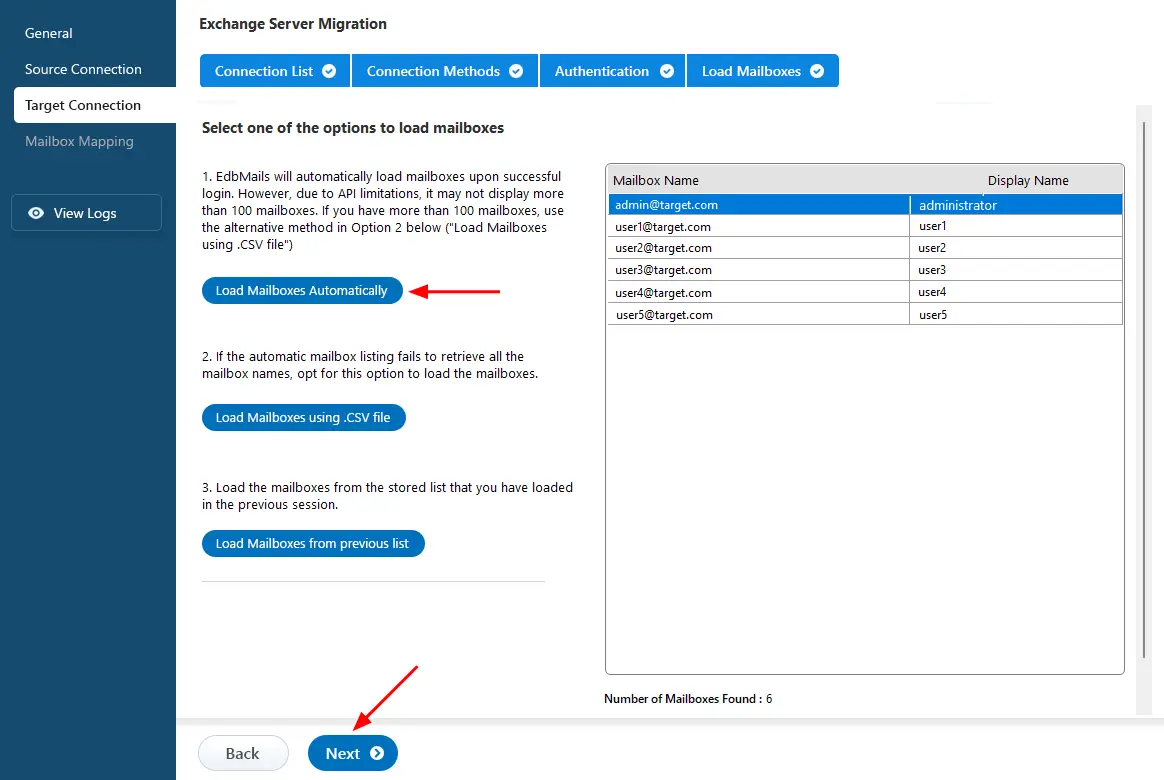
- Choose a method to load the shared mailboxes and click ‘Next’ to continue. If preferred, you can also upload them manually using a CSV file.
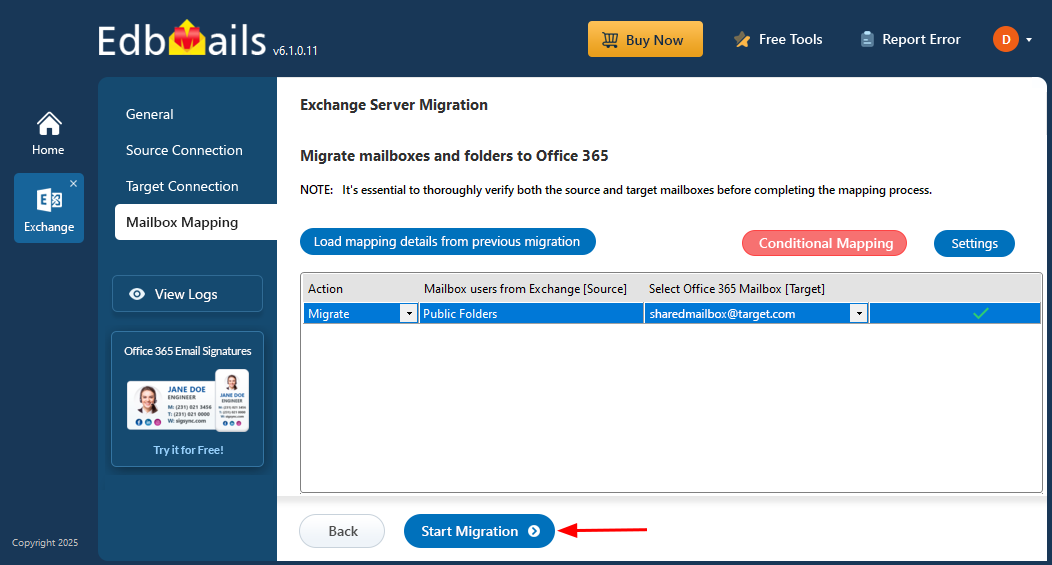
Step 5: Public folders to Shared mailbox mapping
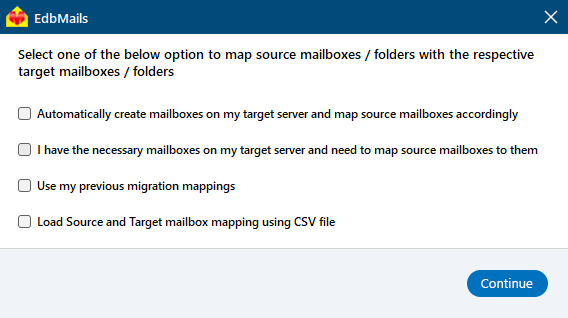
- Choose the required mailbox mapping option
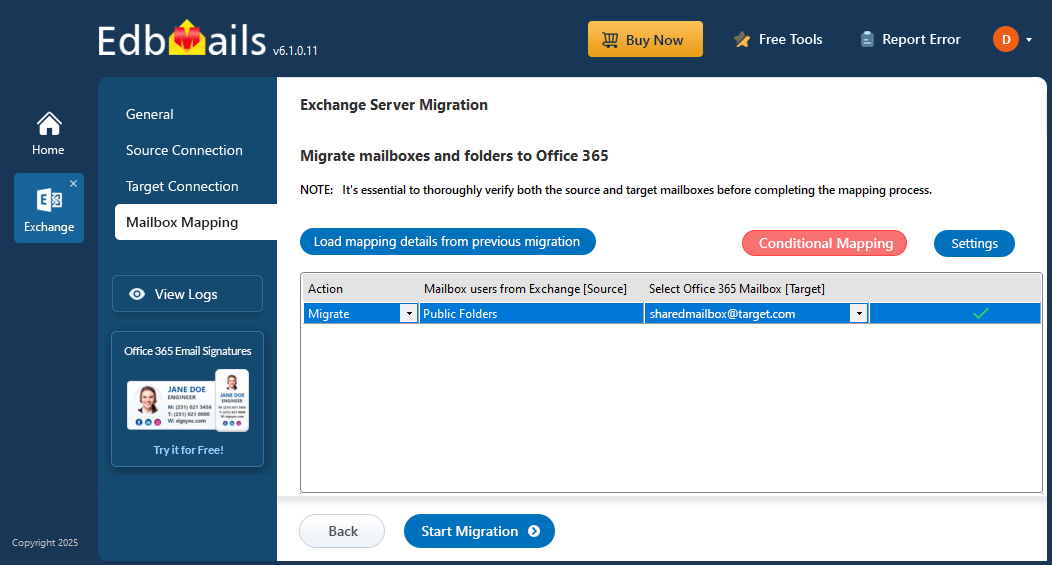
- EdbMails takes care of mapping public folders to shared mailboxes automatically. If needed, you can also perform the mapping manually.
Step 6: Start Public folder to Shared mailbox migration
- To initiate the migration, simply click on the ‘Start Migration’ button.
- Track the migration using the progress bar. When everything is successfully migrated, EdbMails notifies you with a completion alert. You can then click ‘View Logs’ to see the migration report.
Public folder to shared mailbox post-migration tasks
- Check that all emails, folders, and data have migrated correctly by reviewing the shared mailboxes and migration reports.
- Set the correct permissions (Full Access, Send As) for users who need access to the shared mailboxes.
- Inform users about the new shared mailboxes and provide guidance on how to access and use them.
- Ensure users can access the shared mailboxes in Outlook and other email apps. Provide instructions if needed.
- Make sure emails are delivered correctly to the shared mailboxes. Set up any necessary mail rules or forwarding.
- Set up Office 365 archiving and retention policies to manage email storage and compliance.
- Keep an eye on Office 365 performance to ensure everything is running smoothly after the migration.
- Once the migration is confirmed successful, remove the old Exchange public folders to free up resources.
Public folder to Shared mailbox migration troubleshooting
Refer to the Exchange migration troubleshooting guide and the public folder troubleshooting resources for potential solutions to any errors you may encounter during migration. For additional details on EdbMails Exchange migration, refer to the frequently asked questions.
Solution for failure in migration of public folders due to insufficient permissions.
Advantages of EdbMails to migrate Public folder to Shared mailbox
- Directly migrate any Exchange server Public folders directly into Office 365 Shared mailbox.
- Carry out the migration of Public folders while ensuring your Exchange server remains operational.
- Free personalized demonstration along with 24/7 free technical support throughout the migration process.
- Brick-level migrations, providing detailed control over which items to be transferred.
- Compatible with all Exchange server versions 2019, 2016, 2007, 2010, 2013, 2010 and 2007.
- Intuitive software interface without need of PowerShell scripting or PST import methods.
- Comprehensive migration reports to confirm the successful completion of the migration process.


