Migrate mailboxes across different Exchange servers
Migrating mailboxes between different Exchange server versions can be a complex task due to varying architecture, protocols, and data structures. EdbMails Exchange migration tool offers a comprehensive solution that supports direct mailbox migration across Exchange versions, including 2007, 2010, 2013, 2016, and 2019. This feature-rich tool enables seamless data transfer between on-premises Exchange environments, maintaining full data integrity, folder hierarchy, and system compatibility.
EdbMails supports a range of migration types, such as cutover, staged, hybrid, and cross-forest migration, catering to different organizational needs. The tool’s ability to handle incremental migration allows for transferring only newly added or modified data in subsequent passes, optimizing bandwidth utilization and avoiding redundant data transfer. Additionally, automatic mailbox mapping ensures accurate alignment between source and target mailboxes, eliminating manual intervention and reducing the risk of errors during the migration.
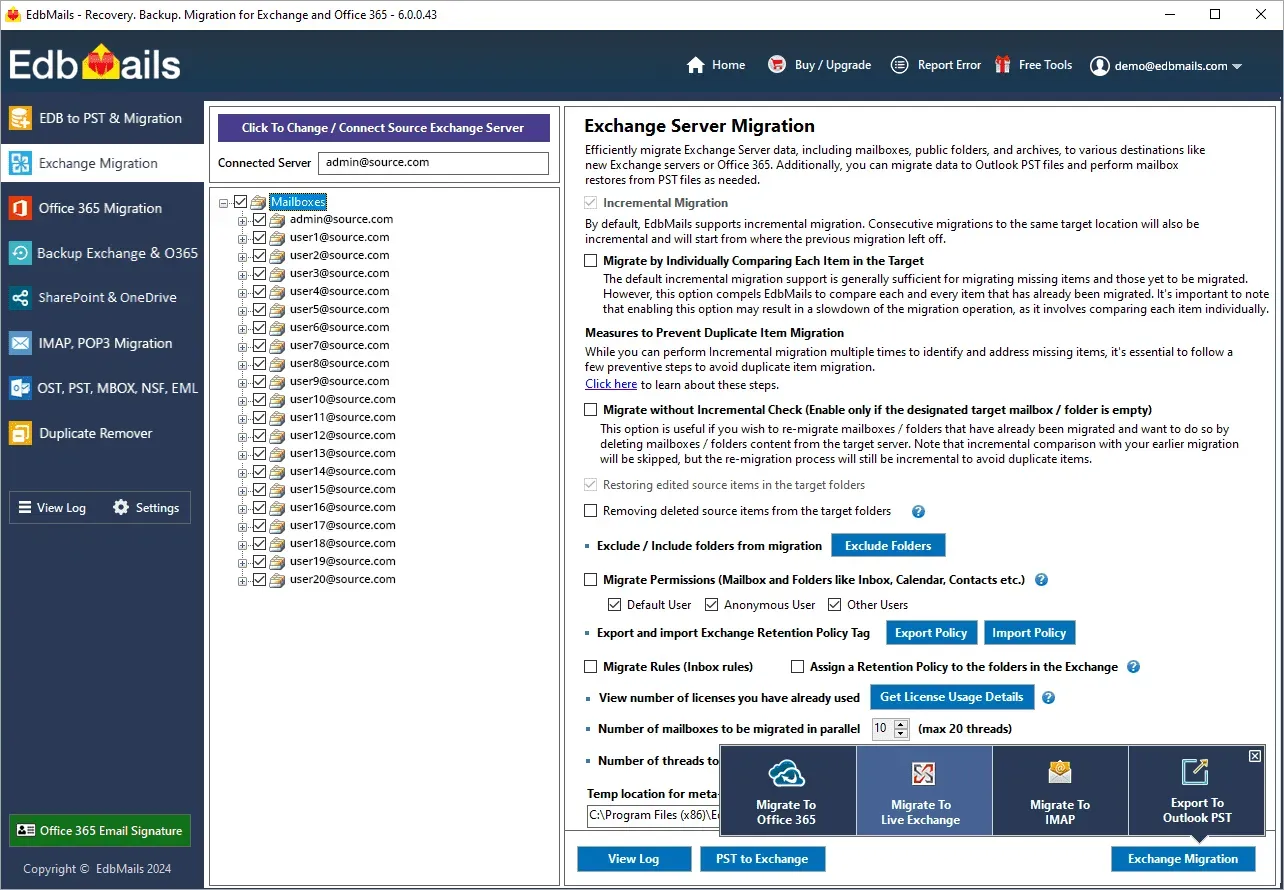
Designed to meet enterprise-level needs, EdbMails can scale across environments of all sizes. Its multi-threading engine ensures fast and efficient migrations, even in large-scale scenarios, while maintaining Exchange server performance. The tool provides administrators with granular control over the process, allowing for selective migration of mailboxes and items, including emails, calendars, contacts, and tasks, with advanced filtering options to customize the migration flow.
EdbMails' built-in security features ensure encrypted data transfer using modern authentication protocols, guaranteeing compliance with regulatory requirements and protecting sensitive information throughout the migration. This approach ensures a smooth and reliable migration process with minimal downtime, allowing organizations to maintain business continuity while upgrading their email infrastructure to newer Exchange environments.
Different Scenarios of Exchange server migration
- Exchange 2007, 2010 to Exchange 2010 migration.
- Exchange 2007, 2010, 2013 to Exchange 2013 migration.
- Exchange 2007, 2010, 2013, 2016 to Exchange 2016 migration.
- Exchange 2007, 2010, 2013, 2016 to Exchange 2019 migration.
- Exchange 2007, 2010, 2013, 2016, 2019 to Exchange 2019 migration.
Why Use EdbMails for Exchange Server Migration?
When planning a migration between Exchange server versions, selecting the right tool is crucial for a smooth transition. The EdbMails Exchange Migration Tool is an excellent option for various reasons:
- Affordable-cost : EdbMails offers a cost-effective solution for Exchange server migrations, making it an accessible choice for organizations of any size.
- Compatibility : EdbMails is designed to work with a broad range of Exchange server versions, from the latest releases to older editions, ensuring flexibility in selecting your target environment.
- Data integrity : Protecting data integrity during migration is crucial. EdbMails implements strong measures to ensure that no data is lost or modified throughout the process.
- Enhanced security : Security is paramount in any migration. EdbMails incorporates robust security protocols to safeguard your data and sensitive information during the migration.
Planning migration across different Exchange servers
Effective planning is essential for a successful Exchange migration, ensuring a seamless transition for your organization's email and collaboration systems. Whether you're moving to a new Exchange environment or consolidating existing servers, a well-structured strategy is key.
Essential steps in planning your Exchange migration :
- Assessment : Begin with a comprehensive assessment of your current Exchange environment, including user accounts, data volumes, and server configurations.
- Licensing and subscription : Ensure your organization holds the necessary Office 365 licenses or Exchange server subscriptions to accommodate all users involved in the migration.
- Migration method : Choose the migration method that aligns with your organization's objectives, whether it's a cutover, staged, or hybrid migration.
- Network considerations : Evaluate your network's bandwidth capacity to manage data transfer efficiently during the migration. Scheduling migrations during off-peak hours can minimize disruptions.
- User communication : Communicate the migration plan to your users well in advance, offering clear instructions and timelines to ensure a smooth transition.
- Security and compliance : Maintain a focus on security and compliance requirements throughout the migration process to safeguard sensitive data effectively.
- Testing and validation : After the migration, conduct rigorous testing to confirm user access, mailbox functionality, and data integrity are maintained.
- Rollback plan : Prepare a contingency plan to address unexpected issues that may arise during or after the migration.
- Documentation : Keep meticulous records of the migration process, including configurations and encountered challenges. This documentation serves as a valuable reference for future needs and audits.
Steps to migrate mailboxes across different Exchange servers using EdbMails
EdbMails simplifies direct migration between Exchange servers, regardless of the versions involved. The software allows for cross-forest migrations without any intermediate steps, enabling a smooth transition from Exchange 2010 or 2013 to Exchange server 2016 or 2019. EdbMails is the ideal choice for moving your Exchange environment. Below are the steps for migrating mailboxes between different Exchange servers using EdbMails.
Step 1: Download EdbMails and install the application
- To migrate your Exchange server data, start by downloading and installing EdbMails. You can set it up on the source Exchange server or on any compatible non-Exchange server computer. The software works seamlessly with Windows 7, 8, 10, and 11.
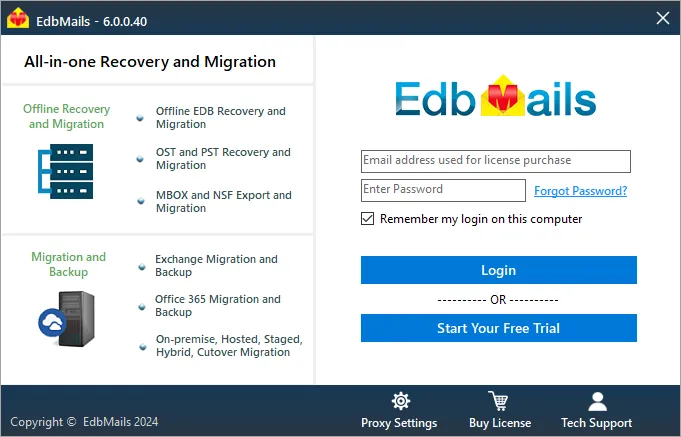
- Launch the application and proceed with 'Login' or 'Start Your Free Trial.'
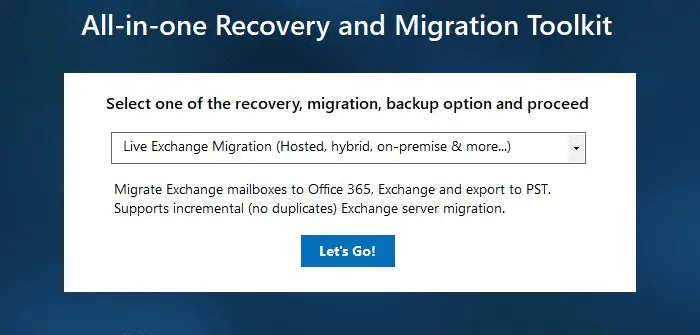
- Select the migration option : 'Live Exchange Migration (Hosted, Hybrid, On-Premises, and More...)'.
Step 2: Connect to source Exchange server
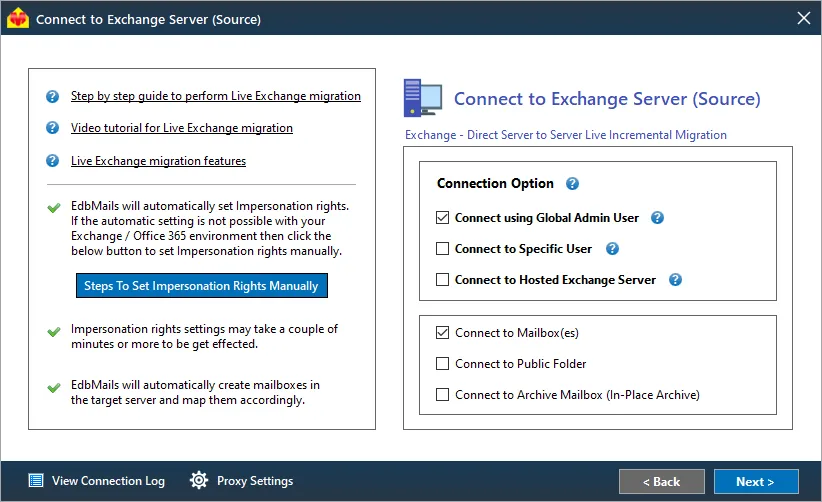
- Next, in the 'Connect to Exchange Server (Source)' window, Choose the options to connect to your source Exchange server.
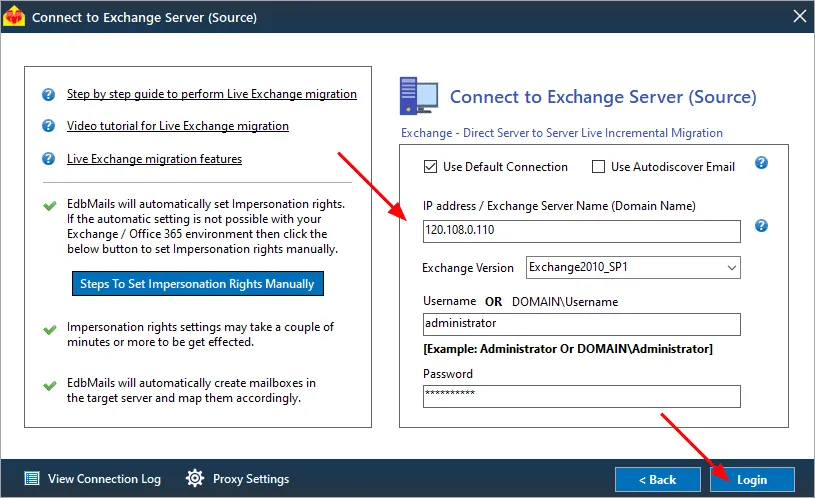
- Enter your login credentials for the source Exchange server details, then click the ‘Login’ button.
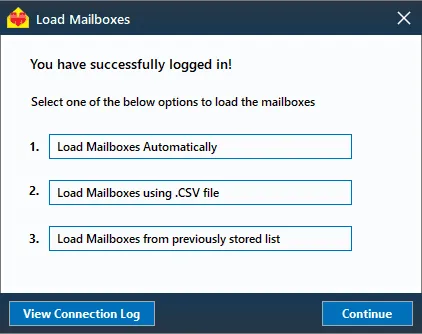
- Next, select the option to load the mailboxes. You can also load them by uploading a CSV file.
Step 3: Select the Exchange server mailboxes
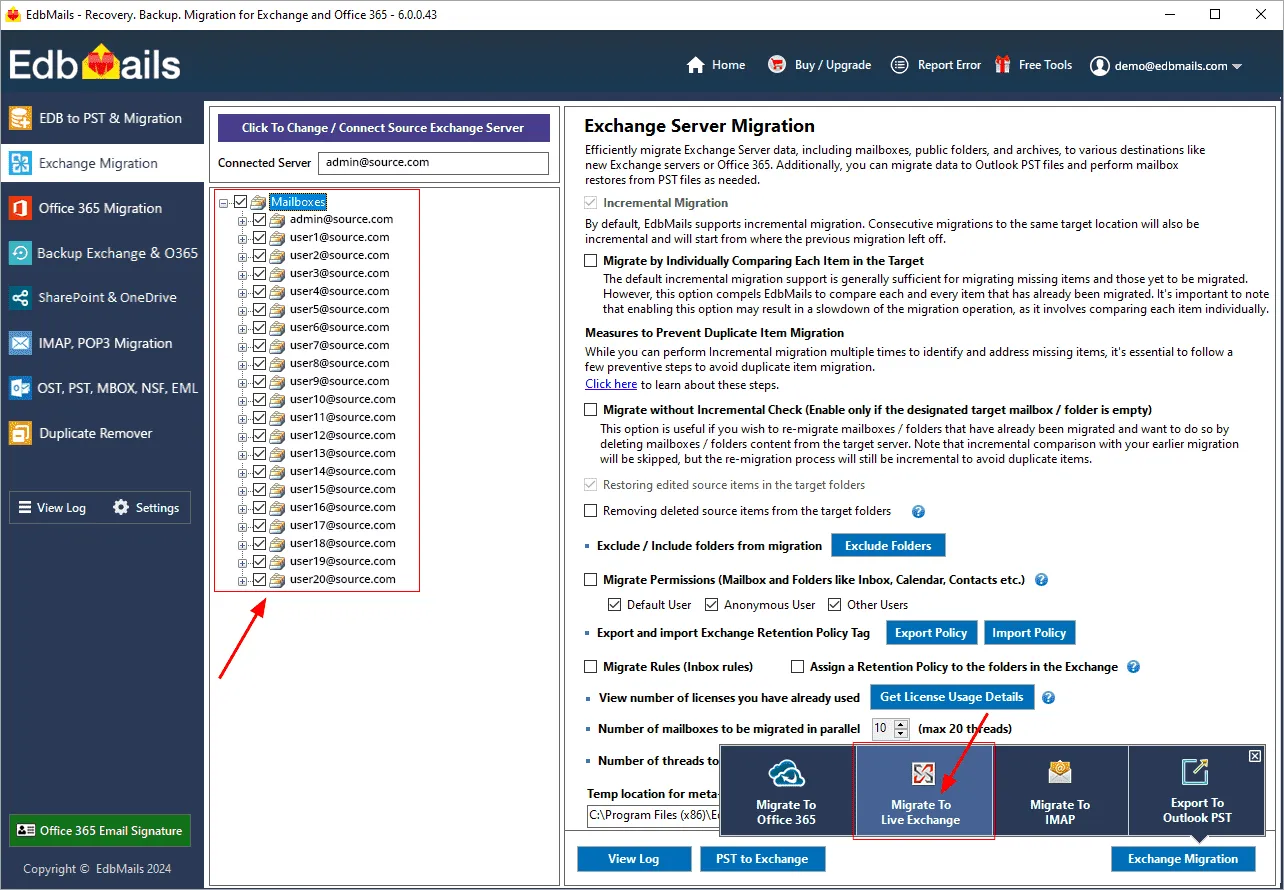
- Choose the mailboxes and folders from the source Exchange server that you wish to migrate to a target Exchange server.
- Select 'Migrate to Live Exchange' to establish a connection with the target server.
Step 4: Connect to target Exchange server
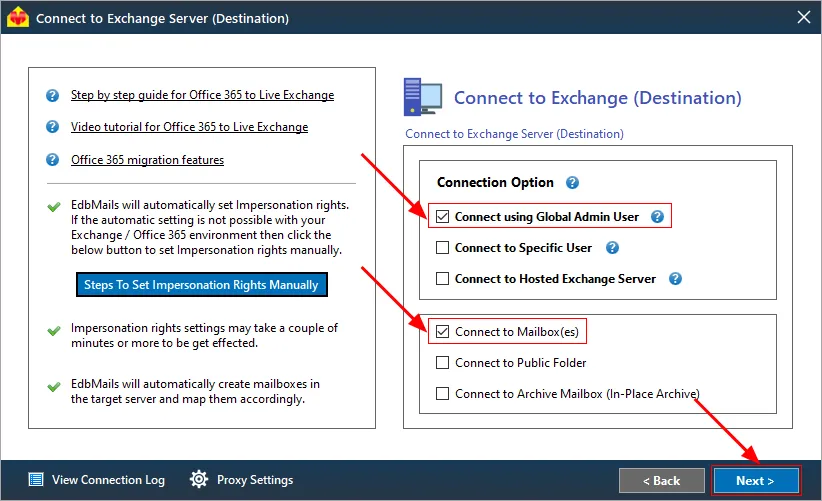
- Connect to the target Exchange server by selecting the required connection options
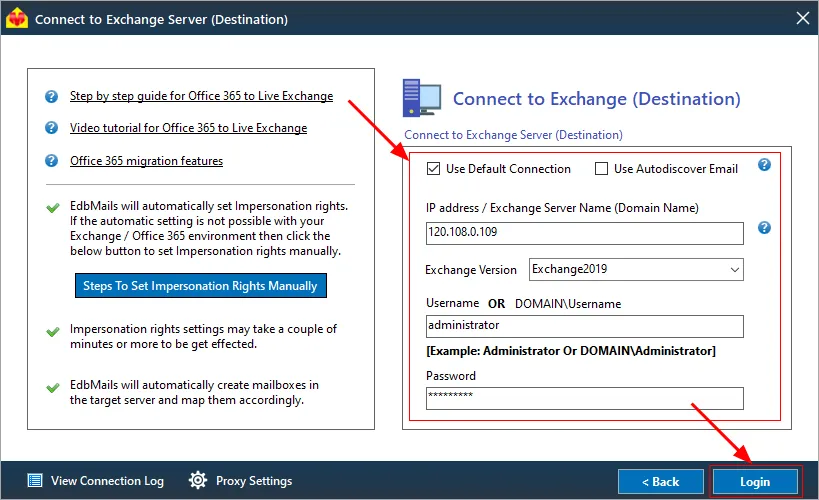
- Input the target Exchange server details and click the ‘Login’ button.
- Once you've successfully logged in, select the required option for loading the target Exchange server mailboxes.
Step 5: Map the mailboxes between source and target exchange servers
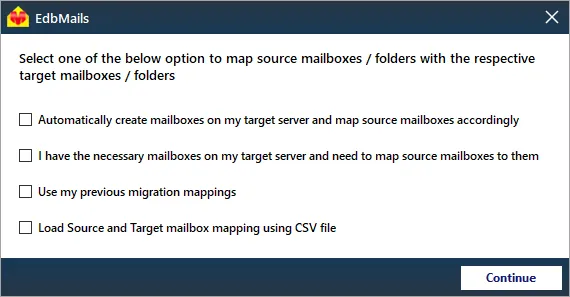
- Select the required mailbox loading option
- If you install EdbMails on your target Exchange server, you can choose the application to create target mailboxes automatically.
Click here to know more about automatic mailbox creation.
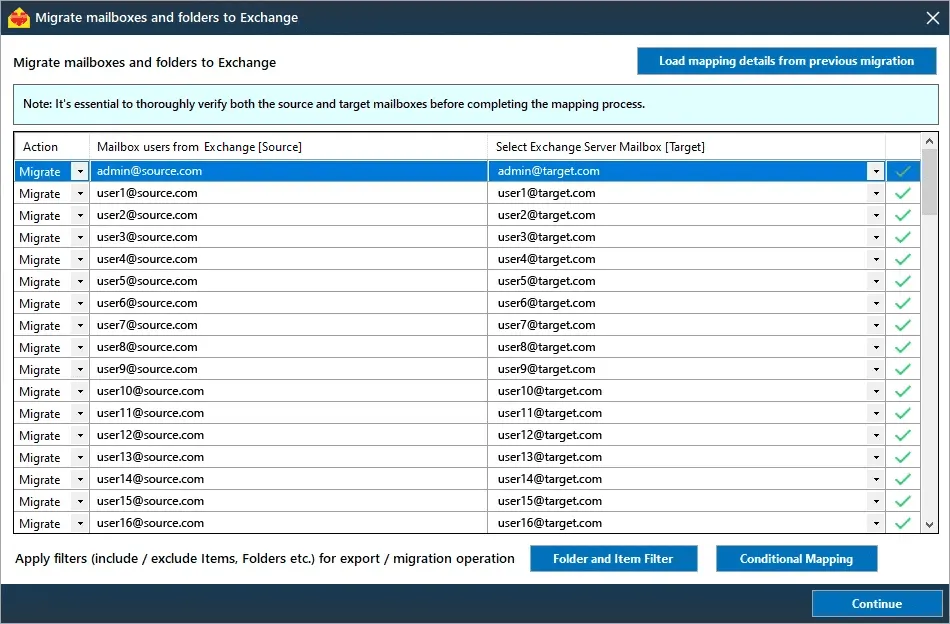
- EdbMails automatically maps the mailboxes and folders between the source and the target servers. You can also choose to map manually.
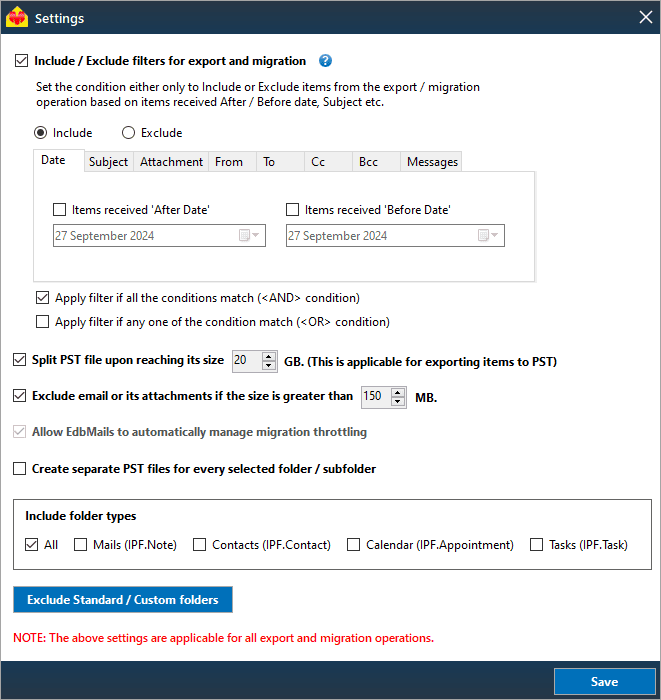
- Click the ‘Folder and Item Filter’ button to customize the migration operation. For instance: If you want to migrate only the last month data, you can set the date filter. Additionally, you have the option to exclude both standard and custom folders from the migration process.
Step 6: Start migration between the Exchange servers
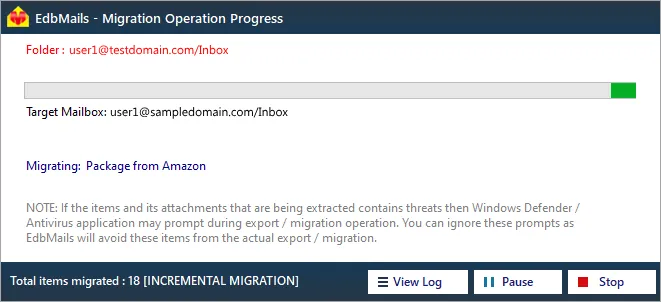
- Once mailbox mapping is complete, click the ‘Continue’ button, then provide a job name to initiate the migration. When the migration is finished, EdbMails will display a completion message. To review the details of the migration, click the ‘View Log’ button for a comprehensive migration report.
Exchange migration : post-migration tasks
Step 1: Update the MX records to point to the new Exchange server
To receive messages on the Exchange server 2019 to 2016, update MX records to enable email to work with the new server you have migrated to. In addition, configure the Autodiscover record to allow Outlook to connect to the migrated mailboxes.
Step 2: Create a new Outlook profile for users in the new domain
Configure the Outlook profile for each user in your domain if Outlook has problems connecting to the new Exchange server.
Step 3: Decommission and uninstall the source Exchange server
After the migration to the target Exchange server is complete, decommission or uninstall the source server, depending on which Exchange server you used as the source.
Migrate between Exchange servers: troubleshooting guide
If you encounter migration errors, refer the Exchange migration troubleshooting guide for various possible solutions. For further information about EdbMails Exchange migration, you can also check the frequently asked questions (FAQs).
EdbMails features to migrate mailboxes across different Exchange servers
- EdbMails facilitates migration across all Exchange server versions, including 2019, 2016, 2013, 2010, and 2007.
- EdbMails uses incremental migration, ensuring that only new and modified items are migrated while preventing duplicate items from being migrated during subsequent operations.
- With advanced filtering options, EdbMails allows users to selectively migrate mailbox items and folders.
- EdbMails supports migration of Exchange Public folders to Shared mailboxes between any Exchange servers.
- Throughout the migration process, data integrity is upheld, ensuring that there is no downtime or data loss.
- EdbMails automates mailbox mapping between source and target servers, ensuring a streamlined migration experience.
- EdbMails accommodates cutover, staged, and hybrid migrations, making it versatile for different migration strategies.
- EdbMails supports concurrent mailbox migrations, enhancing migration speed.

