EDB Archive Mailbox to Exchange Server Migration
Migrating archive mailboxes from offline EDB files to an Exchange Server is a key part of maintaining a modern, efficient email infrastructure—especially during upgrades or recovery scenarios. Archive mailboxes store older emails separately from the primary mailbox, making them vital for compliance, record-keeping, and long-term data access.
EdbMails EDB to Exchange Migrator provides a reliable, straightforward solution to transfer archive data directly from EDB files to Exchange Server. Whether you're working with Exchange 2013, 2016, or 2019, the tool supports direct migration without needing the original server or Active Directory access.
In this step-by-step guide, you’ll learn how to use EdbMails to migrate archive mailboxes quickly and securely. From loading your EDB file to selecting the archive mailboxes and completing the transfer, the process is designed to be simple, accurate, and efficient—making it ideal for IT admins and users alike.
Prerequisites to migrate EDB Archive Mailbox to Exchange server
- Step 1: Check that your system meets the Exchange server setup requirements
The following links will help you to set up your target Exchange server. Learn more about the network configuration, hardware prerequisites, coexistence scenarios, and operating system requirements for installing Exchange server.
- Step 2: Prepare your target system with the following prerequisites
Complete the following prerequisites for Active Directory, Windows Mailbox server, and Windows Edge Transport servers before installing the target Exchange server.
- Step 1: Check that your system meets the Exchange server setup requirements
Set up the target Exchange server for migration
Given below is a list of key points for installing and preparing the Exchange server for migration. If you have already installed and performed the set up operations, jump to Step 4 in this section.
- Prepare the AD and domains
- Before installing Exchange Server, you need to prepare your Active Directory forest and its domains for the new version of Exchange.
- If you have a separate team to manage the Active Directory schema, you need to first extend the active directory schema, else proceed to the next step to prepare the Active Directory.
- If you have multiple domains you need to additionally prepare the Active Directory domains.
- Install Exchange server on your computer
Ensure that you meet the server system requirements and prerequisites as outlined previously. Next, follow the link to install Exchange 2016 or install Exchange 2019 from the setup wizard based on which server you want to migrate to.
- Prepare a clean Exchange target environment
- Create and configure a Send connector to send mail outside the Exchange organization.
- By default, Exchange automatically creates receive connectors for inbound mail flow when the mailbox server is installed. If you need to configure receive connectors manually, follow the steps in the link.
- Add accepted domains to allow recipients to send and receive email from another domain.
- Configure the default email address policy to add the accepted domain to every recipient in the organization.
- Configure external URLs (domains) on the virtual directories in the Client Access (frontend) services on the Mailbox server to allow clients to connect to your server from the internet (outside the organization’s network).
- Configure internal URLs on the virtual directories in the Client Access (frontend) services on the Mailbox server to allow clients to connect to your server from the internal network.
- Configure SSL certificates from a third-party certificate authority for services such as Outlook Anywhere and Exchange ActiveSync.
- Verify the Exchange server installation by running the command Get-ExchangeServer on the Exchange Management Shell (EMS).
- Create mailboxes and enable archive mailboxes on the Exchange server
Before migrating your mail data, make sure to create the necessary mailboxes on the target Exchange server, assign appropriate licenses, and enable archive mailboxes for each user.
- Assign management roles to the admin account
Set the following permissions to the admin account on the target Exchange server to migrate mailboxes on behalf of other users in your organization.
- ApplicationImpersonation
- View-Only Recipients
- View-Only Configuration
- Verify the mailbox of the admin account
Check to see if the admin account that has been assigned management roles has a valid and non-hidden mailbox on the Exchange server.
- Configure the throttling and message-size limits
Set custom policies for EWS throttling and set message size to a maximum value on the Exchange server by following the steps in the link.
- Prepare the AD and domains
Steps to migrate from EDB Archive Mailbox to Exchange server
- Step 1: Download and Install EdbMails application
- Download and install the EdbMails EDB to Exchange migrator on your computer.
- Log in using your registered email and password, or click on ‘Start Your Free Trial’ to begin without an account.
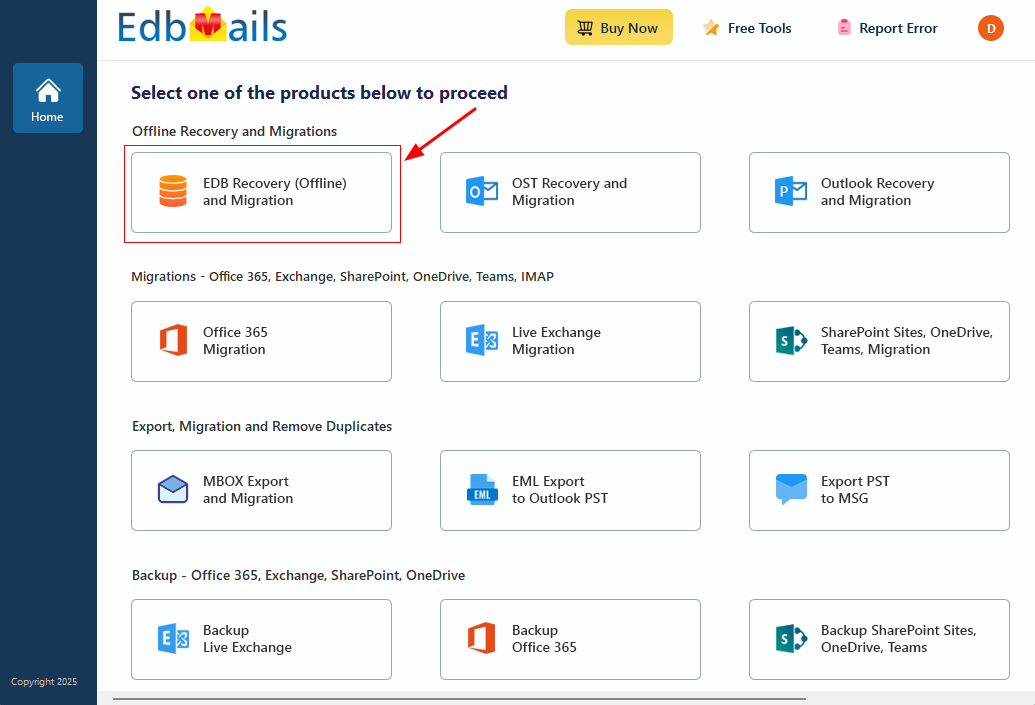
- Step 2: Select EDB Recovery (Offline) and Migration Product
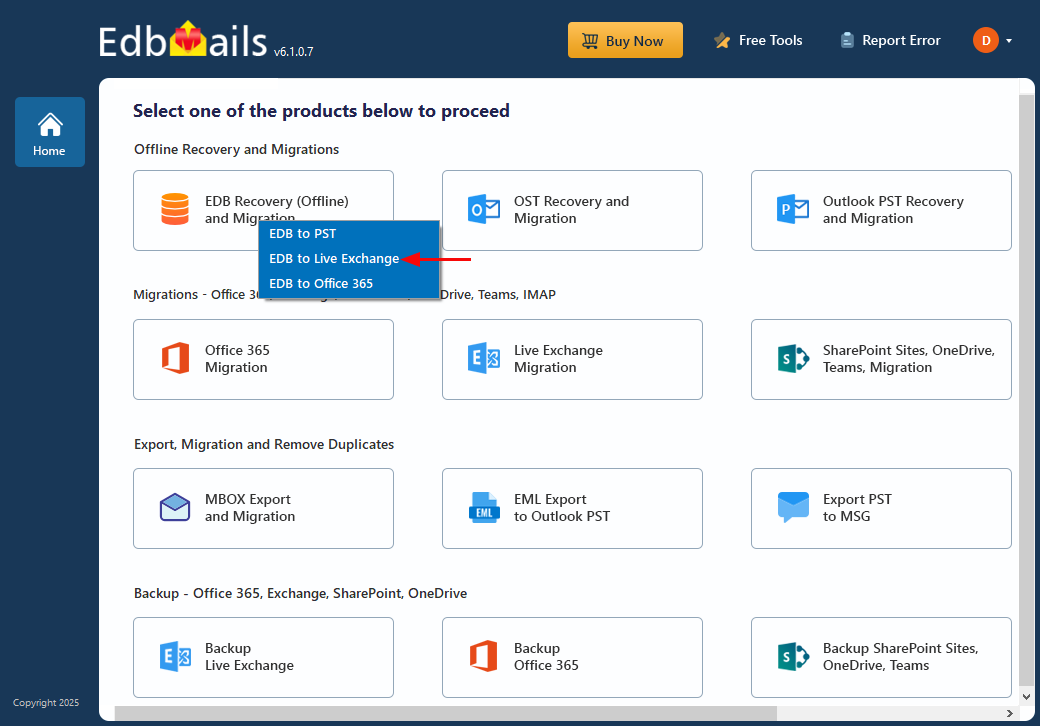
- Choose the ‘EDB Recovery (Offline) and Migration’ option from the product list.
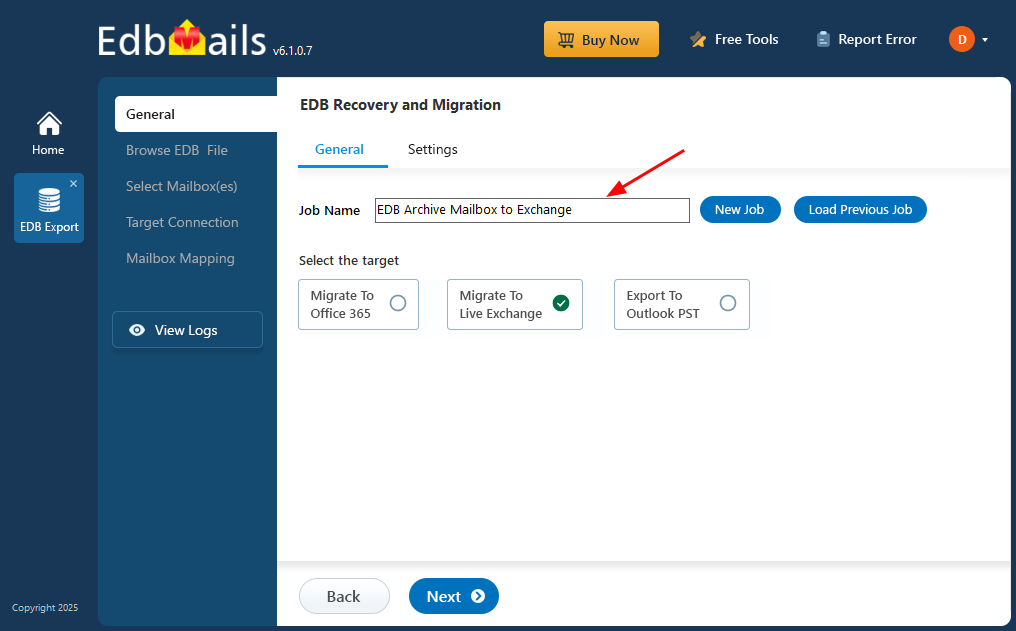
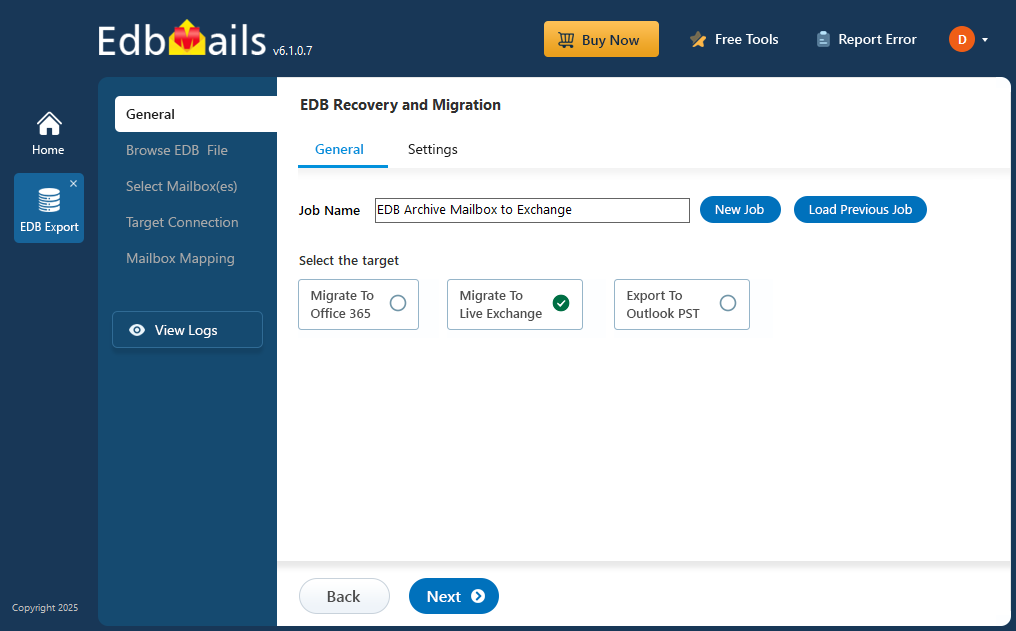
- Select ‘EDB to Live Exchange’ option
- You can use the default job name or click ‘New Job’ to enter a custom name for your task.
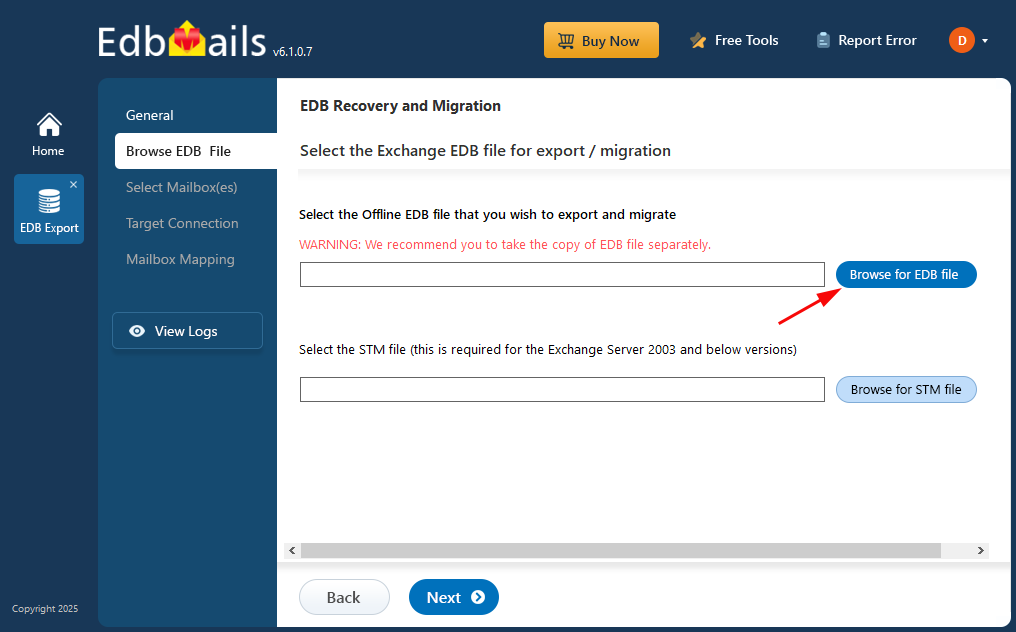
- Step 3: Browse EDB file
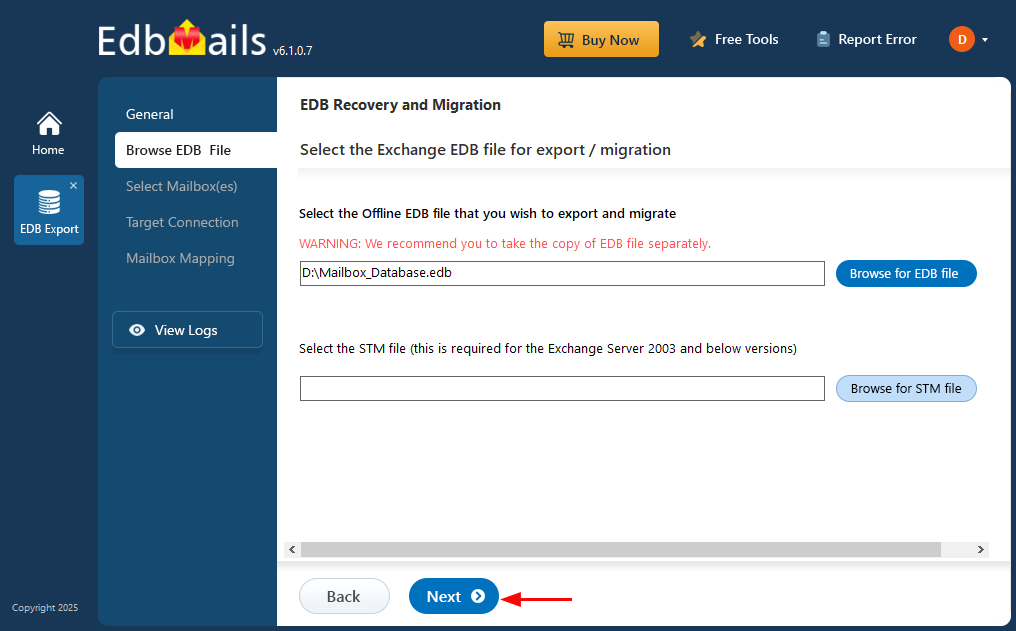
- Click the ‘Browse for EDB file’ button
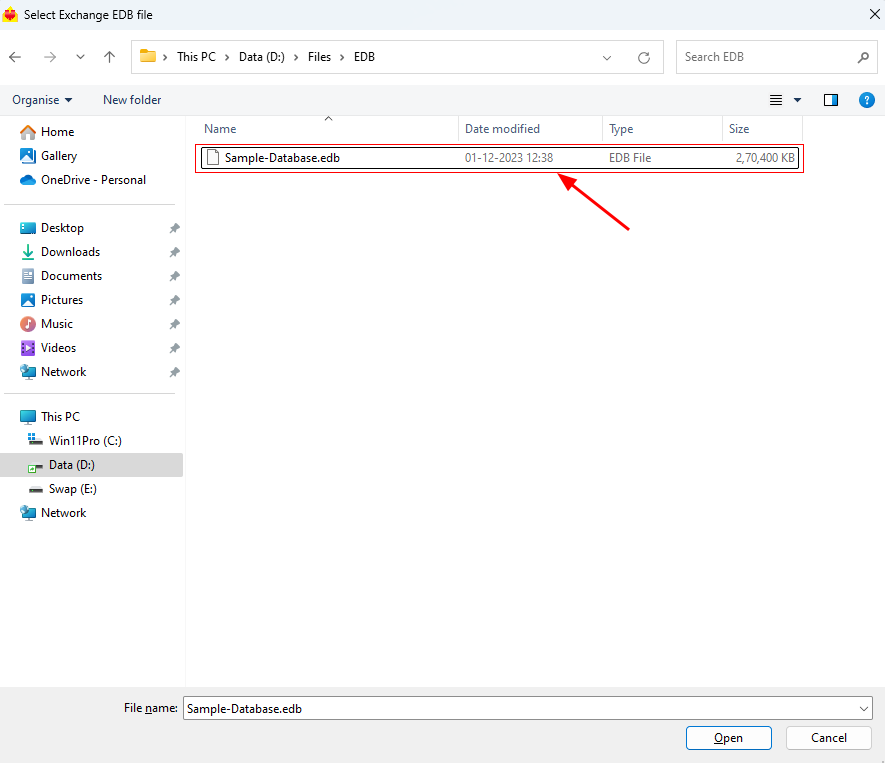
- Select the offline EDB file from your local drive or a shared network path with read and write permissions.
- Click ‘Next’ to continue
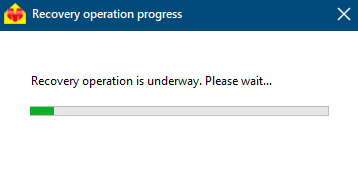
- EdbMails performs an in-depth scan of the EDB file to retrieve mailbox data that is corrupted, damaged, or otherwise inaccessible.
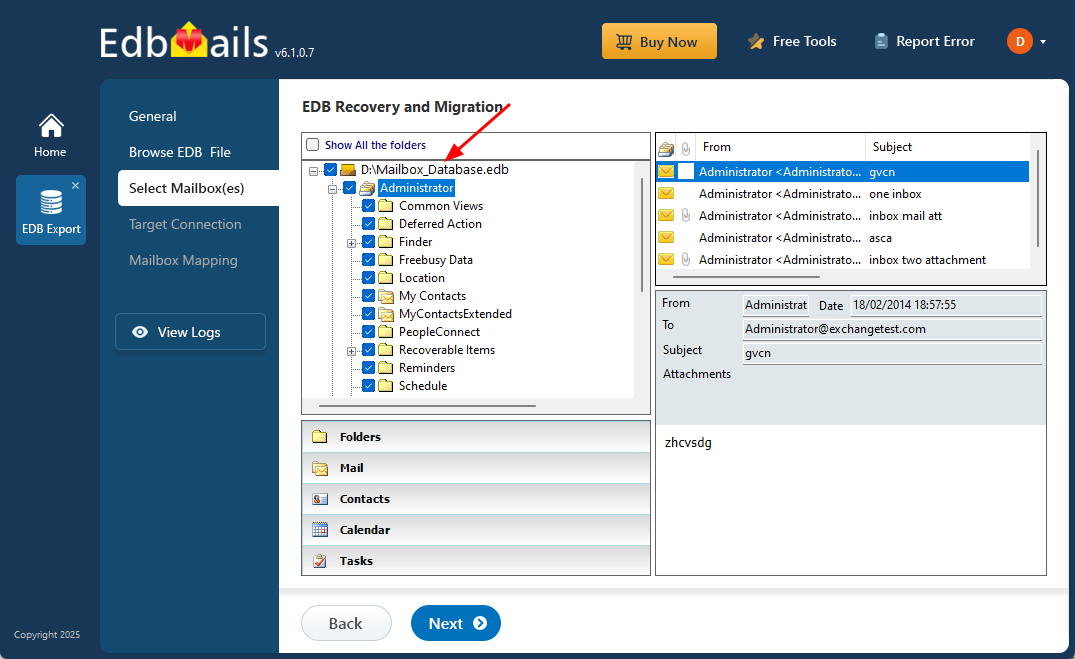
- Once the recovery is finished, you can easily browse through mailboxes and preview items like emails, contacts, folders, notes, tasks, and calendars directly from the application's preview panel.
- Choose the required EDB archive mailboxes and click the 'Next' button to proceed.
- Step 4: Connect to target Exchange server
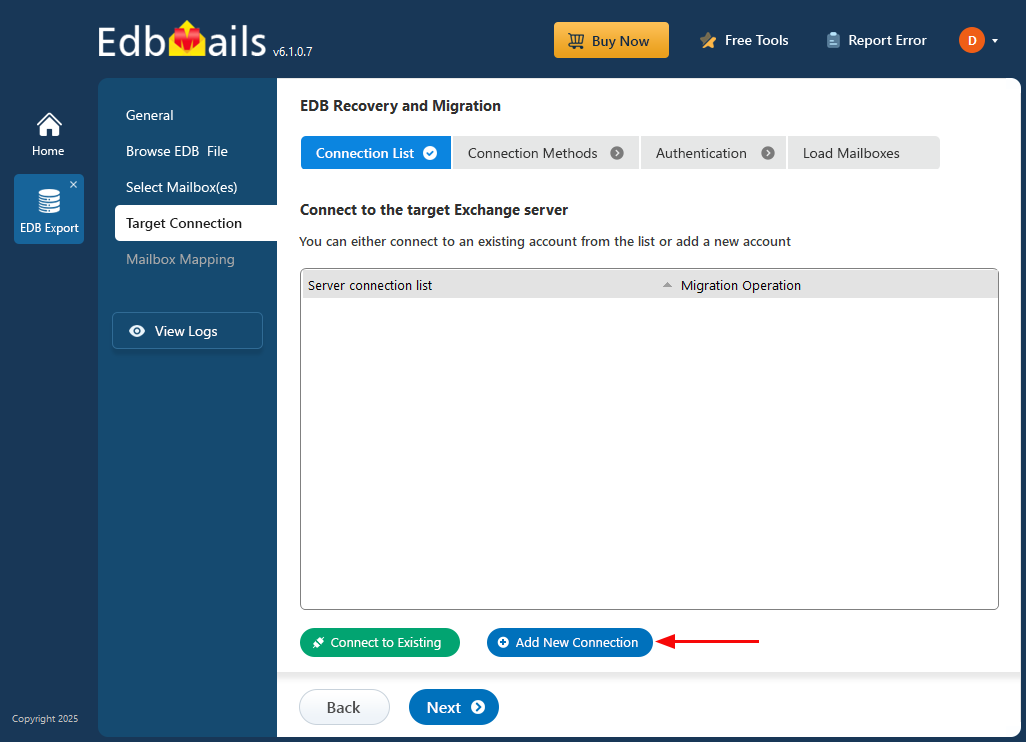
- To connect to your target Exchange server, click ‘Add New Connection’ to configure a new Exchange server connection. If a connection already exists, select it from the list and click ‘Connect to Existing’ and continue.
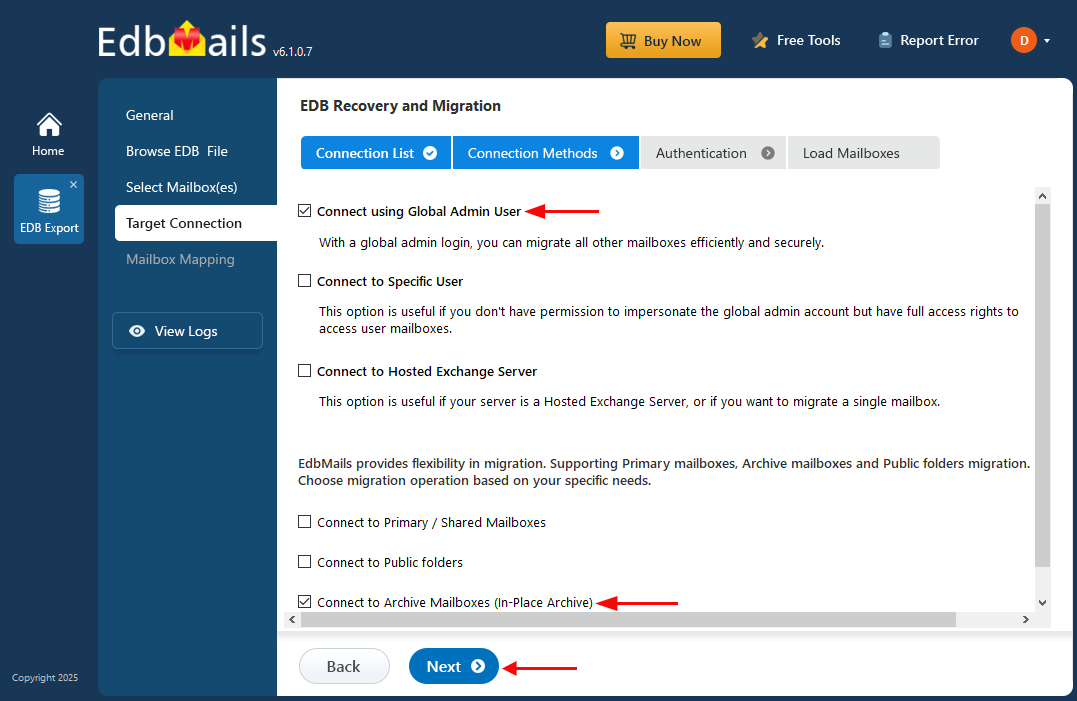
- Select ‘Connect to Archive Mailboxes (In-Place Archive)’ and click the ‘Next’ button to proceed.
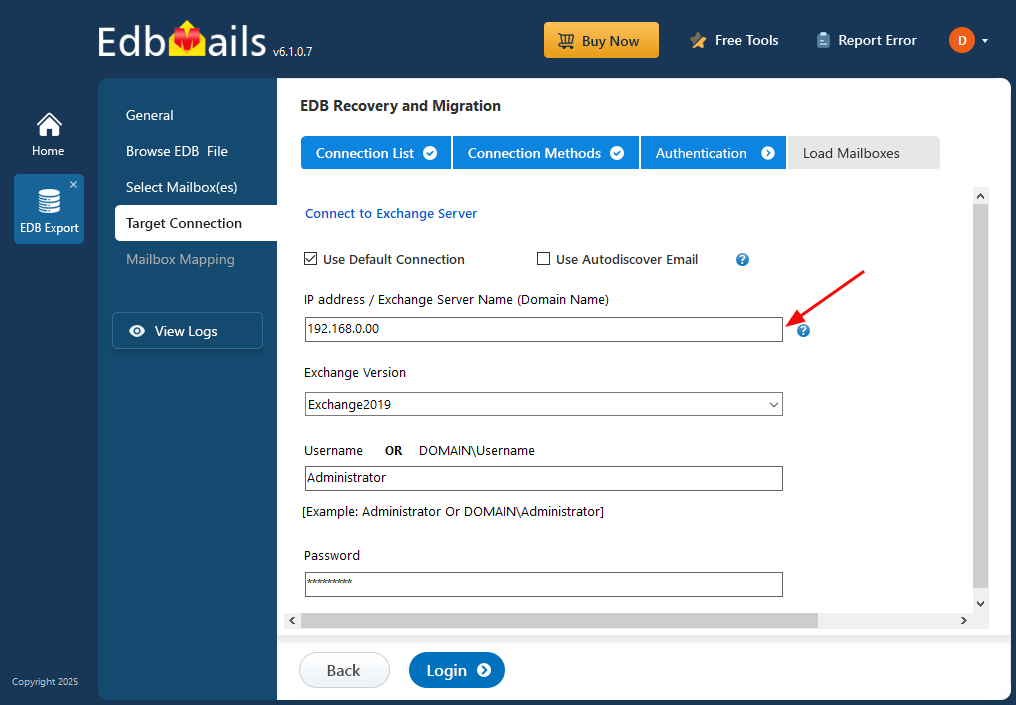
- Provide the target Exchange server details and click the ‘Login’ button.
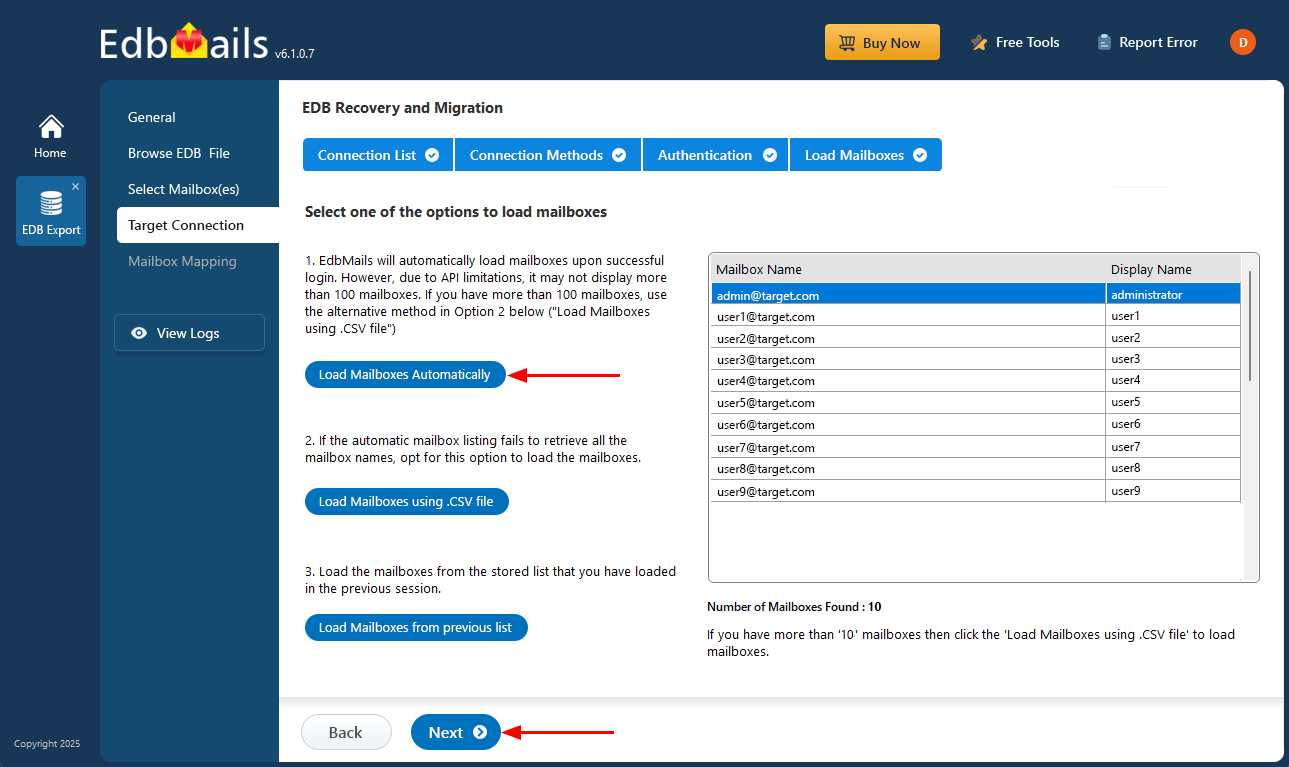
- Select a method to load the archive mailboxes and click ‘Next’. You can also use a CSV file to load the archive mailboxes.
- Step 5: Map source and target archive mailboxes
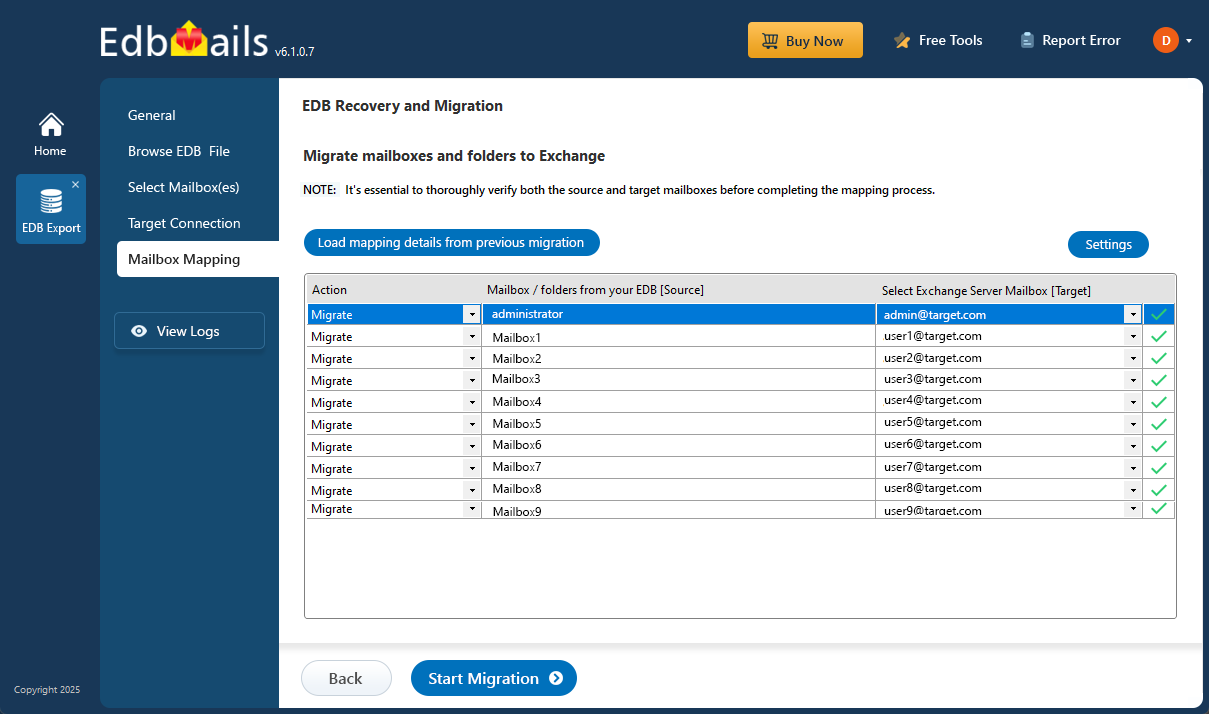
- EdbMails automatic mapping feature automatically maps archive mailboxes between the source and target server. Alternatively, you can also manually map the source archive mailboxes to the target archive mailboxes.
- Step 6: Start EDB Archive Mailbox to Exchange migration
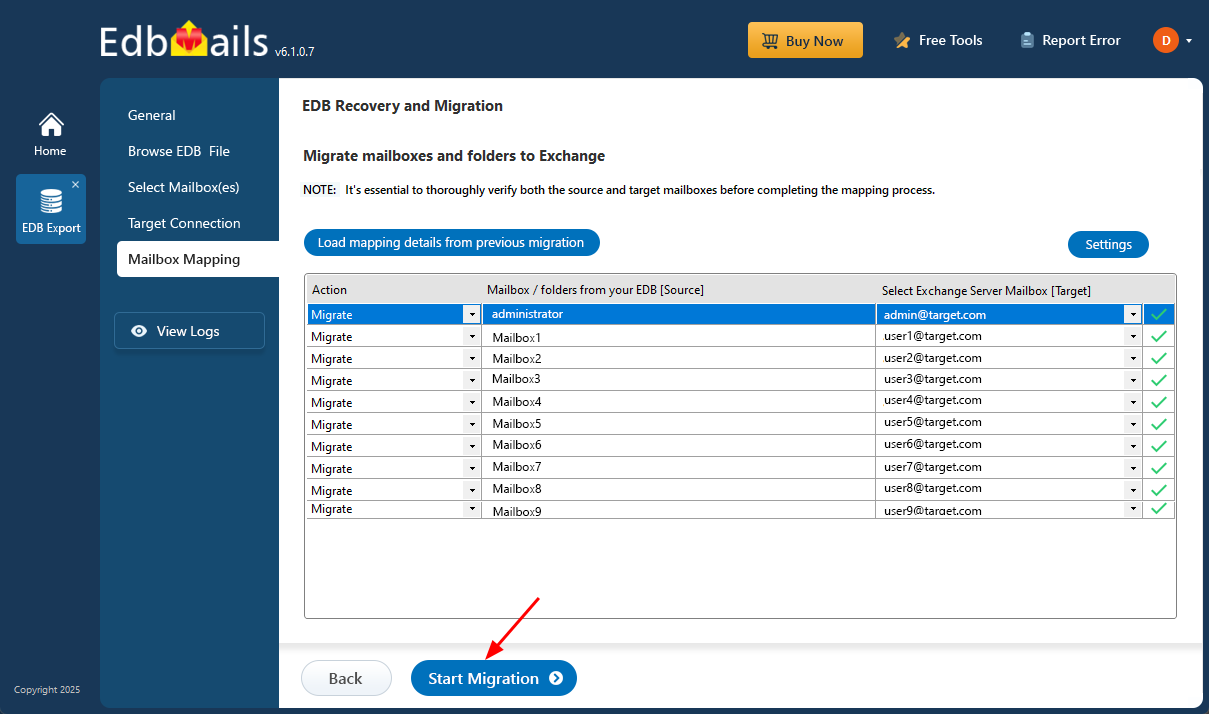
- Click the ‘Start Migration’ button to begin the migration process.
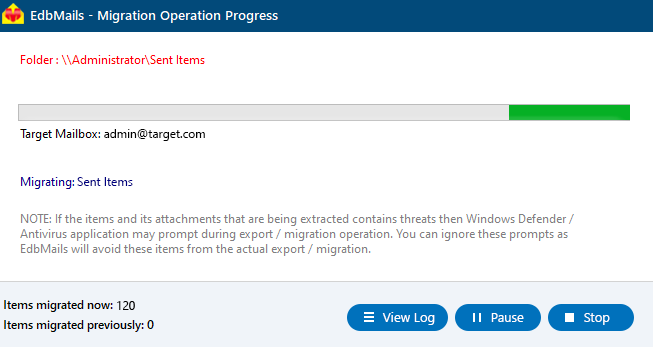
- That’s it! You can monitor the migration progress in real time, with the flexibility to pause and resume the operation as needed. Once the migration is successfully completed, a confirmation message will appear.
- Step 1: Download and Install EdbMails application
Benefits of using EDB Archive Mailbox to Exchange server
- Restore archived data to a live Exchange server for easy access.
- Quick migration without any disruption to daily operations.
- No data loss or corruption during the migration process.
- Simple and easy-to-use tool, even for non-technical users.
- Facility to apply filters to migrate only relevant data
- Can handle large EDB files without issues.


